How to re-stamp your bazooka rockets
Date Written: 7/13/2007
Author: Chris Guska
Background:
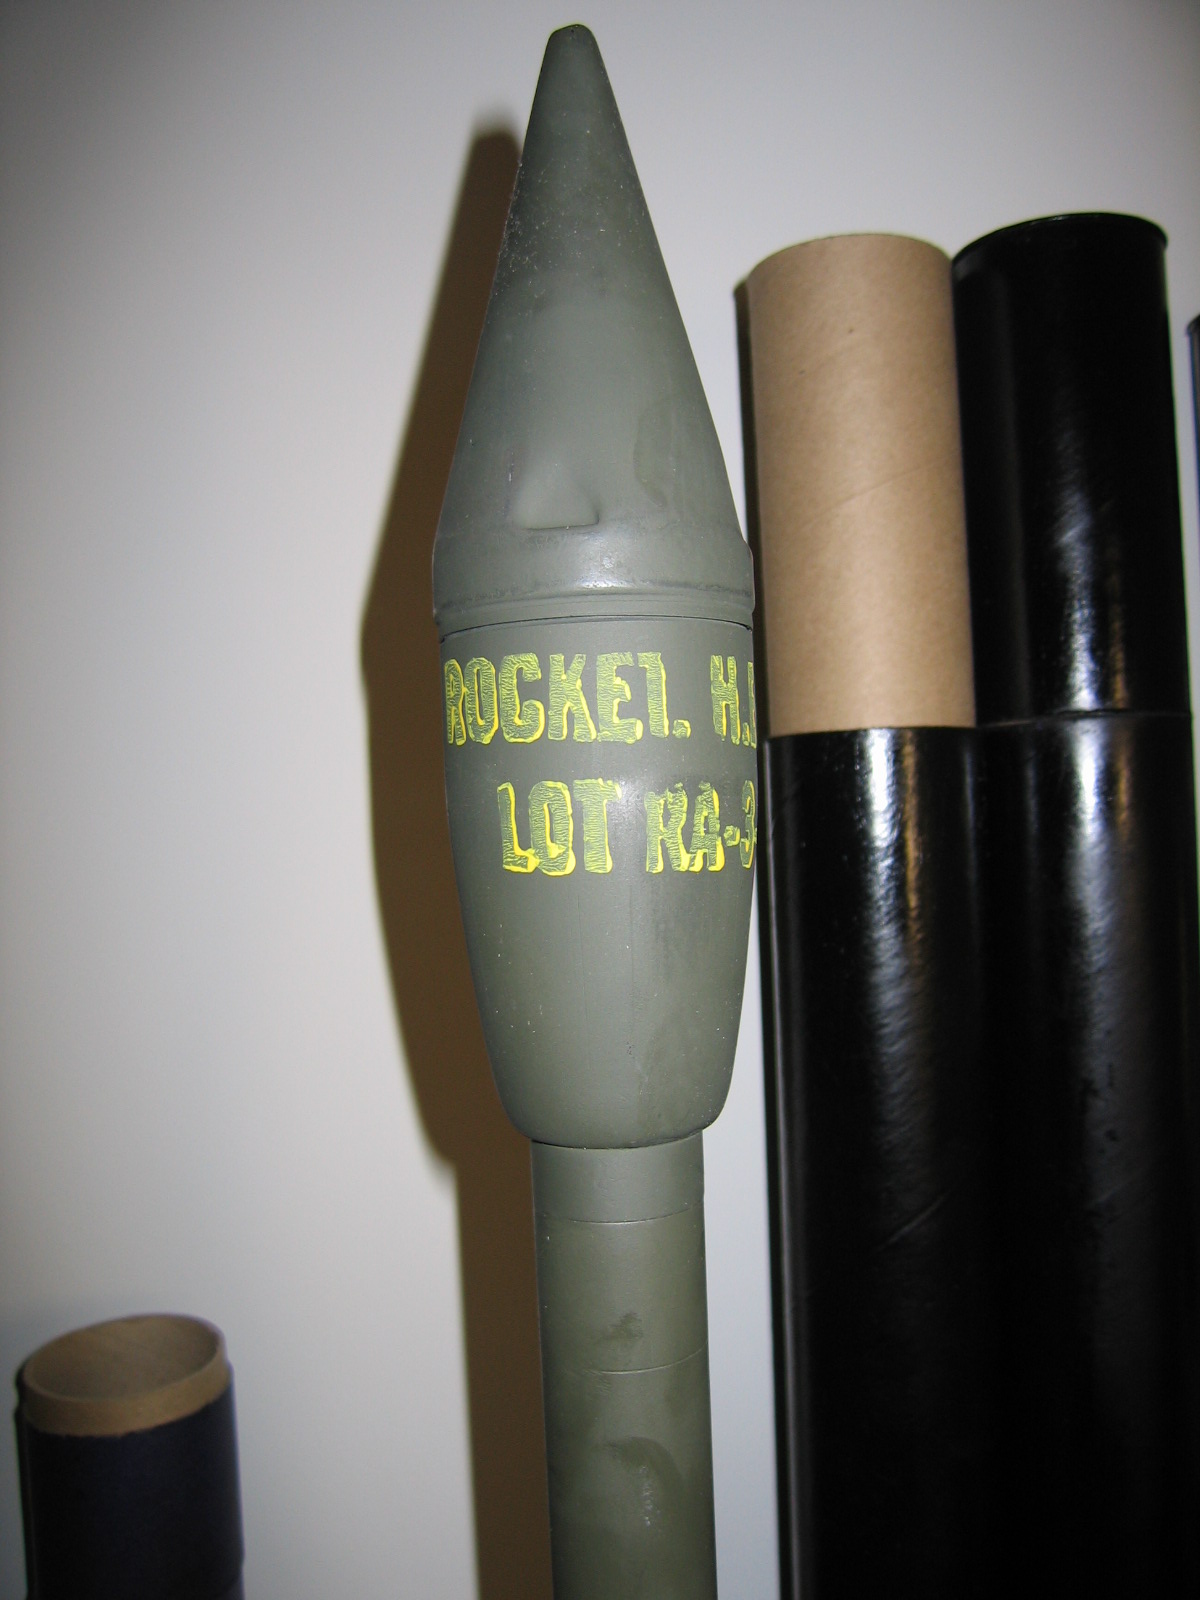
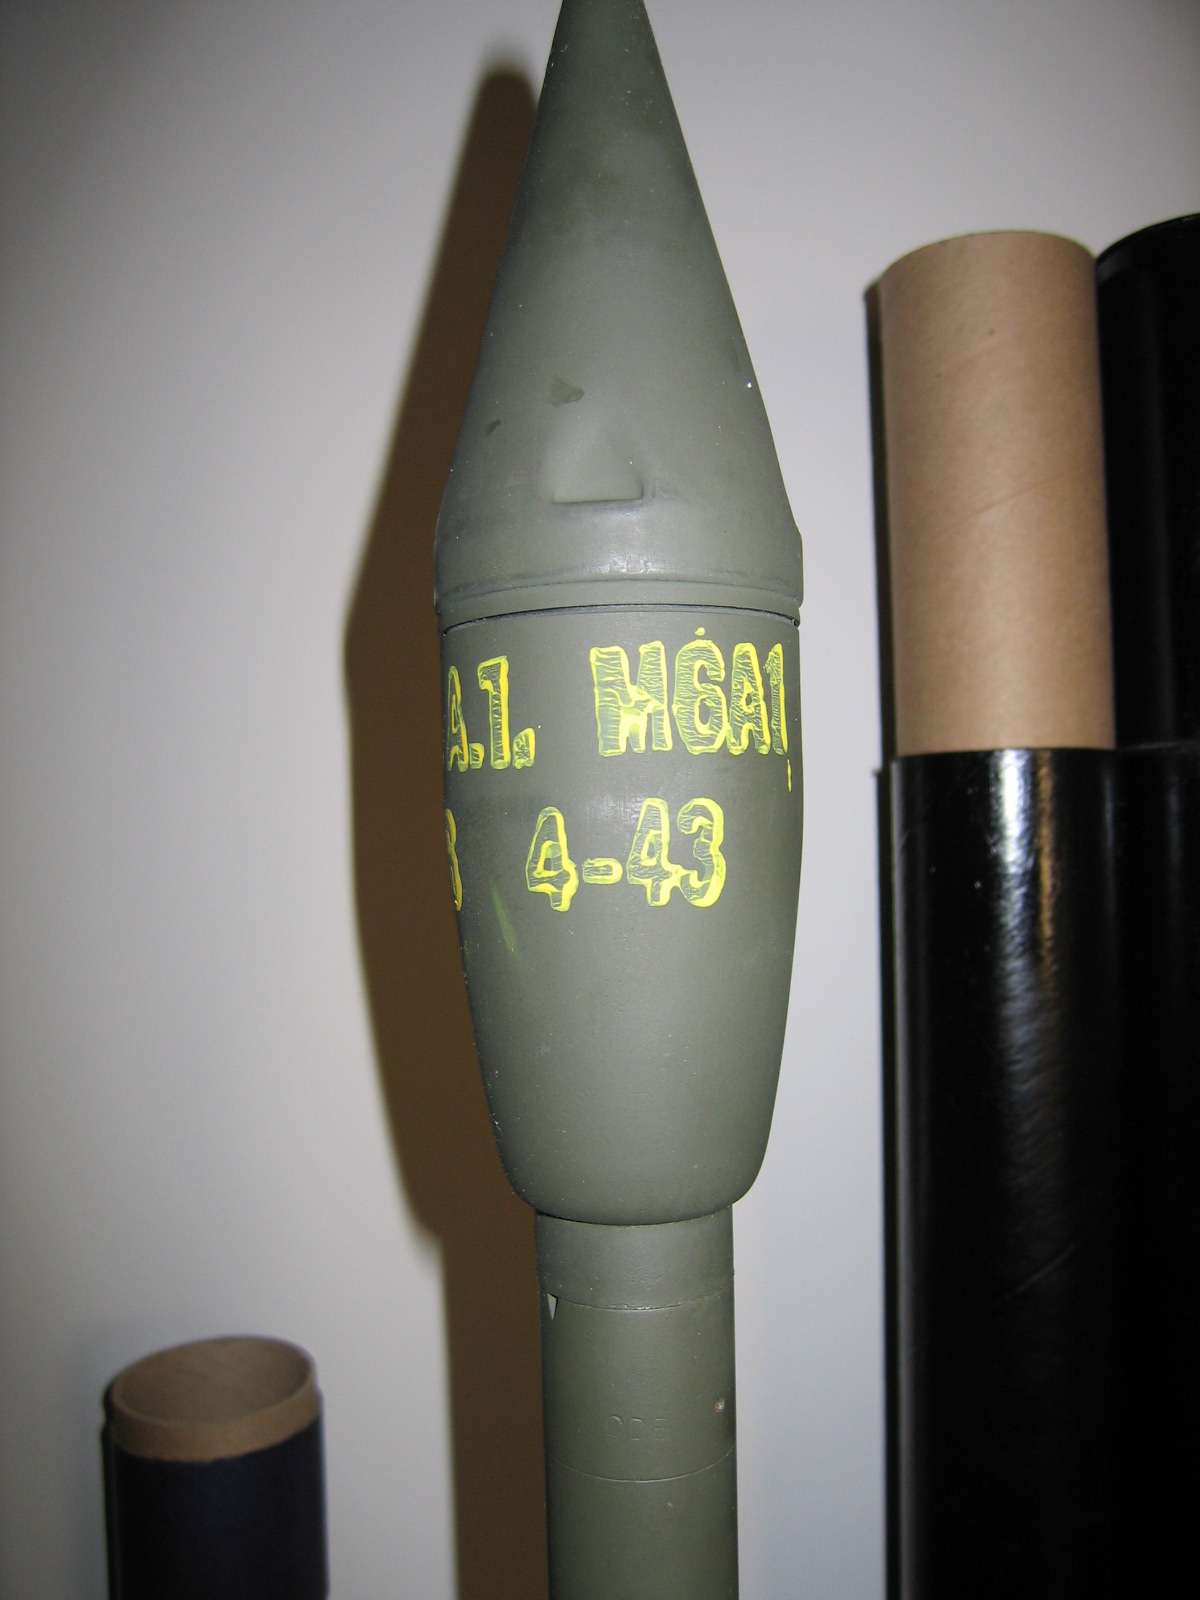
I acquired 2 bazooka rockets over the winter, as part of a pair of trench art ashtrays. The bazooka rockets were being used as the center columns, between metal “cloverleaves” on the top and bottom, with a long threaded bolt running from top to bottom. I bought the trench art specifically for those 4 cloverleaves. The bazooka rockets were just an added bonus to me. The whole ashtray was painted silver/grey. A quick buff on the wire wheel stripped all the paint, and got them prepped for paint. The noses of the bazooka rockets had been clipped to run the bolt through the bazooka to hold the top and bottom cloverleaf on. I repaired the damage with bondo, sanding and shaping to the right contour. I repainted the bazooka rockets with flat Krylon OD, the Walmart variety, out of pure convenience. The flat green rockets with no detail left me wanting something more out of them. I looked at the available options on re-stamping/stenciling the heads to add the correct nomenclature. There are two options, either do it yourself, or buy a commercial off the shelf kit from Allied Workshops. The Allied Workshops kit has a rub on, dry transfer decal. The idea sounded really nice, convenient, and easy. The downside, is that a single decal costs 7$, font is wrong, and when the decal is applied it looks too clean, it doesn’t look like a hasty stamping. On a whim, I decided I’d try my hand at hand cutting a stamp.
Here’s what I did:
Time required: ~2 hours
Tools Needed:
X-acto knife, preferably with several new blades, some carving blades would be useful, but not 100% necessary
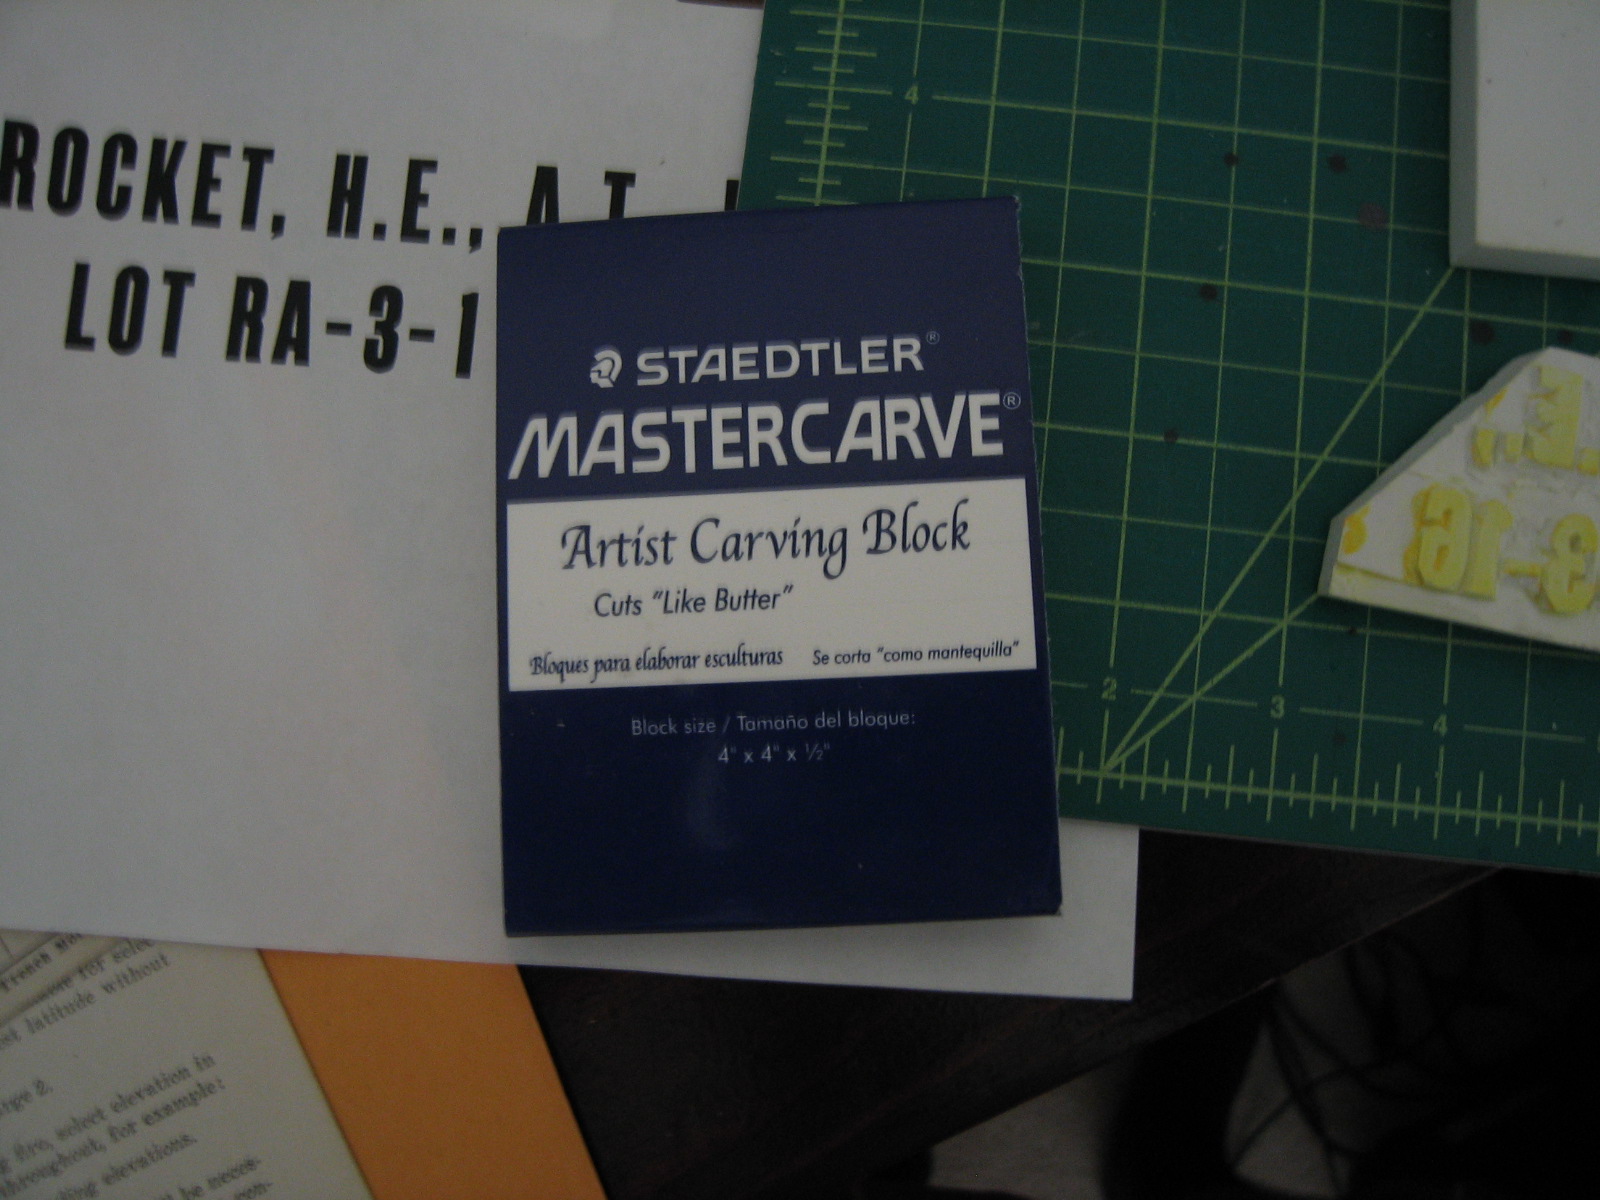
6 x 2 or larger Rubber Block – I used the “artist carving block” from Staedtler, it was the Mastercarve line
Lettering template
Rubber Cement
Yellow Paint – I used a small $0.99 bottle of acrylic craft paint, don’t really need much
Styrofoam or paper plateThe rubber block:
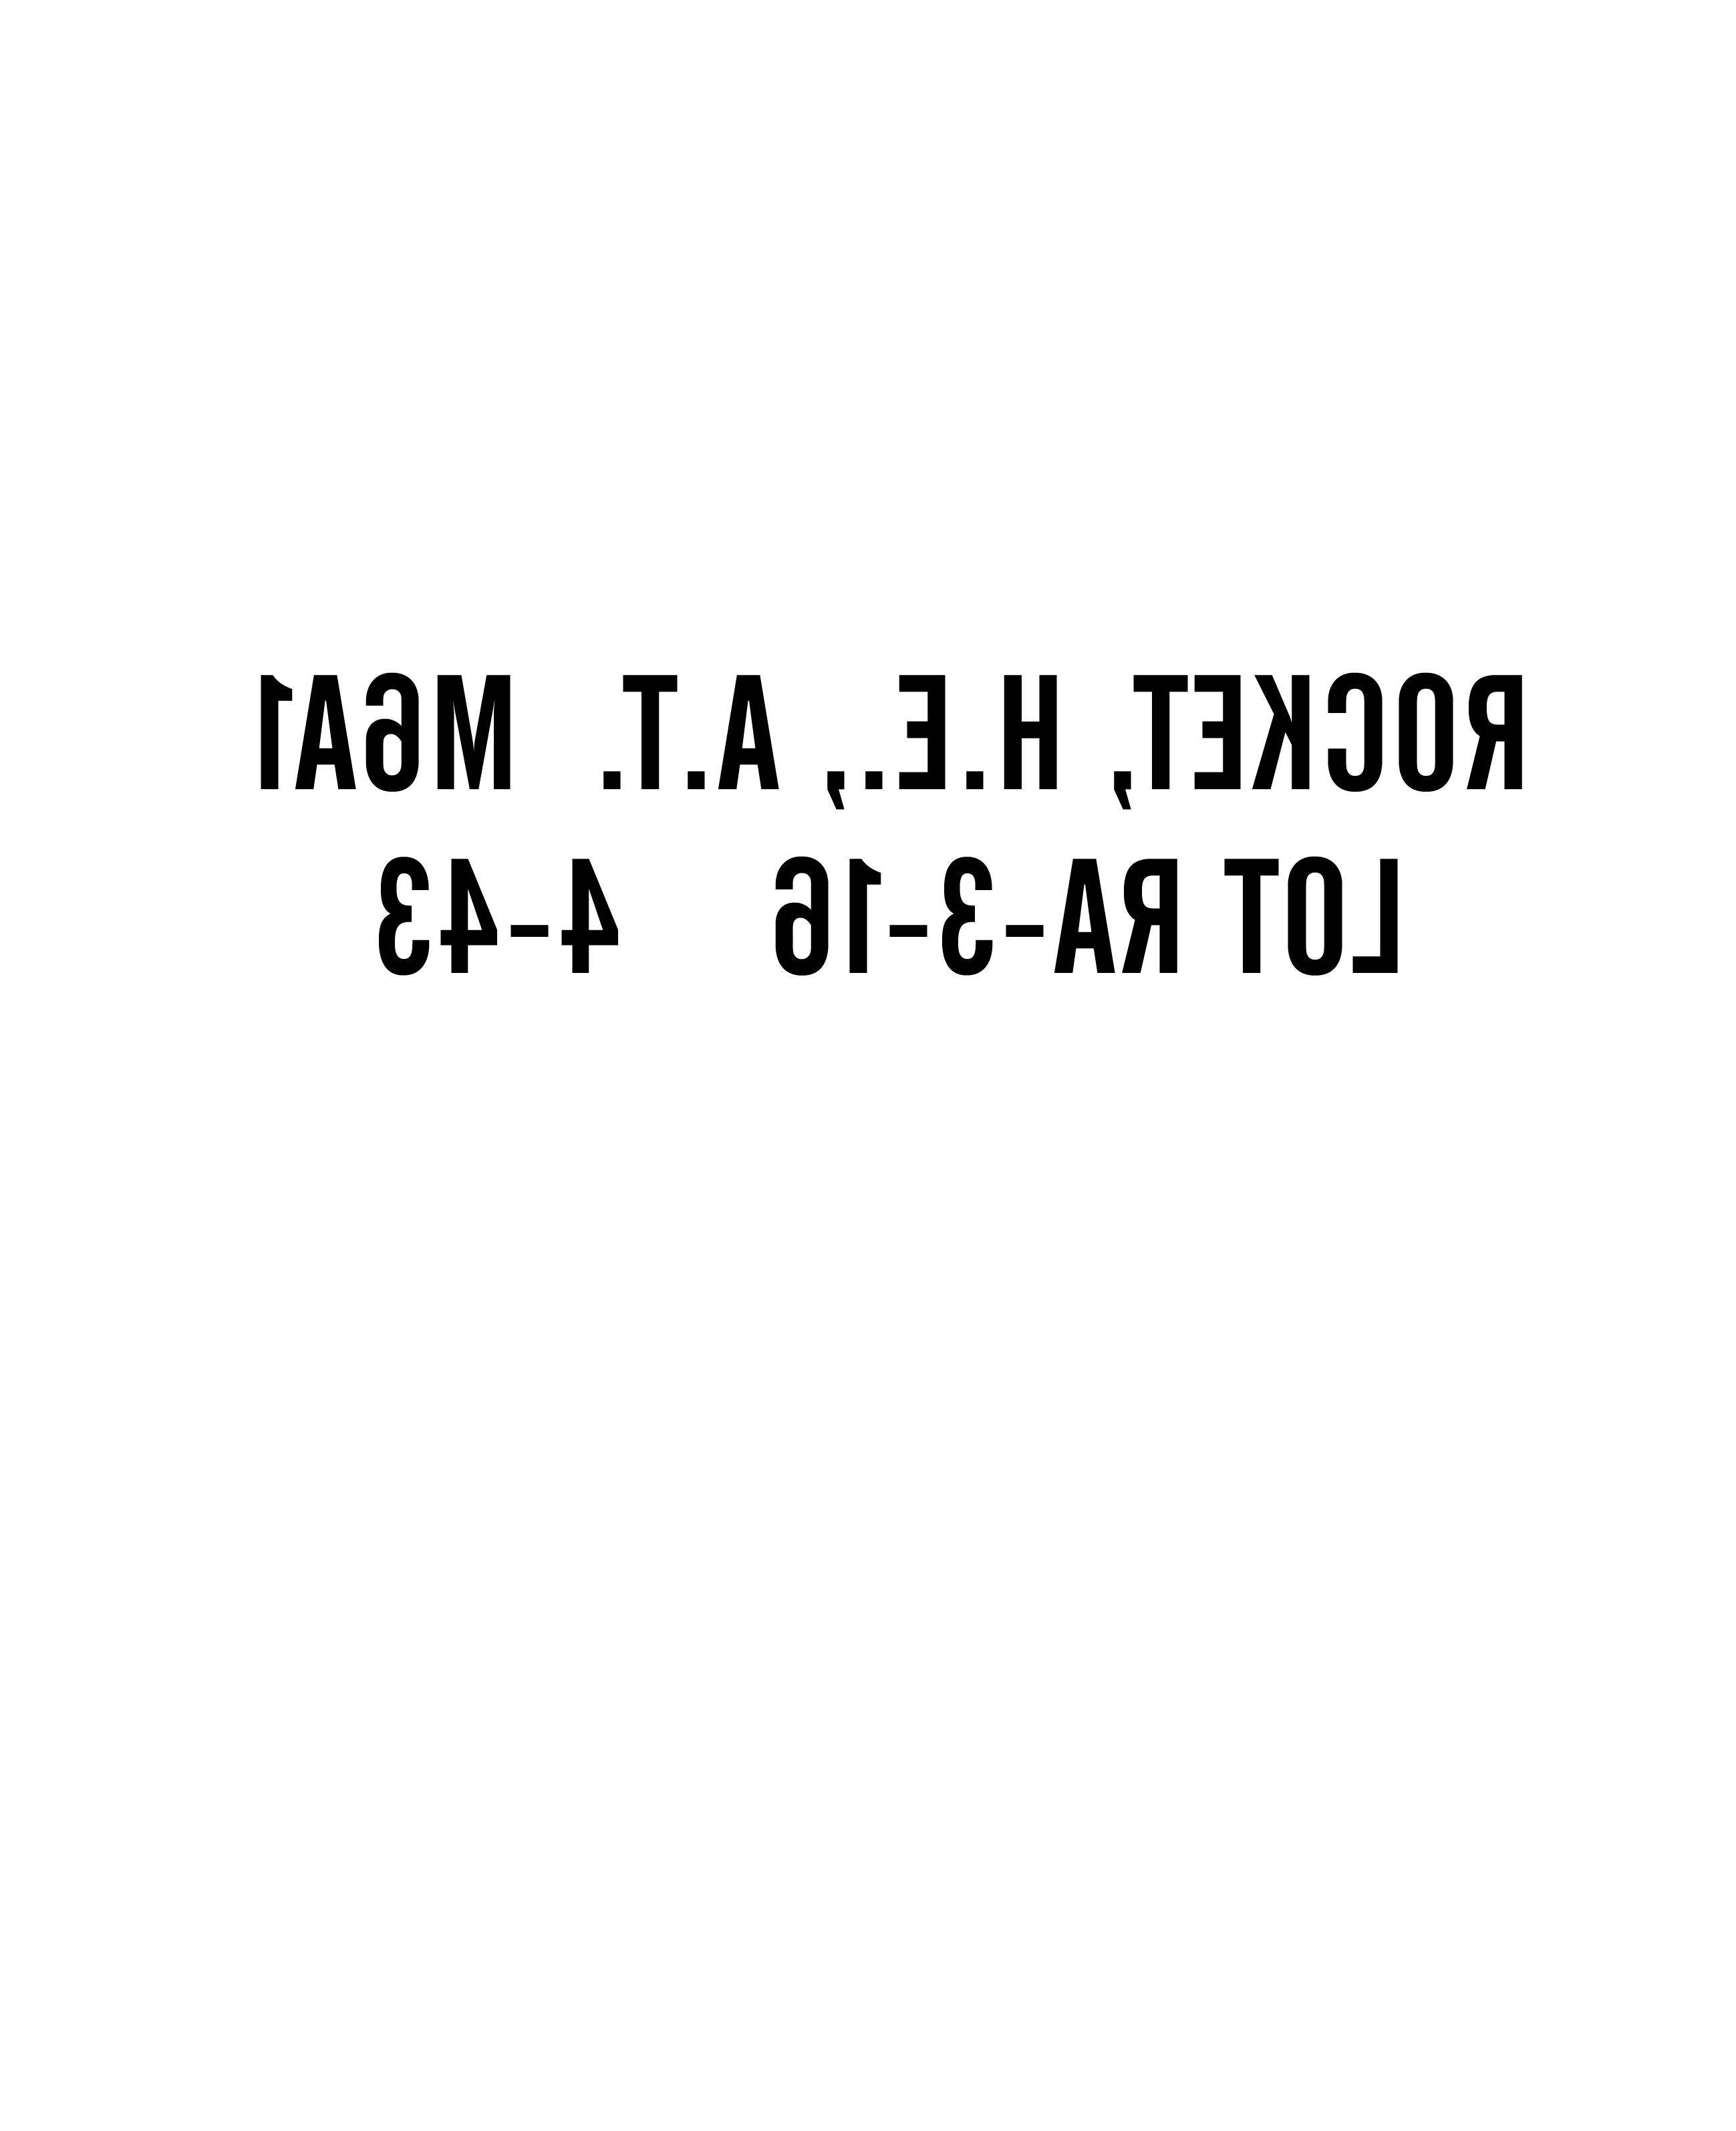
Lettering template - I contacted Mike Ellis (Squirrely) about doing a quick Paintshop or Illustrator layout of the text on the bazooka round. Using a few poor quality images sourced off the net, Squirrely was able to work his usual magic and hook me up within a few minutes. The guy is a machine. The only thing I had to do, as to reverse the image, so when I applied it to the stamp and cut it out, I would be stamping the right way.
Template:
The text should be just under 6 inches long. You should be just able to cover it up with a dollar bill. The text is an approximation, it’s not a direct tracing of an original, but it’s pretty damn close. Variations existed, it’s in the correct style, sizing and font, so I’m happy.
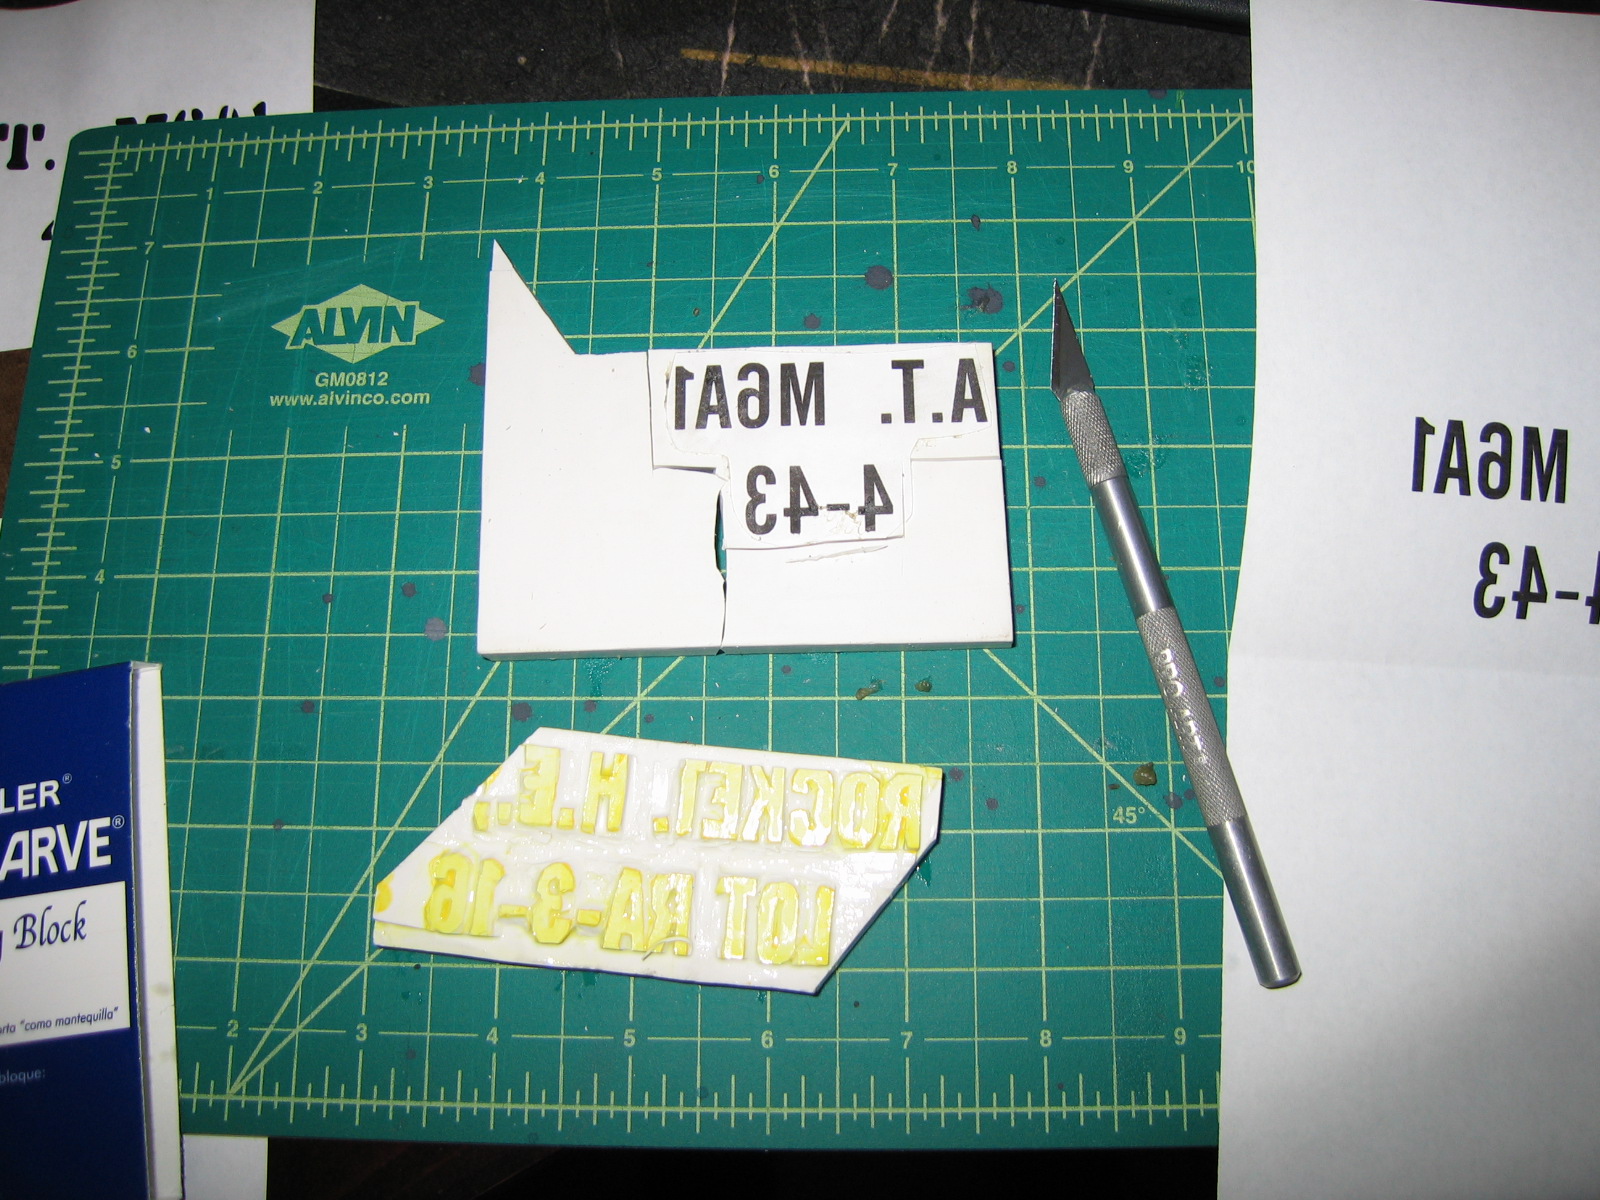
I roughly cut out the text from the sheet, applied rubber cement to the back of the text and to the rubber block itself. Glue the two together, rub off the excess rubber cement, and you’re good to start carving.Note, it’s really nice to get a rubber block that is atleast 6 inches long, so you can do the whole stencil in one piece. I bought a 4 inch block, since they were out of stock of the 6 inch blocks. Since I only had 4 inches to work with, I two-pieced the stamp. In the image is one of the finished parts of the stamp that has already been used, with some of the yellow paint still left on it. Also visible is the paper template, glued on another piece of the rubber.
Carving the stamps:
Be careful when removing material from the field areas not to undercut your letters. It can be easy to do. This is where specific carving tools are useful. You can use an X-acto knife though, a bit more patience and dexterity is required.
A good FAQ and how to on carving rubber stamps is here: http://www.limegreennews.com/howcarv.html I highly recommend you read that before you proceed.
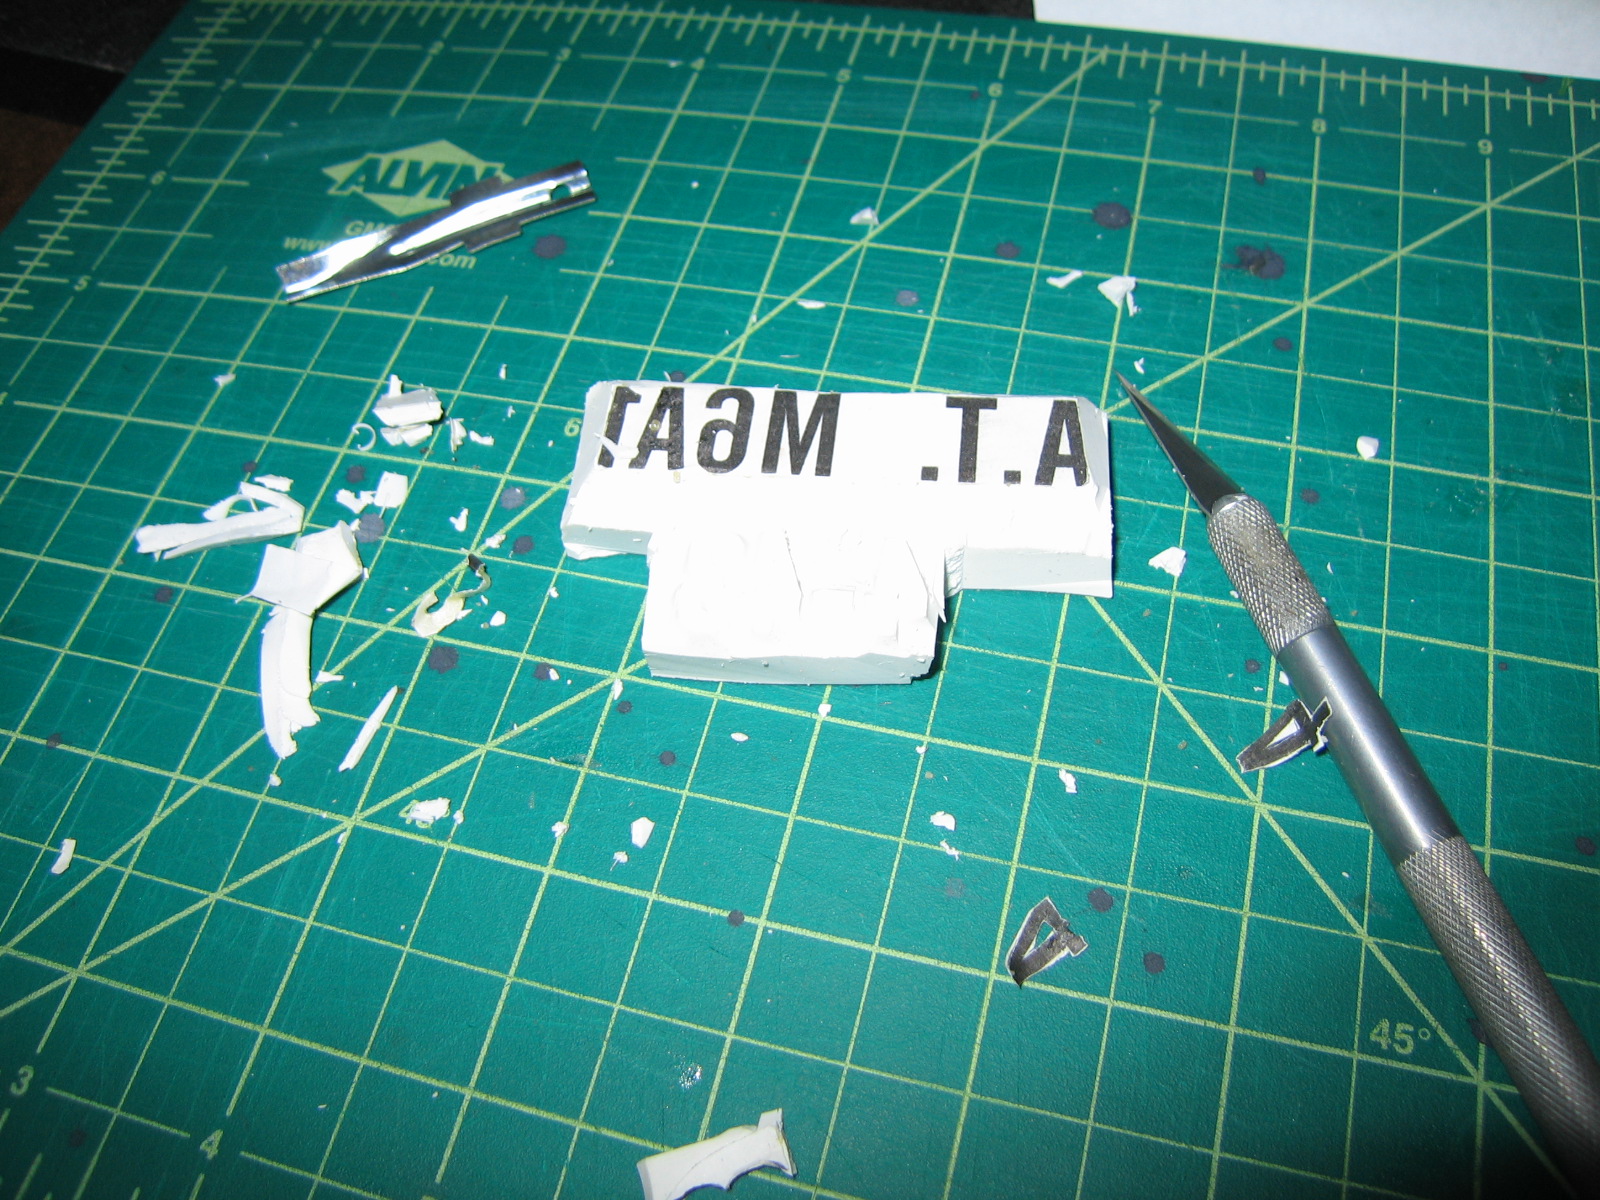
Since you glued the pattern directly on the rubber, you now have an easy guide to follow as you cut out the rubber. Basically, you want to cut always at a slight angle, so that the cross section of the stamp appears as / \ rather than | | Angled walls will make a stronger, longer lasting stamp. What you don’t want to do, is to \ / under cut the letters, which will cause them to either tear or break off under use. That’s what happened to me on part of the T on ROCKET.Once you have cut away all the material around a grouping of letters, you can go ahead and carefully peel off the paper to reveal the finished portion of your stamp. After removing the paper letters, go back and clean up any letters that need to have their edges straightened, or from the insides of the letters where more material needs to be removed, like on A’s and 4’s.
Lay the stamp letters up on the counter and position it so you can roll the bazooka head across the stamp. I removed the head of the bazooka rocket from the body and fin assembly so it would be easier to work with. Roll the bazooka head across the stamp, in a straight line, with firm even pressure.
Paint:
When your stamp is completed and you are ready to paint, pour a small glob of paint, about the size of a dime onto a Styrofoam or paper plate (Styrofoam Is preferred, even a regular ceramic plate would work too, I’m lazy and didn’t feel like doing any more dishes) spread the paint around into a rectangle about the size of your stamp, in a thin layer. I mean thin, not bone dry, but just a little paint in the area that you’re going to use to ink the stamp. Ink the stamp in the paint, pressing firmly across the stamp to ensure even coverage, but not pressing hard to ink the backer.