IMPORTANT:
Proceed at your own risk. We're not responsible for you blowing yourself or your gun up.Blank Adapting the M1 Carbine
Date Written: 8/4/2007
Author: Chris Guska
Blank Adapting the M1 Carbine
So you’ve decided to blank adapt your M1 carbine? There are already several articles out there that detail how to drill & tap your carbine. Both of them are excellent articles, but I thought I would try and address many of the issues not addressed in the prior articles.
The first article is excellent except for those of us that down own a machine shop and have a lathe handy. The article can’t easily be replicated at home, let alone without some experience using a lathe. Some time was spent addressing the cosmetic features of the carbine, such as the rear sight, handguard, and safety, but little time was spent to explain the details and why they are correct.
Fallschirmjaeger Regiment of Washington
BackgroundI’m going to walk through a variety of different things with blank adapting the M1 carbine. The other two articles aren’t wrong, or bad, this is just another different take on the same problem.
This article uses an electric hand drill and coarse thread tap / set screws.
There’s been much debate as to which is better, coarse or fine thread, and the answer is purely theoretical. Basically, buy and use what you can readily get. If you cant readily get fine thread set crews, but you can get coarse, use that. You don’t need to go out and specifically find fine thread set screws.
Take your time, don’t rush, and chances are things will turn out nicely.
BFA Apeture hole sizes: Check this chart or just use what your blank manufacturer recommends. Sometimes your weapon might not function at the specified size; it might function with a size larger or smaller. It really depends on a myrad of factors.
Supplies Needed:
Machinists vise
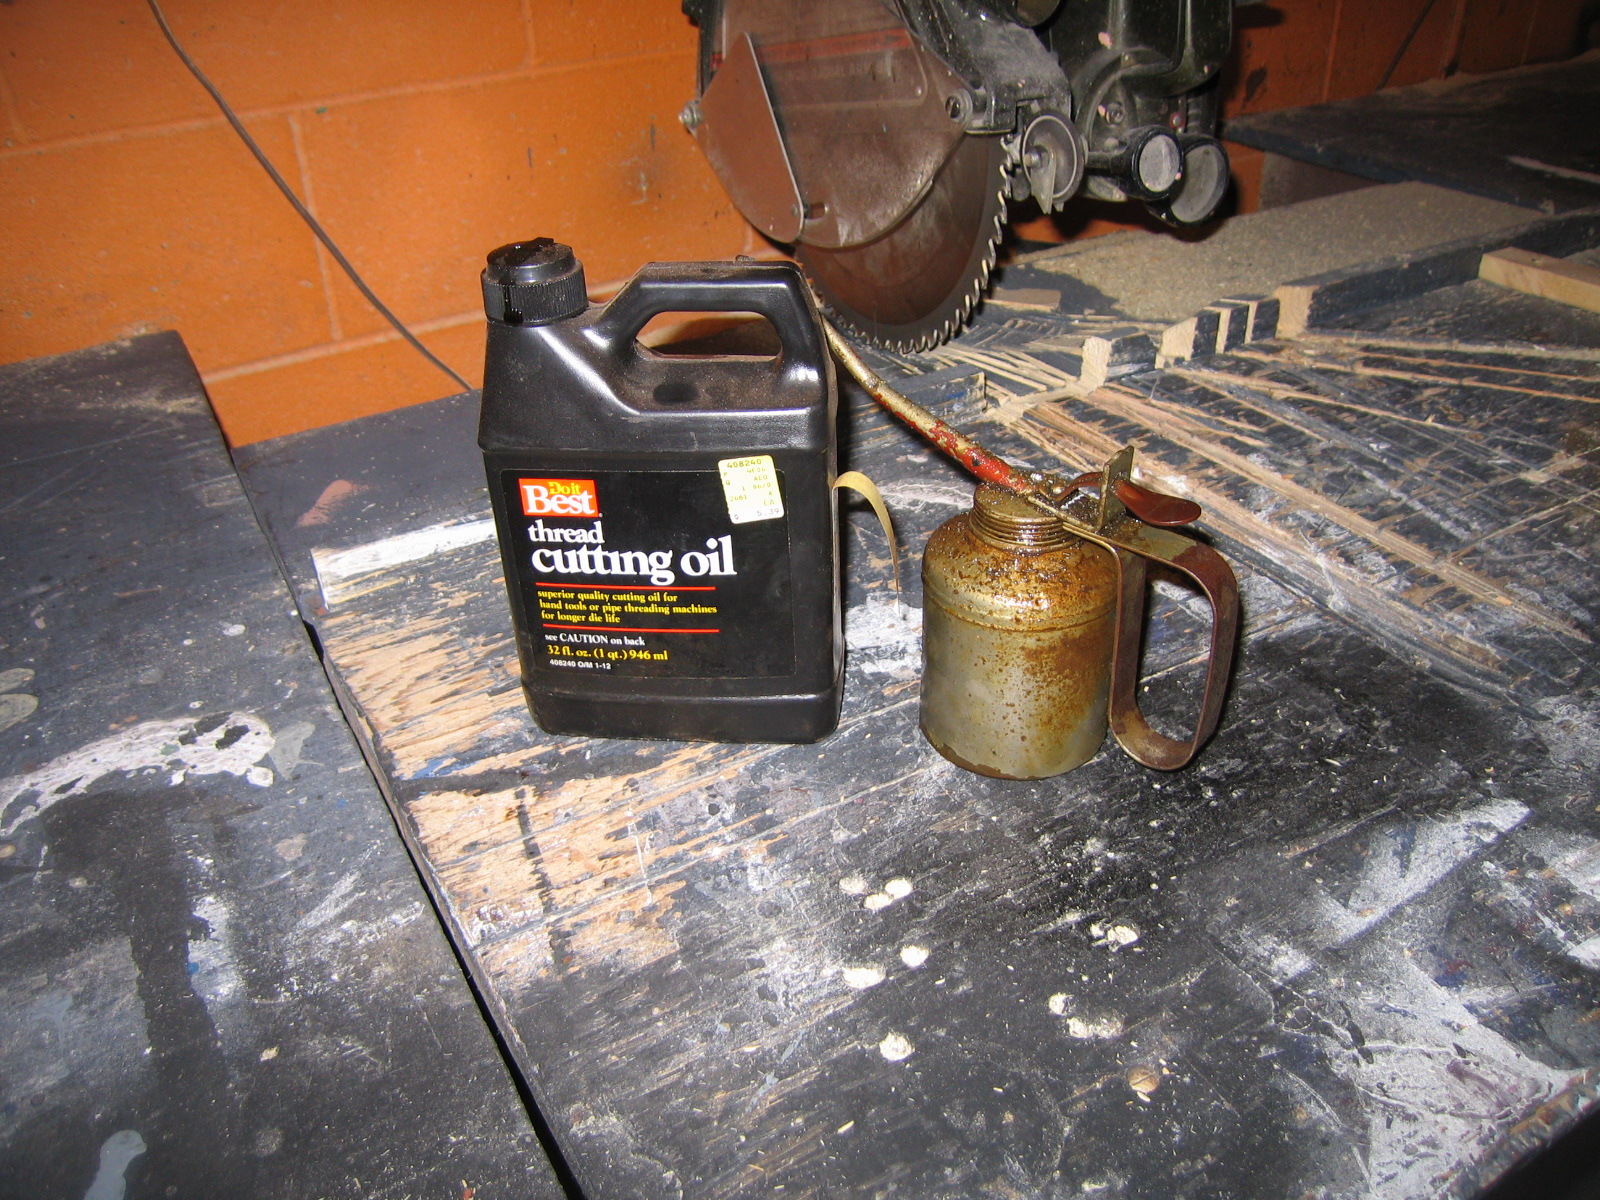
Cutting oil
Propane or MAP gas torch
Electric Drill
Tap wrench
3/8 inch national coarse thread tap (3/8 inch 16 threads per inch)
21/64ths Drill bit or 5/16ths. The tap should say which drill bit to use
3/8 inch national coarse thread cup point set screws (3/8 inch 16 threads per inch)
5/16ths Drill bit
# 26 - # 23, #21, #20, 5/32 Drill Bits (.1470, .1495, .1520, .1540. 156, .159, .161)
IF YOU ARE USING JOE SWANSON MOVIE BLANKS - CONTACT HIM FOR DRILL BIT SIZES TO AVOID DAMAGE OR INJURY
Allen wrench or bit driver to fit your set screw
Procedure 1 – Drilling and Tapping the barrel
Supplies Needed:
Electric Drill
21/64ths or 5/16ths drill bit (use what your tap recommends)
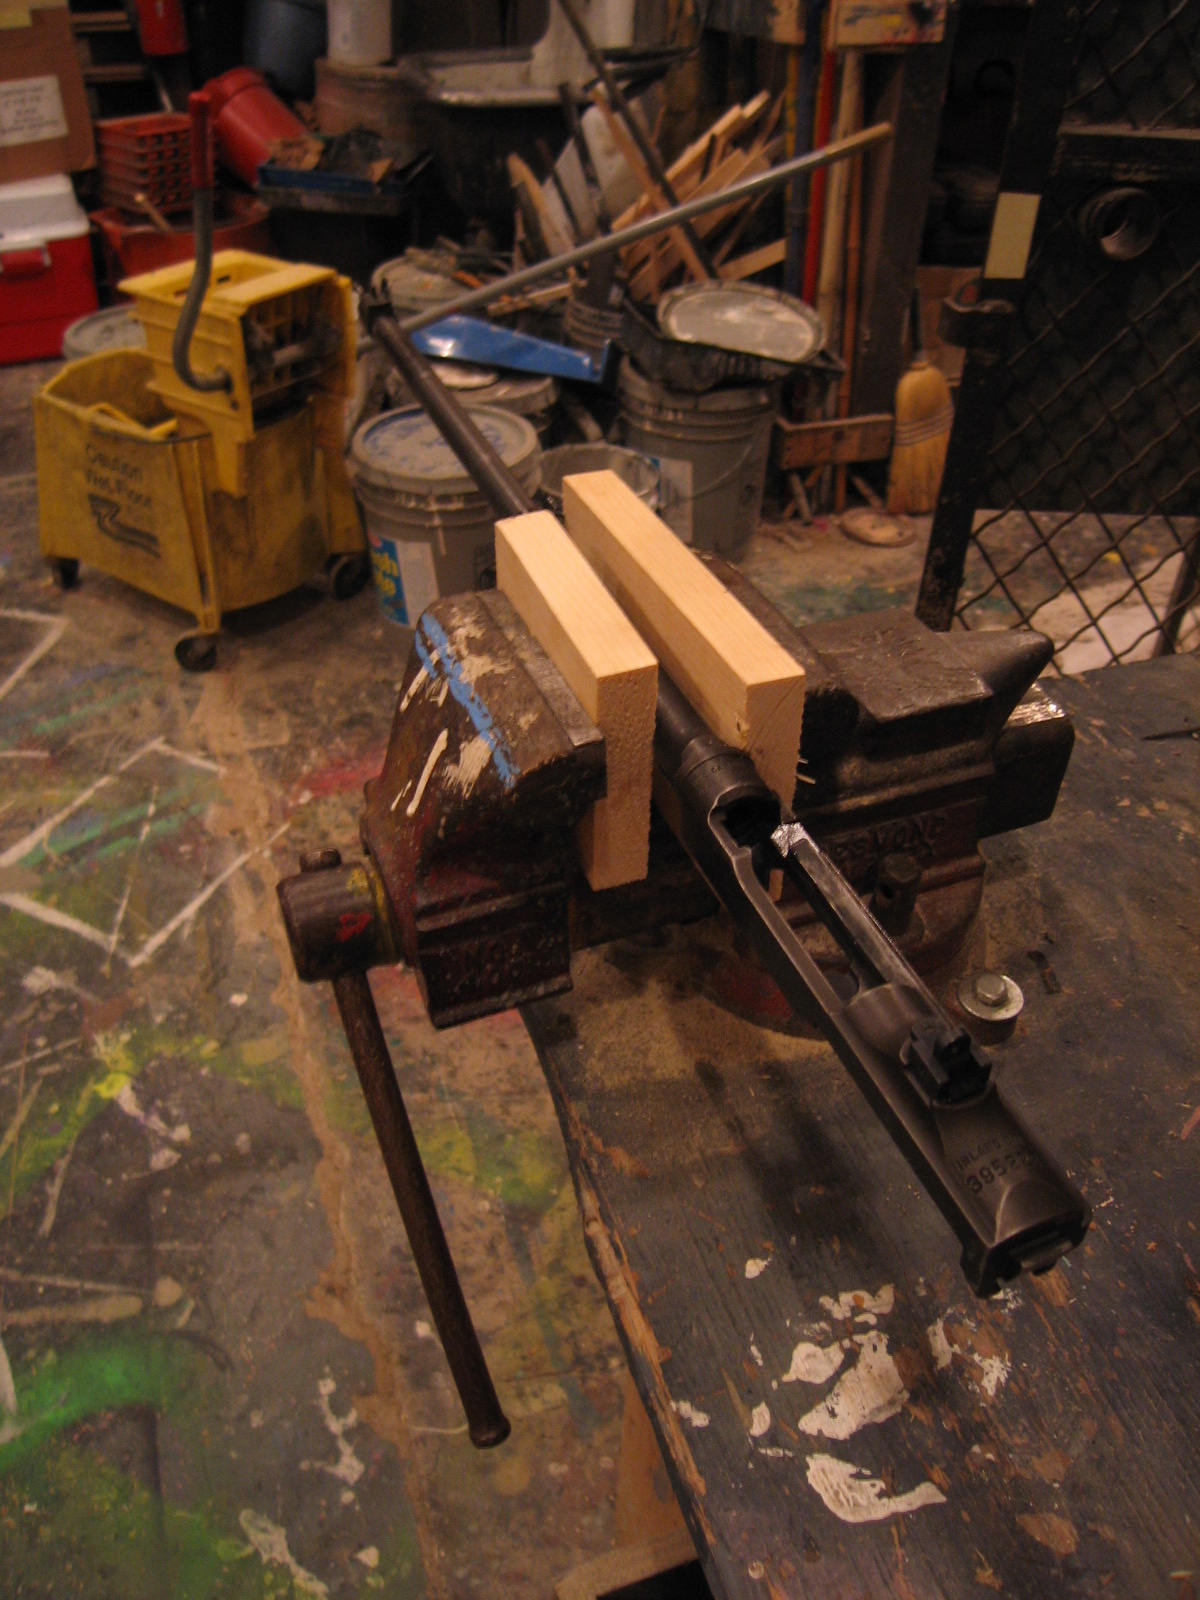
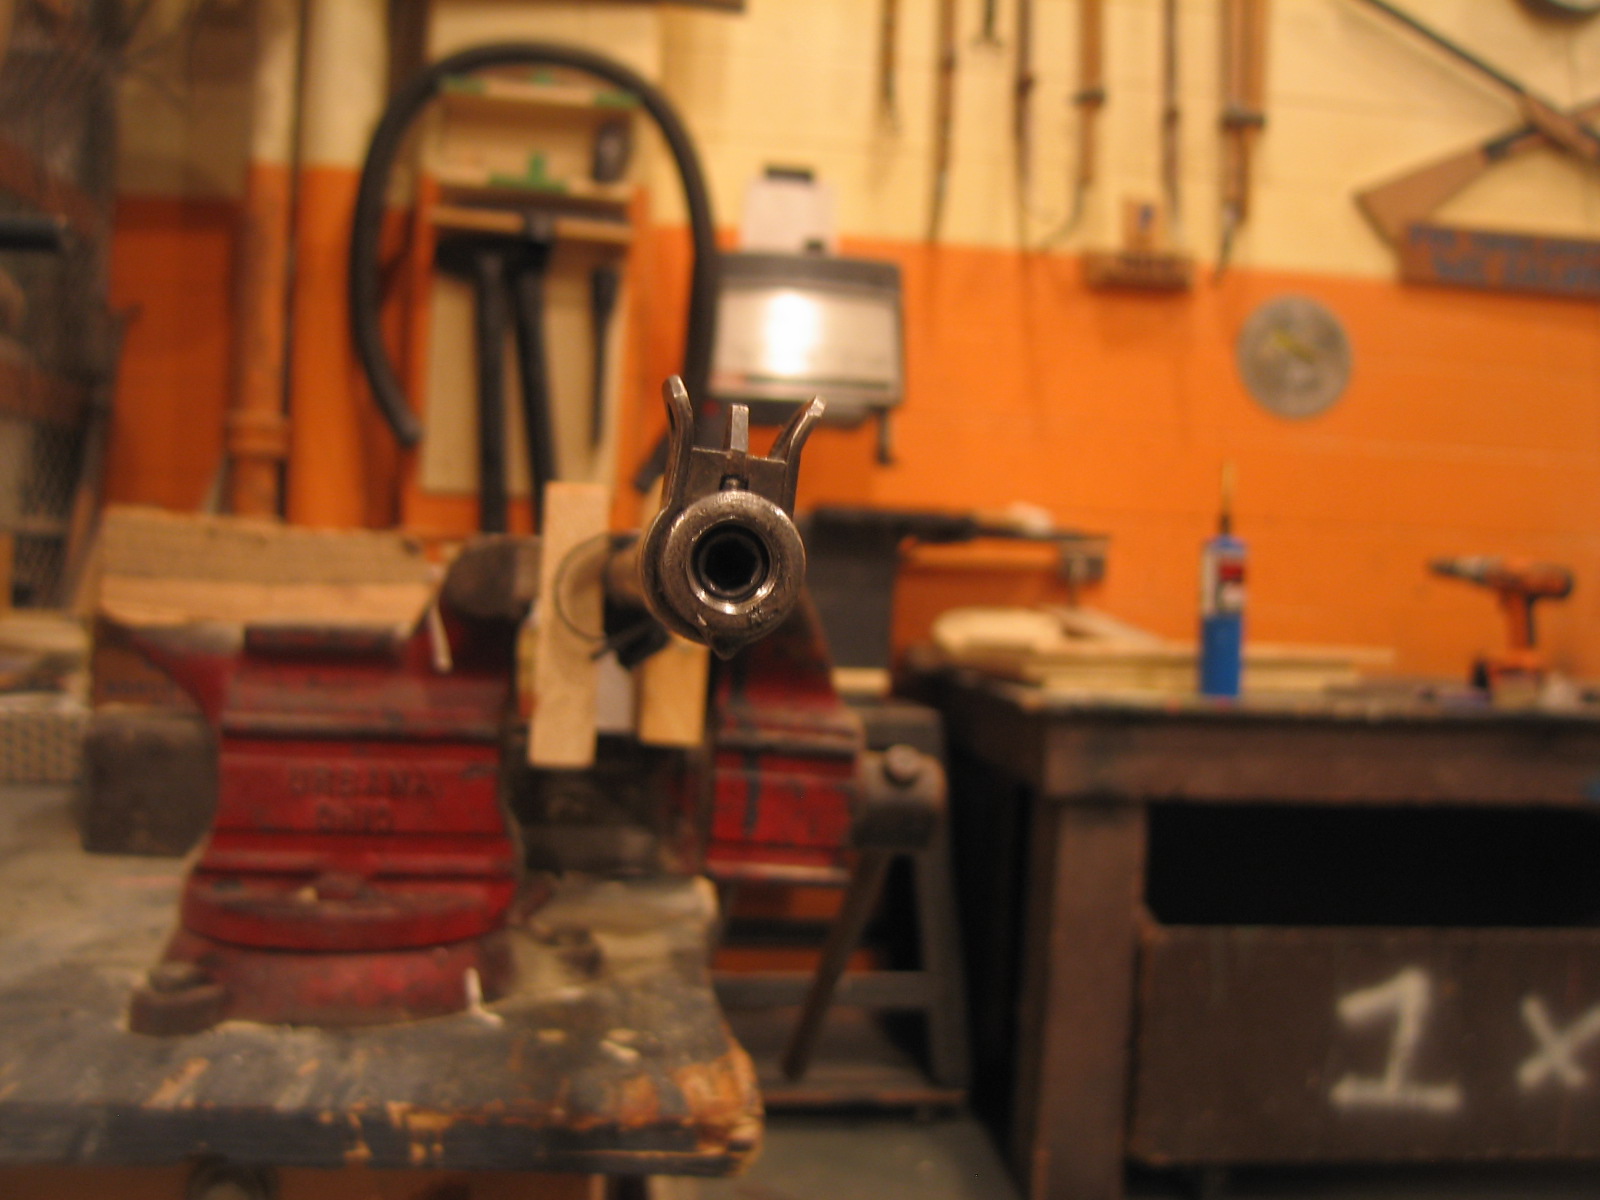
Dis-assemble your carbine. Take the carbine down to the barreled receiver – take the trigger group off, take the recoil spring/guide out, take the slide off, take the bolt out.
Take the barreled action; put it in the vise with a couple pieces of pine or whatever you’ve got on the barrel flats in front of the receiver. No need to put a death grip on the carbine, just tight enough that it doesn’t move around and is secure.
Drill the barrel. Take your time to make sure your drill is in line with the bore so you don’t hog the bore. This is where you can screw a good barrel up bad. If it’s a POS barrel, still take your time.
Advance the drill about ¾ to 1 inch.
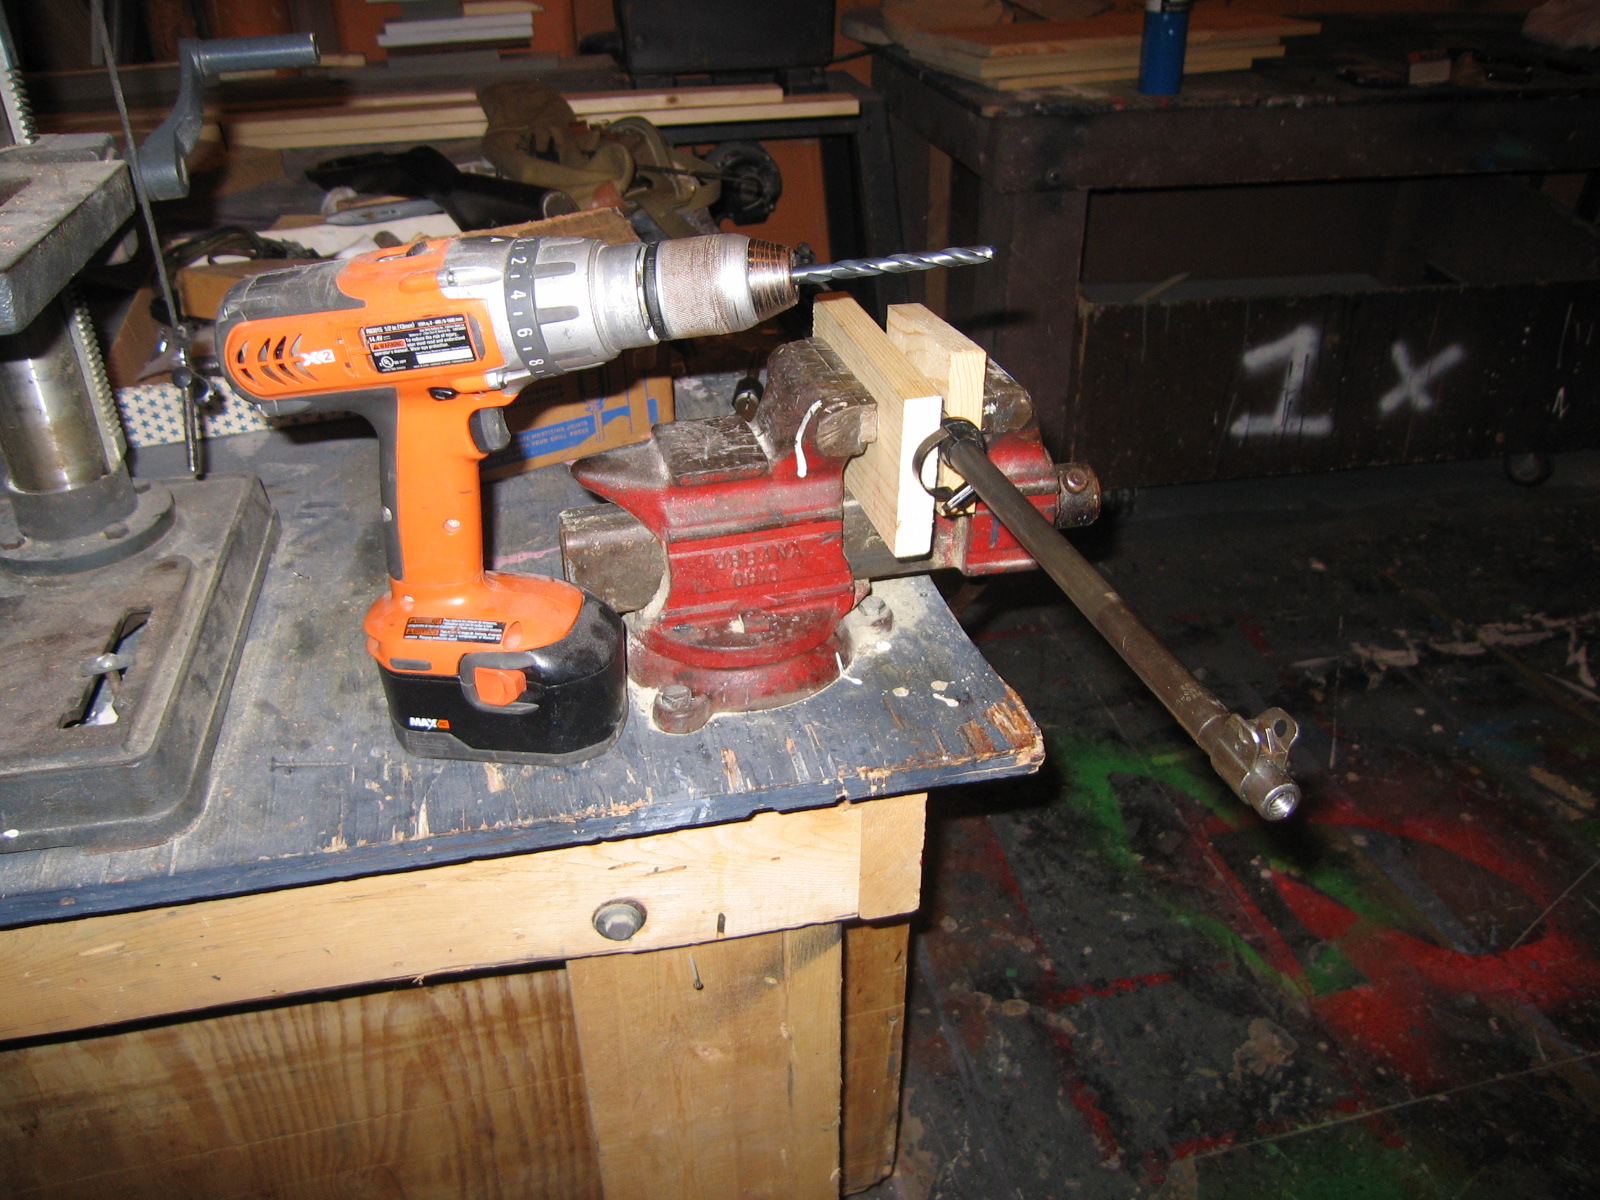
Procedure 2 – Threading the barrel.Supplies Needed:
Tap wrench
3/8ths inch national coarse thread tap
3/8ths inch national coarse thread set screw
Allen wrench
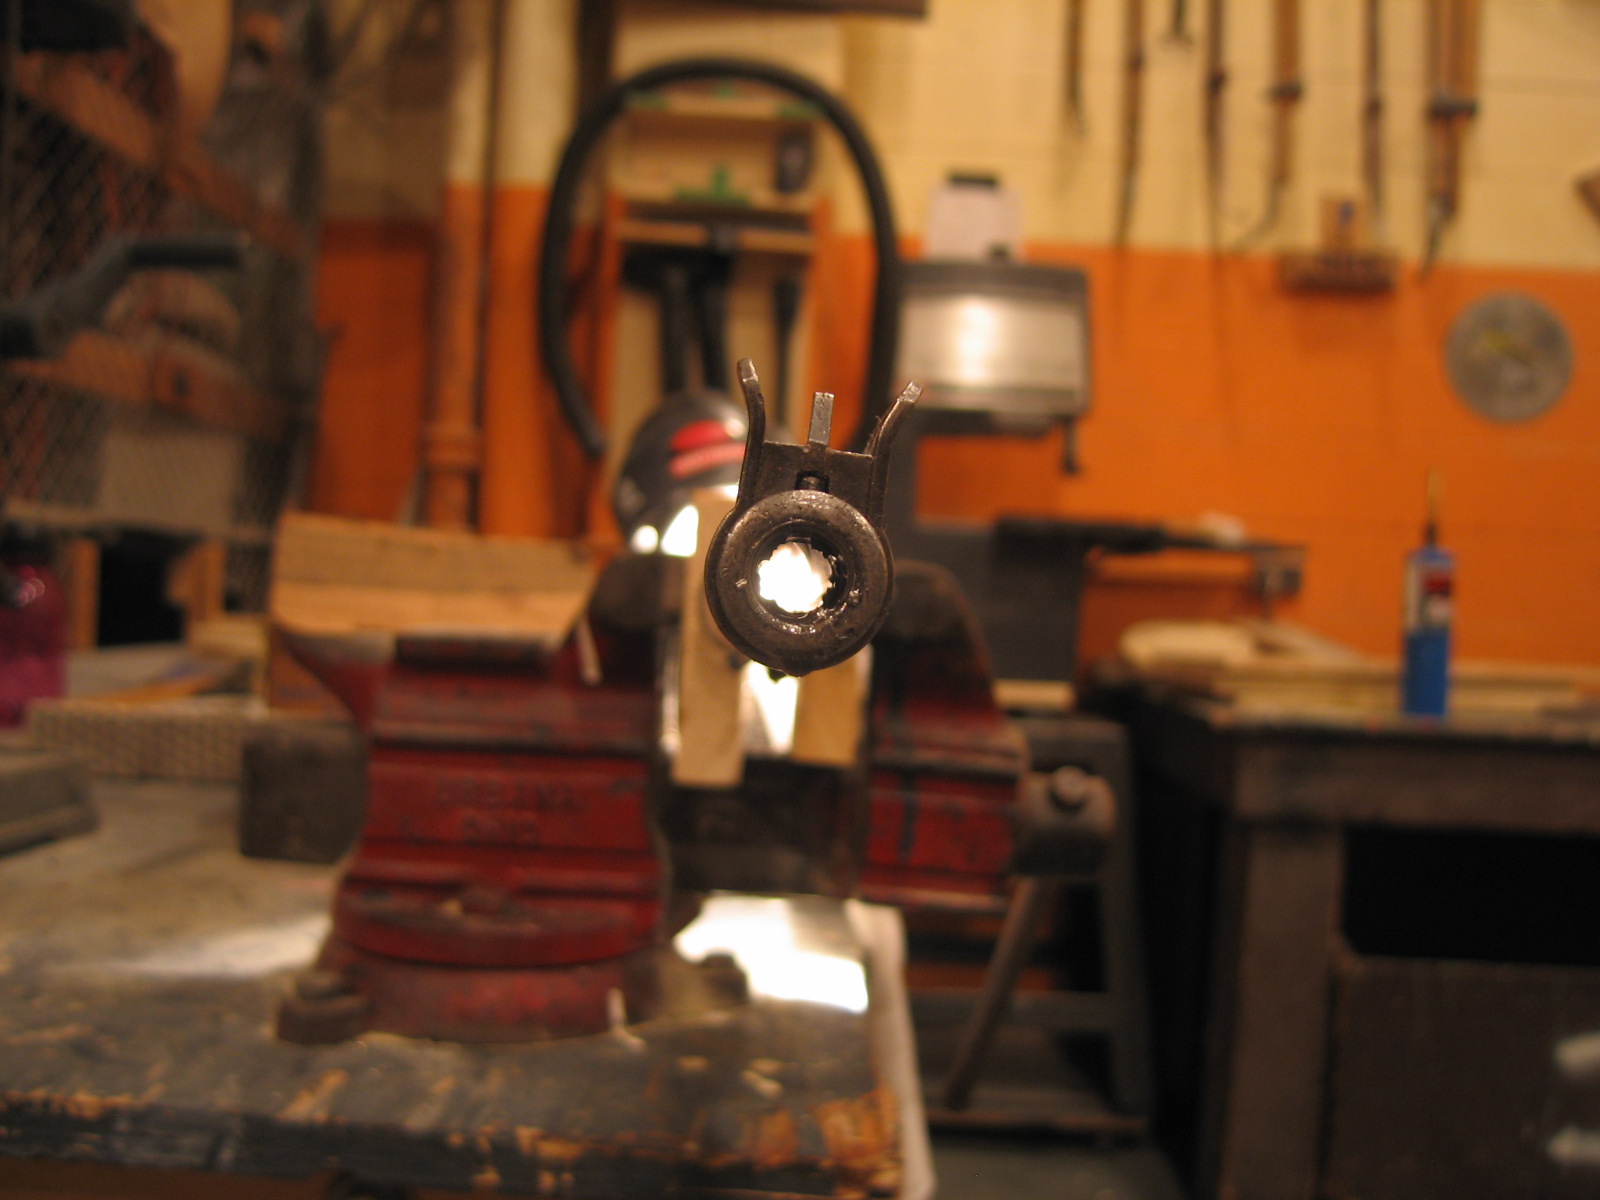
Cutting oilLine up your tap so its true to the bore; you don’t want to start your threads cockeyed. The first few turns are the most critical – take your time when you do this, be firm and deliberate. Use cutting oil. After initially starting the threads, periodically reverse the tap to break the chips as they form.
Advance the tap about ½ to ¾ inch into the bore.
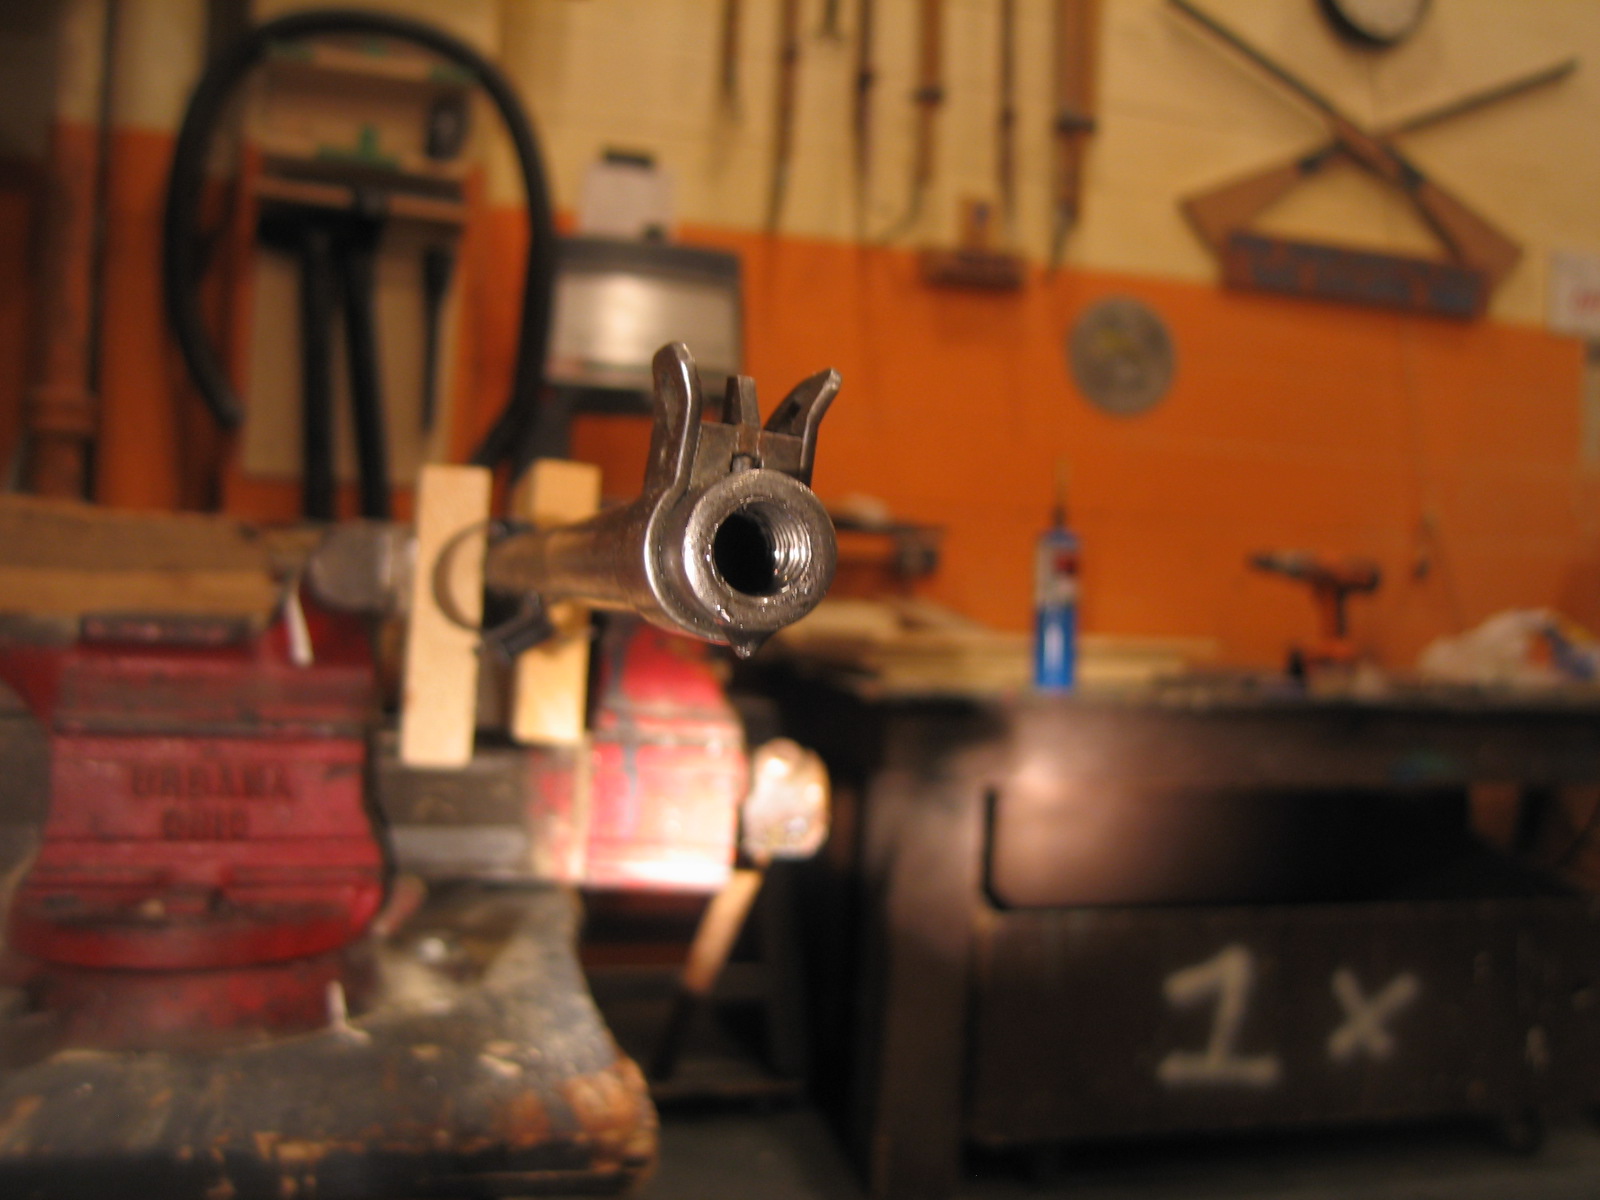
If you have any question if you haven’t threaded the barrel deep enough, go ahead and test fit a set screw.
Note that the screw is fully into the bore, with a few threads in excess above the top of the set screw.
After drilling and tapping the barrel, make sure that you clean the bore well. There will be metal chips (shavings) in the bore. This is why I removed the bolt and trigger group from the gun, so there’s no chance any of the metal chips could work their way back to the bolt, or trigger group, leaving me with even more things to clean.
Note the chips in the bore.
Procedure 3 – Drilling set screws
Supplies Needed:
Propane or MAP gas torch
3/8 inch national coarse thread set screws
5/16ths Drill bit
# 26 - # 23, #21, #20, 5/32 Drill Bits (.1470, .1495, .1520, .1540. 156, .159, .161)
IF YOU ARE USING JOE SWANSON MOVIE BLANKS - CONTACT HIM FOR DRILL BIT SIZES TO AVOID DAMAGE OR INJURY
Allen wrench or bit driver to fit your set screw
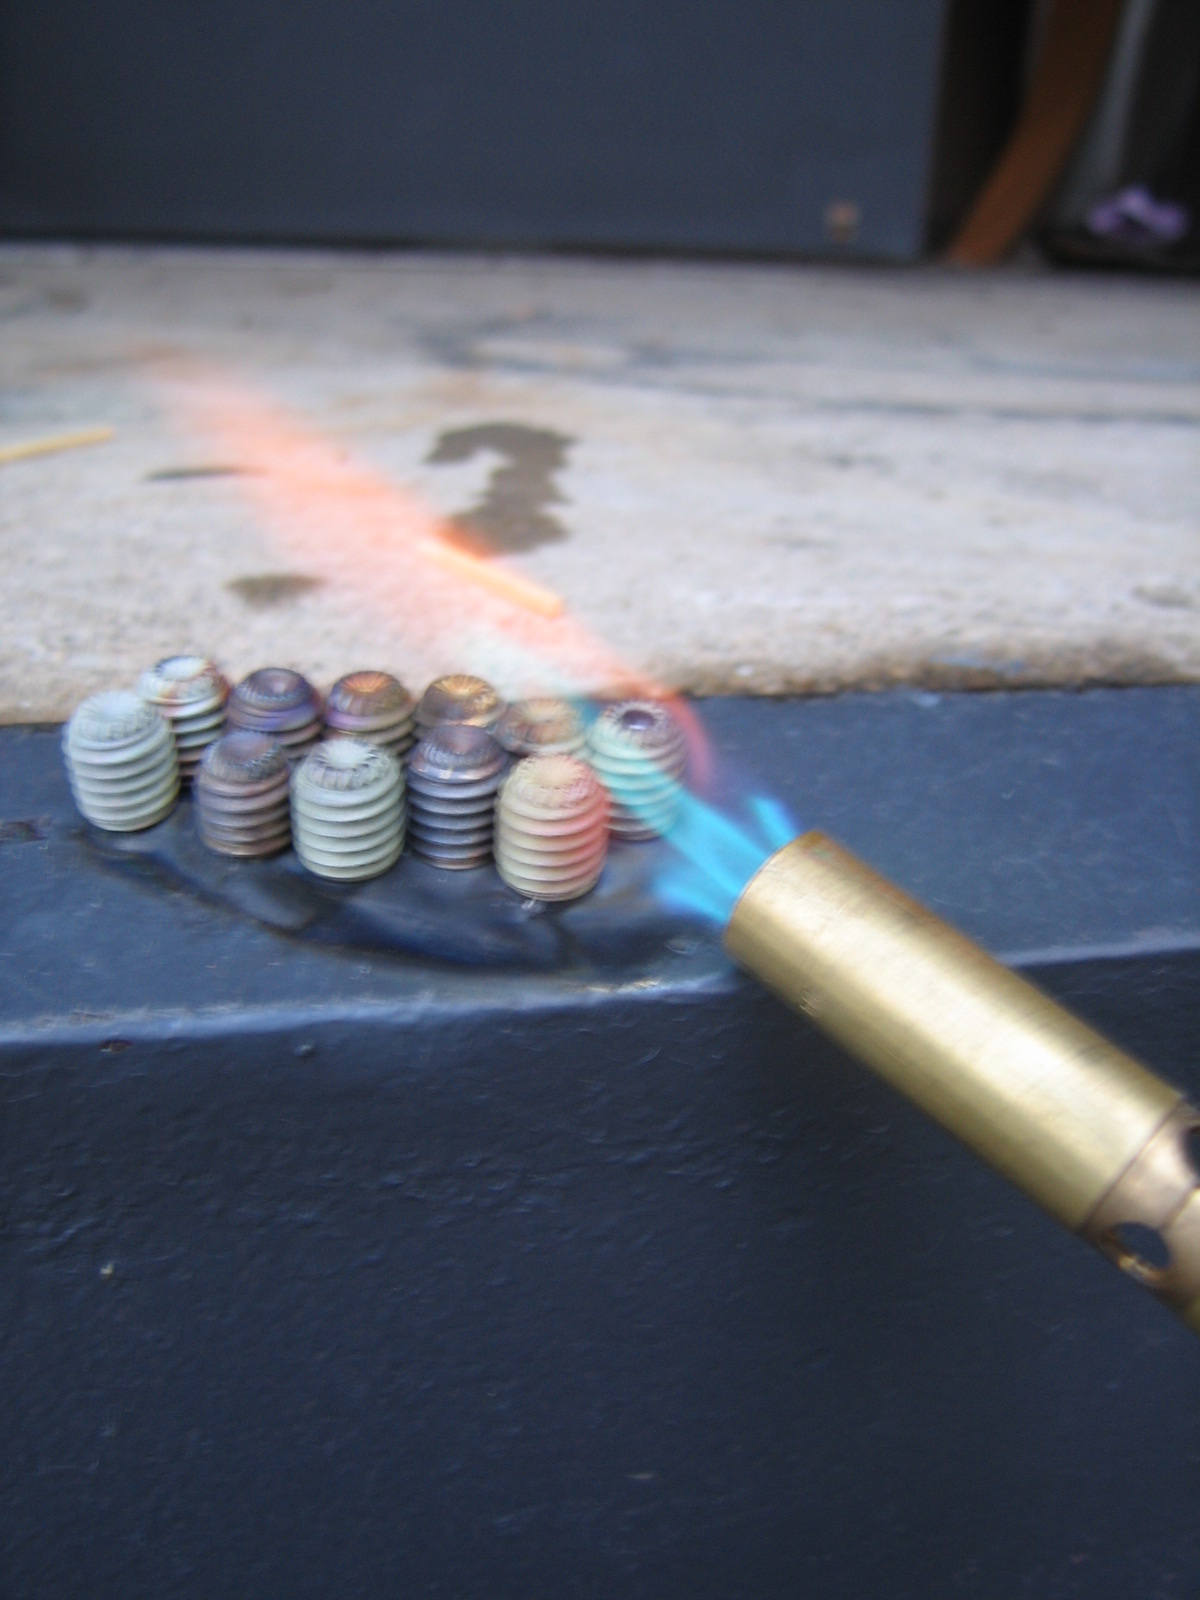
Heat set screws on heat resistant / fireproof surface until the tips are reddish orange in color to soften them, if the set screws are hardened.
Center drill the set screws (preferably using a drill press to prevent hogging of apertures) with the drill bits specified. USE CUTTING OIL. Start with the largest sizes first.Create a means of marking or otherwise identifying the set screws.
A note on drill bits, not all drill bits were created the same. The drill bits your dad used to build the birdhouse probably aren’t good to use for drilling metal. Spend the extra dollar, and get good quality bits that are made for drilling metal. It’ll be a lot easier, the hole will be cleaner, and the chances of you destroying the drill bit are a lot lower.
A block of wood with holes drilled and threaded in, then labeled, or commercial off the shelf pill containers.