M140 81mm Ammo Can Restoration
Date Written: 2/11/2008
Author: Chris Guska
Background:
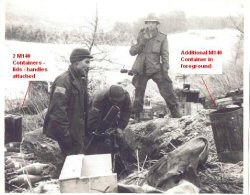
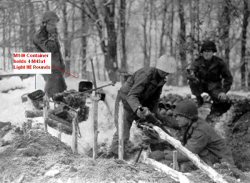
What is a M140 (T16) container? It is a metal container that holds 4 M43 series 81mm HE shells, complete with fuse and increment charges. The rounds are held in the container with an integral insert that holds the round on the ogive and at the tail assembly. The lid is secured with a large screw that is integral to the carrying handle. The rounds are held securely in the container by 2 horsehair pads that are glued to the bottom of the lid.
I purchased 2 of the M140 containers off ePay in 2006. Both were very dirty, ugly, and slightly rusted and pitted from being stored outside. One was in significantly better condition than the other. Both got cleaned up with some phosphoric acid treatment, the rust neutralized, and for one container, the lid repainted just to stabilize it.
About the M140 Ammunition Container:
The M140 container was a heavy stamped steel container designed to transport M43 series light high explosive rounds. The cans weigh 16lbs empty – and has a removable lid with attached handle. The handle has a screw base that screws into a stud inside the can to secure the lid to the can. Inside the can there is a stamped steel support assembly to hold and separate the 4 M43 series rounds. The rounds were packed complete, ready to fire in the can – with a horsehair pad on the lid to protect the primers.
There was a variant of the can, the M140a1, which omitted the stamped steel support assembly, and allowed 4 M36 series fiber containers, containing M43 series light HE rounds to be packed in the can.
These cans were designed to replace the wooden crates, containing 4 M36 series fiber containers. The M140 containers seem to show up in photographs pre-bulge. There is no clear standard of packaging from that point on, as m43 series rounds appear to be packaged in M140 series containers, wooden crates, or in bundles.
The Restoration:
Restoration of both cans wasn’t on my priority list, due to the large number of paint stampings on the can. There is a significant amount of nomenclature stamped on the can, none of it stencils – all stampings. Some unique fonts were used and it looked like it would be expensive, or tough to replicate.
After one season of displaying the cans with the freshly restored mortar, a dozen freshly restored 81mm rounds and other brand new looking items, these cans looked really out of place. Rick bugged me enough until I broke down and let the worse of the 2 cans get bead blasted to be repainted. I was willing to let him do this – after hand cutting a stamp for bazooka rounds, I figured it wouldn’t be too hard to cut all the necessary stamps out for these cans.
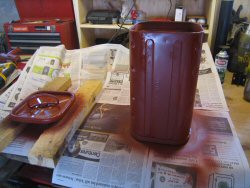
Drew was nice enough to bead blast the first can for me. After bead blasting, we went ahead and gave the can a primer coat of Walmart brand Red Oxide Primer.This was the first time I had used the Walmart Red Oxide Primer. There’s a lot of Red Oxide Primers out there, many of them turning out to be a baby shit rust brown color, rather than RED. At 96 cents a can, I figured I’d give the Walmart Primer a whirl.
The OD coat is the same paint that we used on the mortar itself, it’s a nice darker green color that you see on many ordnance items. Rick had it custom matched at Sherwin Williams – its Enamel btw.BAC Colorant 02 32 64 128 G2-New Green-43 1-R2 Marooon- 11 - - Y3-Deep Gold - 9 - -
The paint is Oil Based Corov Modula Interior Exterior All Surface Low Sheen Satin, from Sherwin Williams
It was order number 1238-00-43744
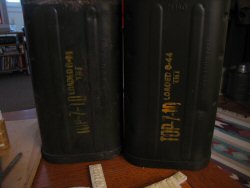
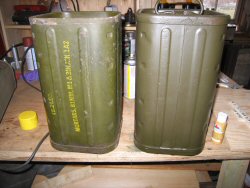
Here are the initial photos, showing the un-restored can, with the freshly stripped and painted can.
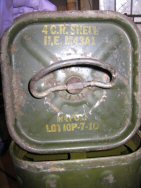
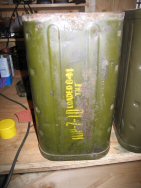
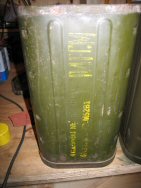
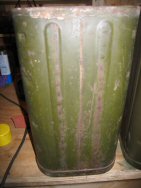
Here are some details of the original and all the markings
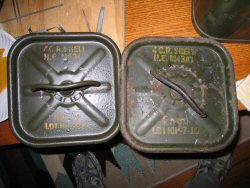
Lid detail: (Note the pitting, and yes – this was the nicer of the 2 cans)
Lot code and date
Contents nomenclature and Identification Code R4FCM
Only one side doesn’t have any markings… lucky me.
If you’ve read my how to on cutting your own stamps as described in my bazooka rocket re-stamping article – this is just the next evolution in that same process.
On to cutting the stamp. Once again – I asked Squirrley to come up with a layout for me to cut the stamp from. I gave him the other can, in better shape with more complete markings to create the layout from.
Here’s what I did:
Time required: ~3 hours
Tools Needed:
X-acto knife, preferably with several new blades, some carving blades would be useful, but not 100% necessary
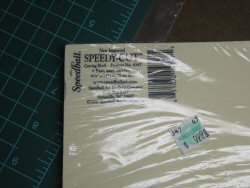
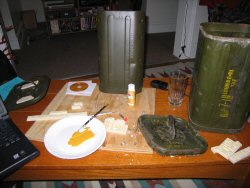
6 x 11 or larger Rubber Block – This time I used the “Speedball Easy Carve” rubber block. Its slightly different than the Staedleter block I used last time. This one has a slightly different consistency. I bought it at HobbyLobby for $10
Lettering template
Rubber Cement
Yellow Paint – I used a small $0.99 bottle of acrylic craft paint, don’t really need much
Styrofoam or paper plate
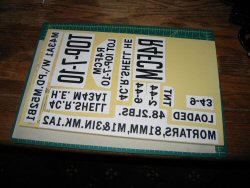
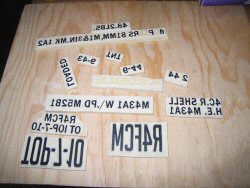
I was able to put the ridiculous amount of text onto the single piece with room to spare – which made me happy. I printed the PDF out on a laser printer, cut it into blocks of text, and glued it onto the “speedy cut” with rubber cement.
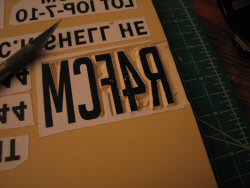
So began the process of cutting out all the stamps individually. I used an x-acto knife with brand new blades. It took me 3 or 4 blades to cut out all the lettering – replacing the blades as they became dull. A sharp blade makes a major difference in cutting through the paper and getting clean edges. As you might recall from the last time I did this – I carved out all the letters such that the letters have a bevel to them.
What works for me – is to cut the larger piece into blocks of text that I can manipulate and carve.
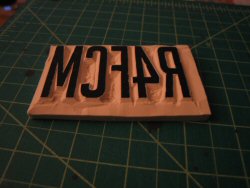
Once I had all of the text blocked up, carved, I peeled off all of the letters and cleaned up all the edges of the lines to make sure that they were straight and any relief cuts as large as needed.
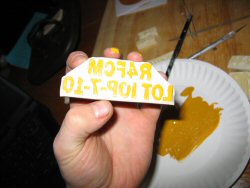
Once everything was cleaned up, I started the stamping process. I used cheap 99 cent acrylic paint for my “ink” for the stamps. It was some golden yellow color; I think named “plaid”.
I put some of the ink onto a paper plate and spread the paint out into a thin even layer big enough for the desired stamp.
I inked the stamp in the thin paint, checking to see if there was paint on all the letters, and then tried to match the position best I could on the original can.
Make sure to apply enough pressure to make a full impression of the stamp. I usually position and lay down the stamp, then rub over the back of my stamp with my finger, like you would do to remove rubber cement. Lift the stamp straight up and off the work surface to avoid distortion or smearing.
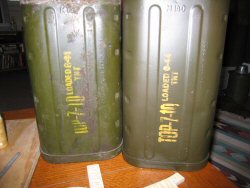
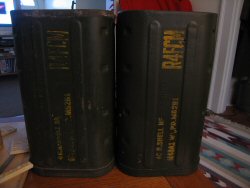
Original on the left, re-stamp restoration on the right.
Lids
For about $15 and a bunch of winter evenings – I’m very pleased with the results. They’re an accurate reproduction of the style of the stamps – and I believe that it could fool most anybody if they didn’t know better.
It took a bunch of time, and I was somewhat apprehensive to do it, but in the end I’m very happy with the results. I was able to bring a very rough condition can back to new or re-pack condition. If I had to do it again, I’d probably spend some time before primer and paint to Bondo all of the pitting and some of the dents in the can to bring it back to “as new” condition.
Since I have all the stamps cut – should I ever need to re-paint and stamp the can, it should be a very quick and easy process.
This process isn’t for everybody; it takes time, patience and some good knife skills.
90th IDPG Projects


 Container Stamp low.jpg)
