M1 Helmet Restoration
by Bryn Spawton
Originally published at: http://www.wwiireenacting.co.uk/archive.htm
Note:
Mr Spawton is an experienced multi impression reenactor from the United Kingdom. As such, his guide is geared towards the UK reenactor and materials available locally. The 90th IDPG recommends RAPCO 33070 Early WWII Lustreless Olive Drab or Krylon K05299000 Camouflage Olive Drab. Additionally, 90th IDPG members have had success media blasting helmet shells or using a knotted cup brush on an angle grinder to remove old paint and texture.
The Guide:
As promised, the step-by-step illustrated guide to refinishing your WWII M1 helmet. This is not a "do it in a day" process. Although the amount of work involved probably totals no more than three hours, it is best done over about a week. Patience has its rewards.
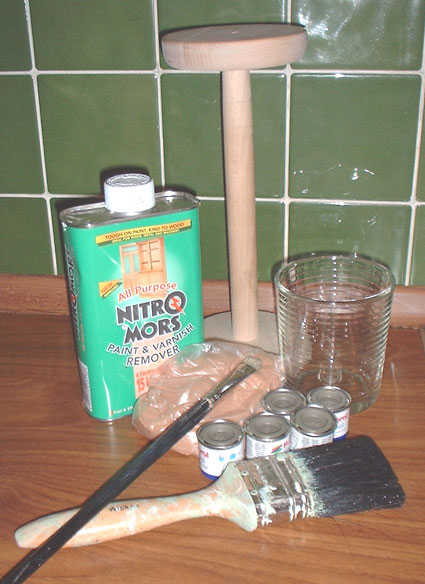
Materials needed:
Nitro Mors (or similar) paint remover and suitable large brush. Approximately 4 or 5 tins of Humbrol No 155 or equivelant model enamel (not acrylic). A bag of Javis or Stockport Model Railway Scatter No 30 "SAND" Ref:JS30 or similar (actually very, very, finely ground cork). Semi stiff, half inch oil painting brush. Something to stand the helmet on. Small glass container.First step is to completely strip the helmet shell of paint, wire wool it, and bang any major dents out.
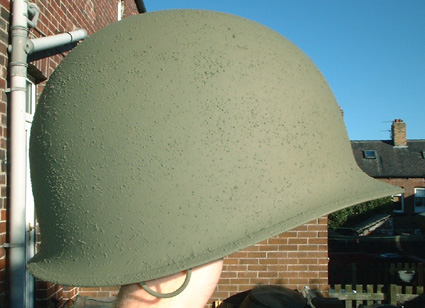
Next, the whole helmet is given a flat coat of the Humbrol 155. Make sure the paint is well stirred, poor it into a glass or ceramic jar. The paint dries much flatter if you thin it slightly with spirit. I did the inside first, then, when that was touch dry (about three hours), painted the outside. Start from the crown. working downwards in a spiral motion to the rim. It's actually better to have slightly too much paint on the brush, rather than not enough. Brush out excess as you go. Once finished, leave to dry for at least 24 hours (if you try to apply new paint before this, the solvents in it will soften the first coat under it, and lead to dragging). The next day, apply a second coat, inside and out, then leave to dry for another 24 hours. Obviously, I hand paint mine, but these stages could be done using a spray gun.
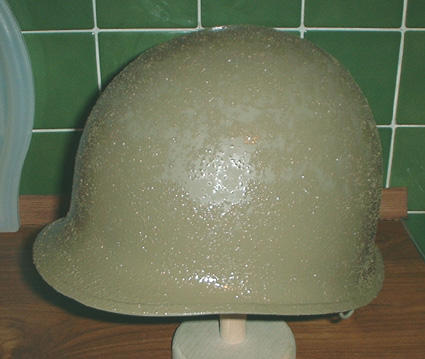
For the cork texture, put a whole tin of the humbrol paint into a clean glass container (with glass you can see it's clean, and you don't want anything but cork in the paint). Add scatter, until you achieve a kind of watery paste. Now stipple on the mixture, again, starting at the crown and working around. This stage, I am afraid, has to be done by hand to get the best results. You can control the amount of cork going on, and adjust accordingly. If the brush starts to become clogged, squeeze the excess cork out of it using an old rag. You may want to practice on another surface first, to get your technique going.
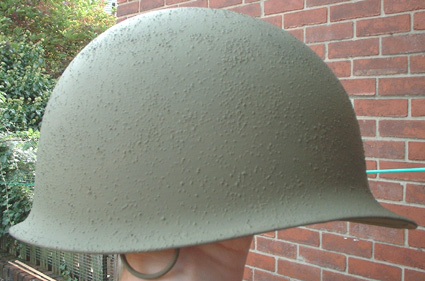
With the whole of the ouside corked, gently run your finger under the rim to remove any cork granules which may have gotten under there. Obviously, don't texture the inside, and don't worry about any loose looking bits on the surface, because the next stage deals with them. Allow another 24 hours to dry, and make sure you clean all the crud out of the brush.
With the corked surface dry, rub over the whole outer surface with your bare hand to remove any loose cork. Any bits which stick out too far can be picked off with the fingernail.
The outside of the helmet now needs between three and four further flat coats to soften the texture somewhat. Don't forget to leave 24 hours between coats again.
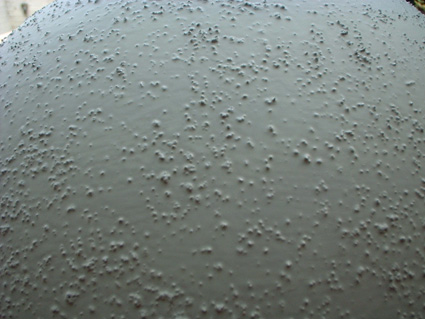
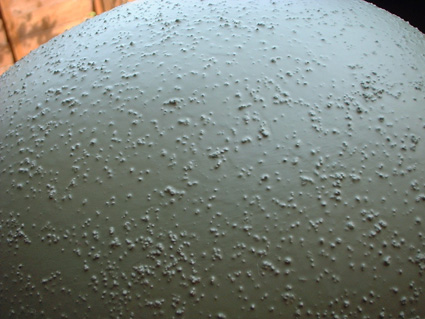
This is what the texture should look like now.
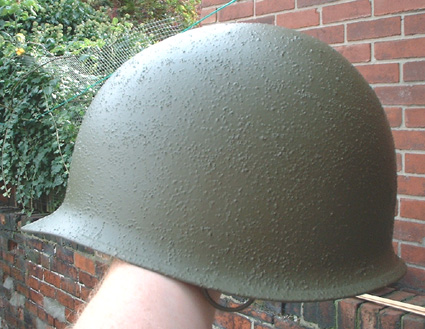
Leave the helmet to thoroughly dry for a couple of days, then spray lightly, inside and out, with WD40. Allow to sit for a few minutes, then rub the excess off with a sponge or soft cloth. Keep rubbing around the shell until you are sure the WD40 has dried off, and you have a uniform appearance all over. This has two effects. It will give the finish the semi-matt appearance which the original paint had when new, and it also darkens the paint nicely.