M43 81mm Mortar Round - Repainting and Stenciling
Date Initially Written: 11/28/2007
Updated: 7/6/2012
Author: Rick Anielski
Foreword(s) and Update: Chris Guska
Update 7/6/2012
Foreword:
It has been over 5 years since we initially hit this project. Over that time, the rounds we had restored were dinged up and chipped through handling at displays. With some of the rounds beginning to look less than factory fresh, we decided it was time to re-do the entire stack of rounds.
What we had initially done 5 years ago was OK for the time - and it was a straight forward, albeit time consuming method that fit within the capabilities we had available to us at the time. Fast forward 5 years, we've made a lot of friends, gained access to a lot of expensive equipment, and generally improved our technique.
Process:
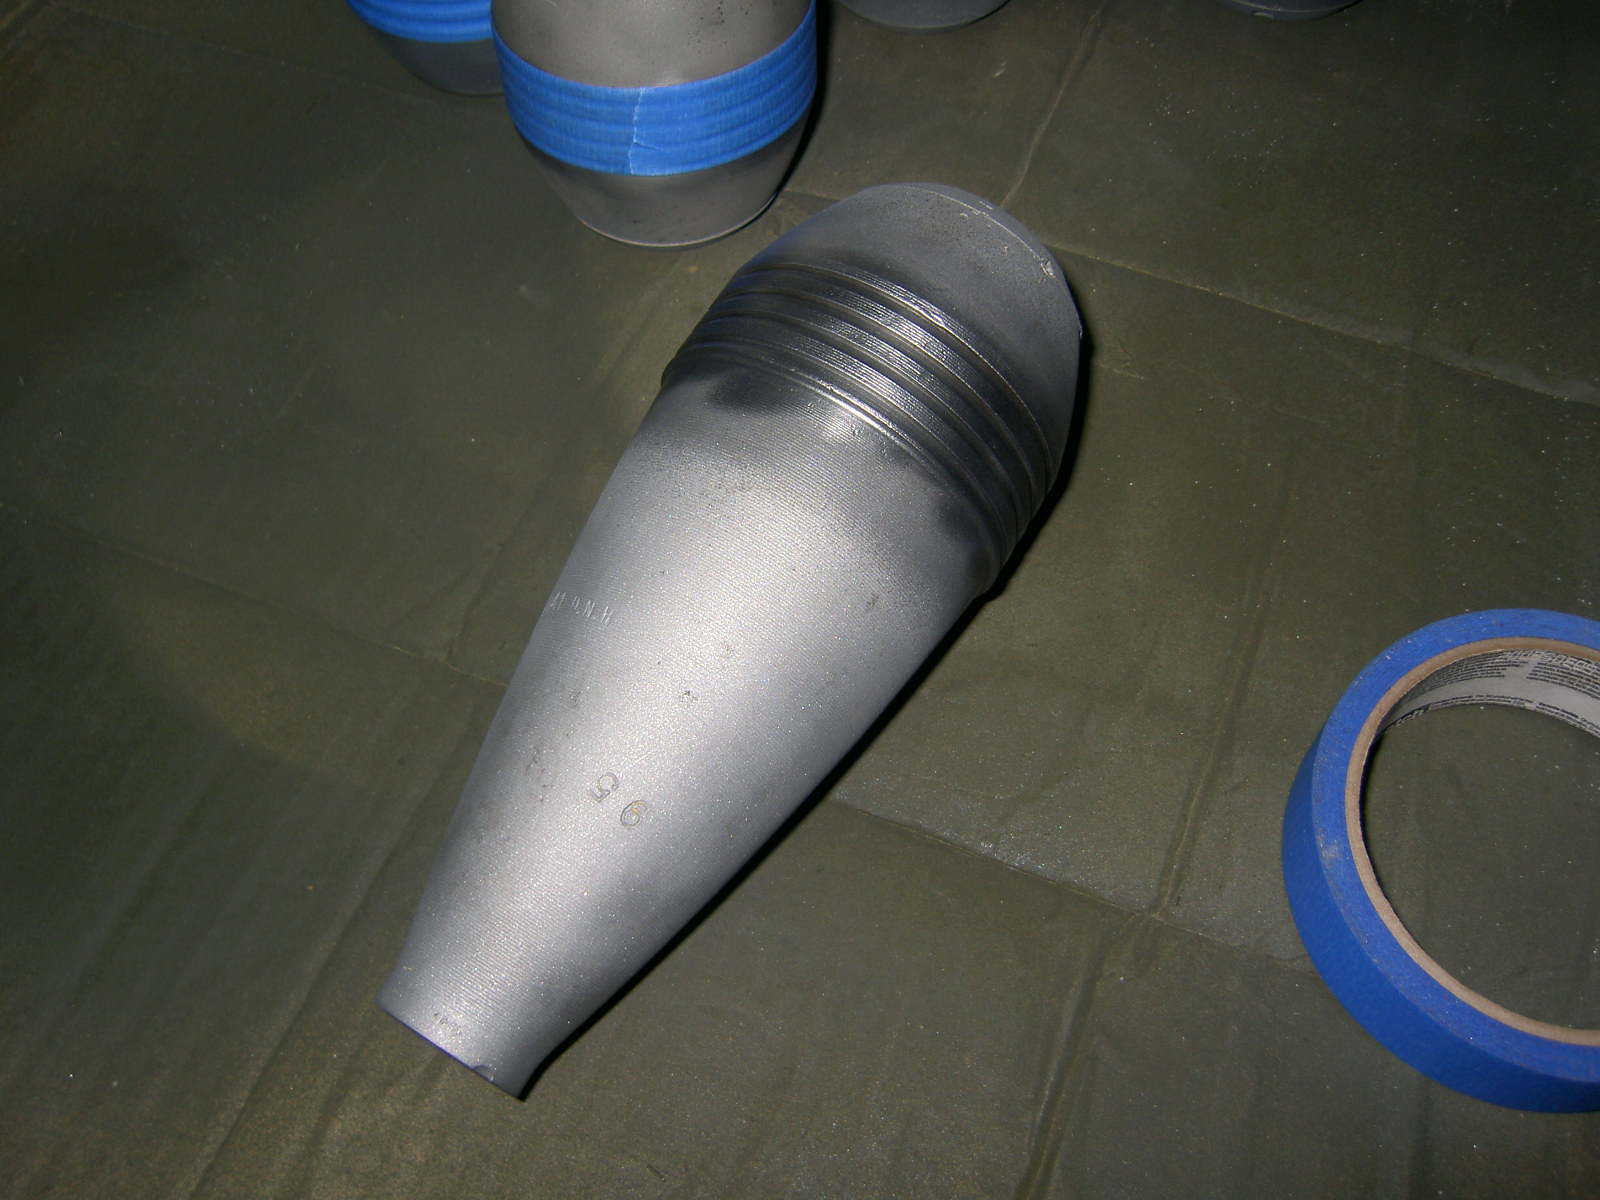
1.) Sandblasted the rounds.
2.) Buffed the borroulets on the grinder with a wire wheel.
3.) Sprayed the borroulets with Rustoleum flat clear coat.
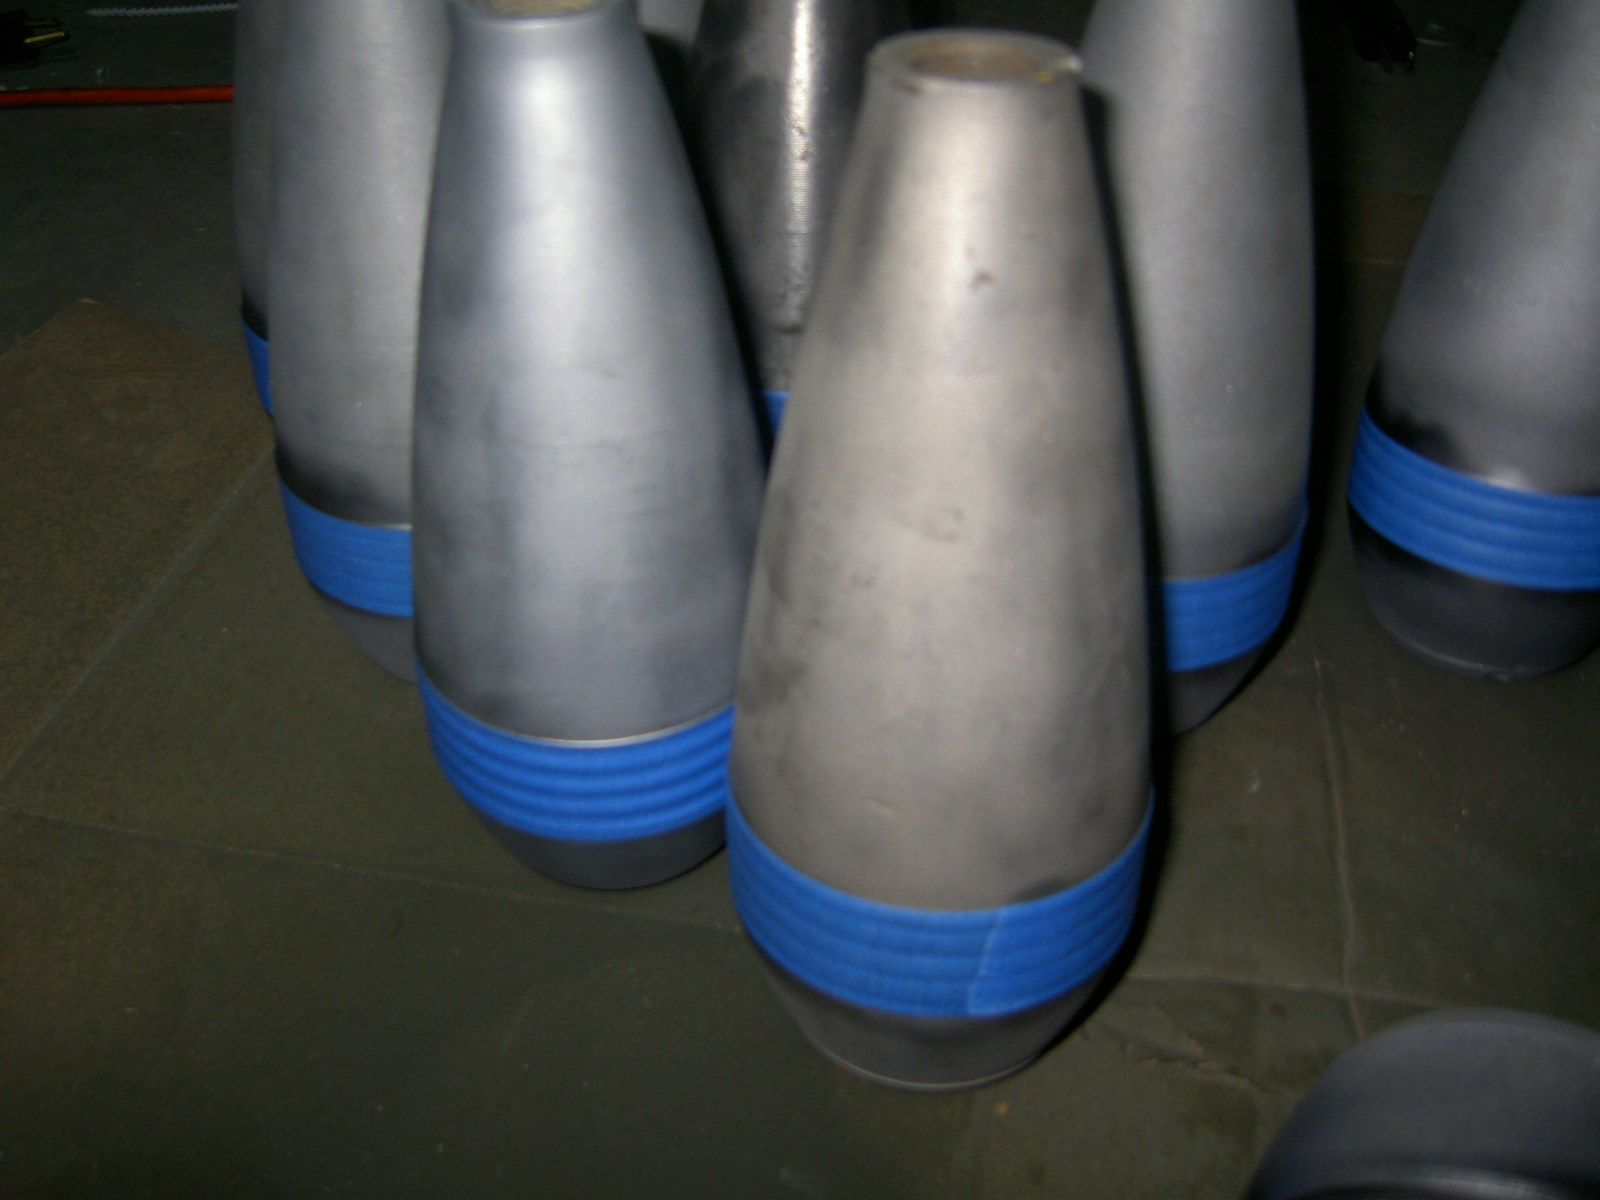
4.) Masked the borroulets
5.) Oversprayed the round OD of your choice.
6.) Paint the fins with Rustoleum Brown.
7.) Removed the masking tape.
7.) Trimmed and applied the plotter cut vinyl stencil, covered with transfer tape.
I created the art work in Adobe Illustrator as vector based text on an arc, then created outlines from the art for transportability. I sent the art off to a buddy who has a vinyl plotter who was nice enough to run them for me. The raw vinyl cuts need to have the letters weeded out, then covered with transfer tape.
I may periodically have stencils available for sale. No, I will not provide the art file as it is my intellectual property and I intend to sell finished stencils at some point in the future.
8.) Burnished then removed the transfer tape.
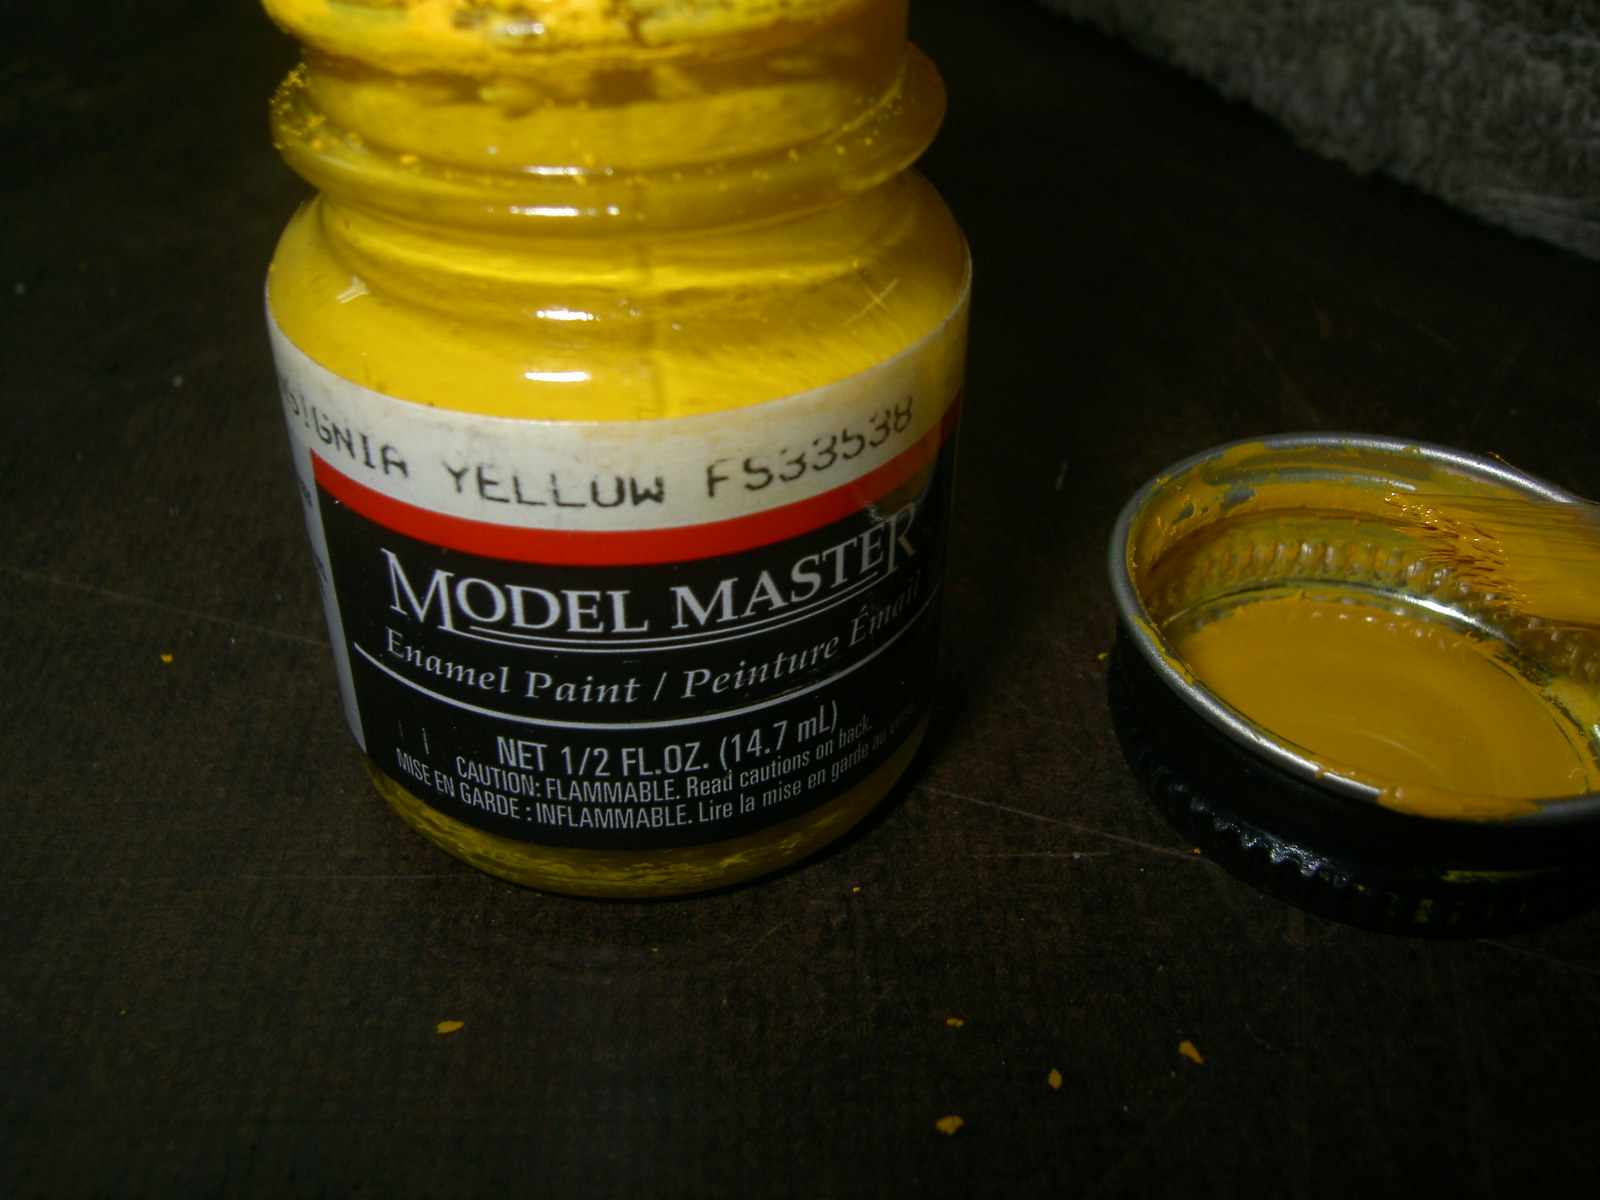
9.) Brush on thin coat of Testors Insignia Yellow. A single coat is fine - that way it looks like a stamp rather than thickly painted.
10.) Remove vinyl cut stencil and enjoy.
Foreword:
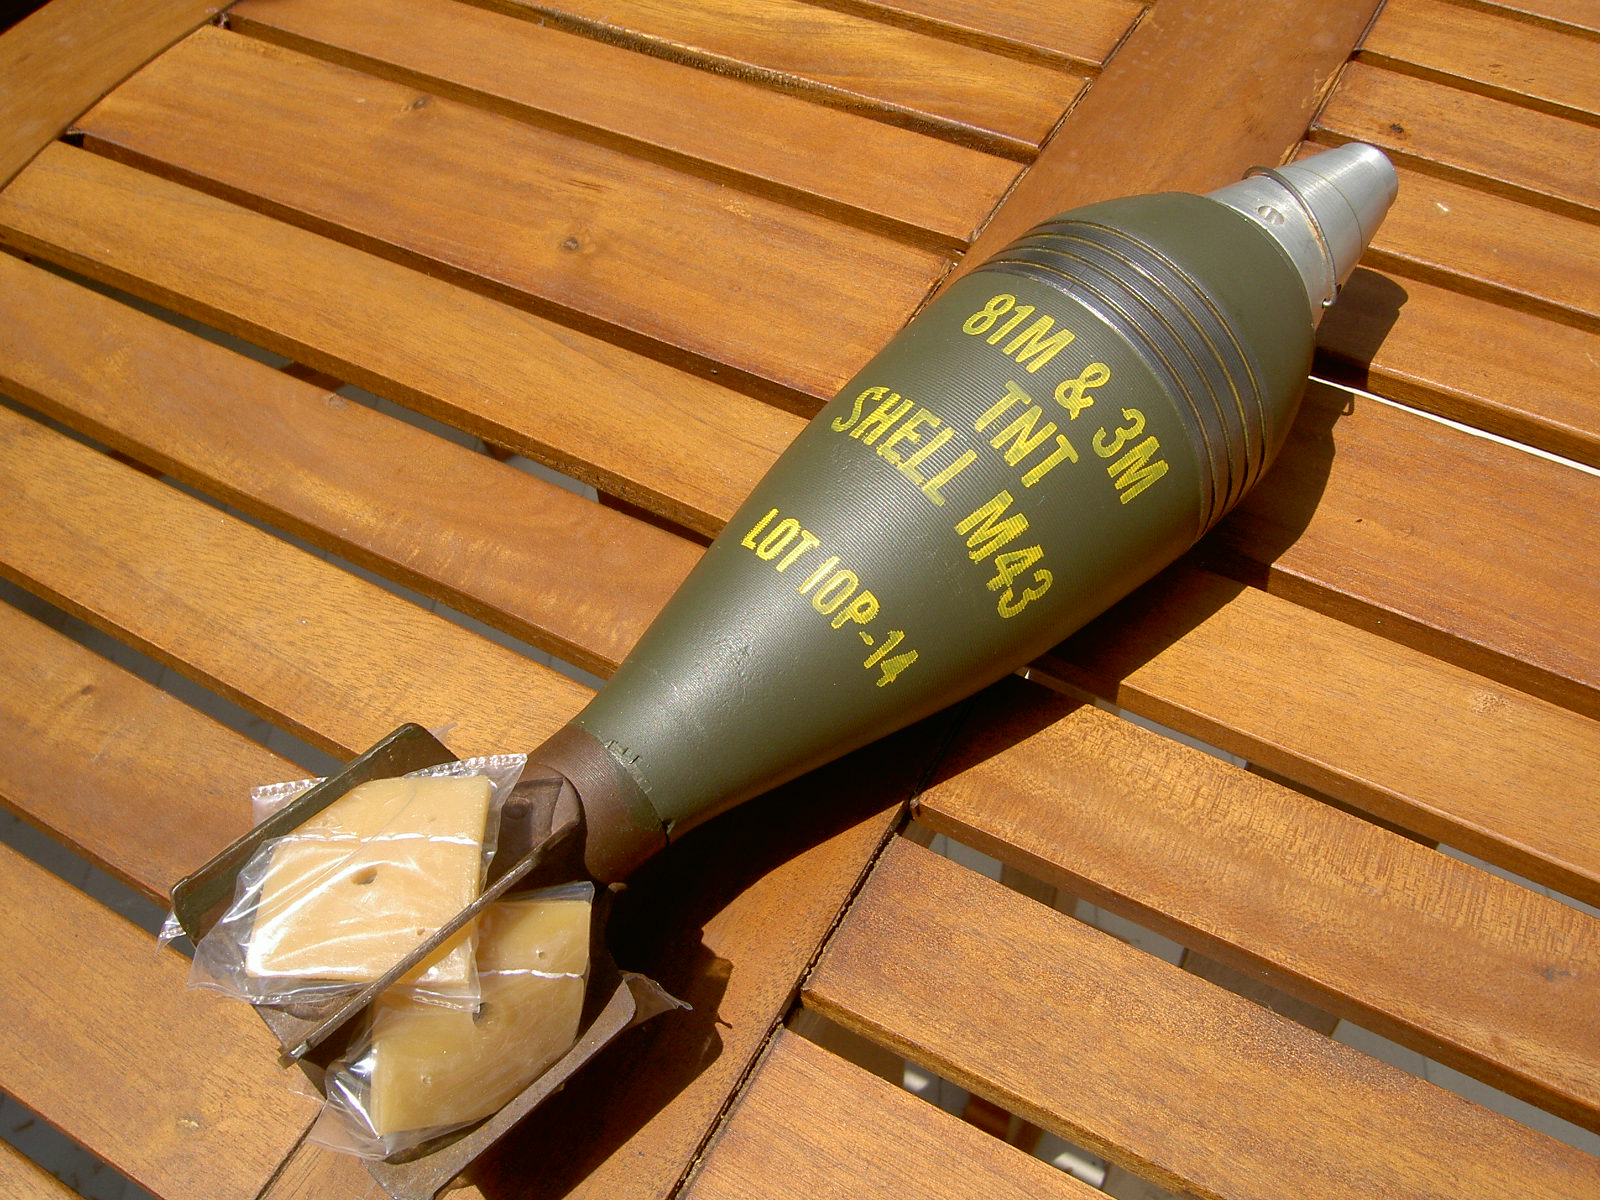
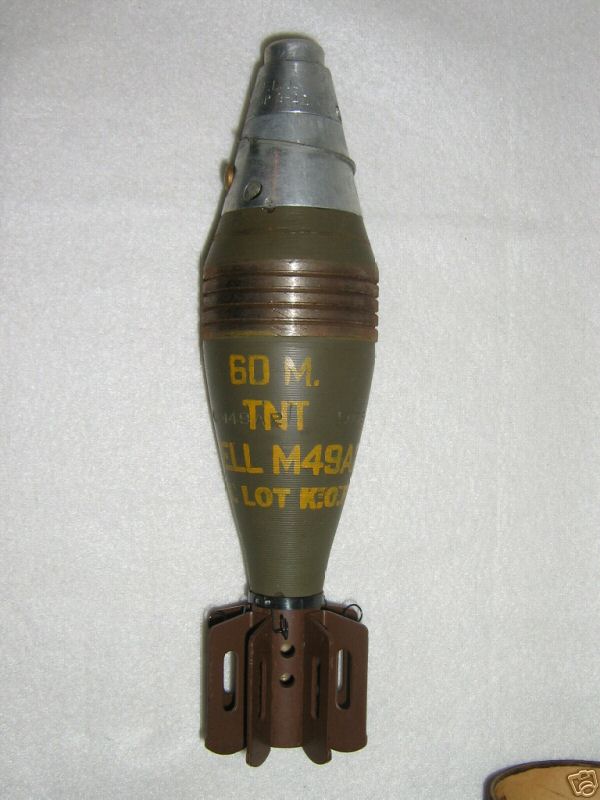
Chances are the mortar rounds that you have purchased for your display are not in their original military paint and stenciling. Even then – if they are – would you really want to take out that $200+ round and stack it up or lay it on the ground for display in your mortar pit? M43, M43a1 and M43a1b1 rounds consistently turn up on ePay – without original paint and fuse(usually repainted for civilian bookends, novelties or lamps) for the$50-80$100-150 range. I generally do not pay more than 50$ for any M43 series round. M43 series rounds, with original paint and original m52 series fuse generally go for between $225-$300 on ePay – when they turn up.
95% of the rounds that I have purchased were re-painted with some god-awful color, turned into a lamp, or stuck somewhere where any and all military paint and markings got eaten away.
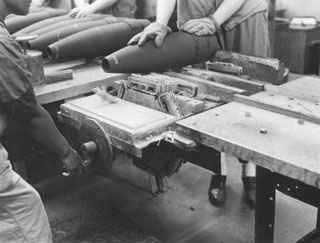
During the war most ordnance was roll-stamped, as illustrated in this wartime photo from Ravenna Arsenal in Ohio – although not 81mm rounds, but rather 155 shells – it shows the process well.
The above photo is a good reference as to what a 60mm or 81mm mortar round would look like – as an original factory finish and lettering.
I turned to a fellow unit member – Rick – our unit paint and plastic model guru for some help. Rick has repainted more than a dozen rounds for me in the past year, and he’s got it down to a real science. With a bit of practice he’s amazingly fast at it. Here’s his process – enjoy!
Supplies:
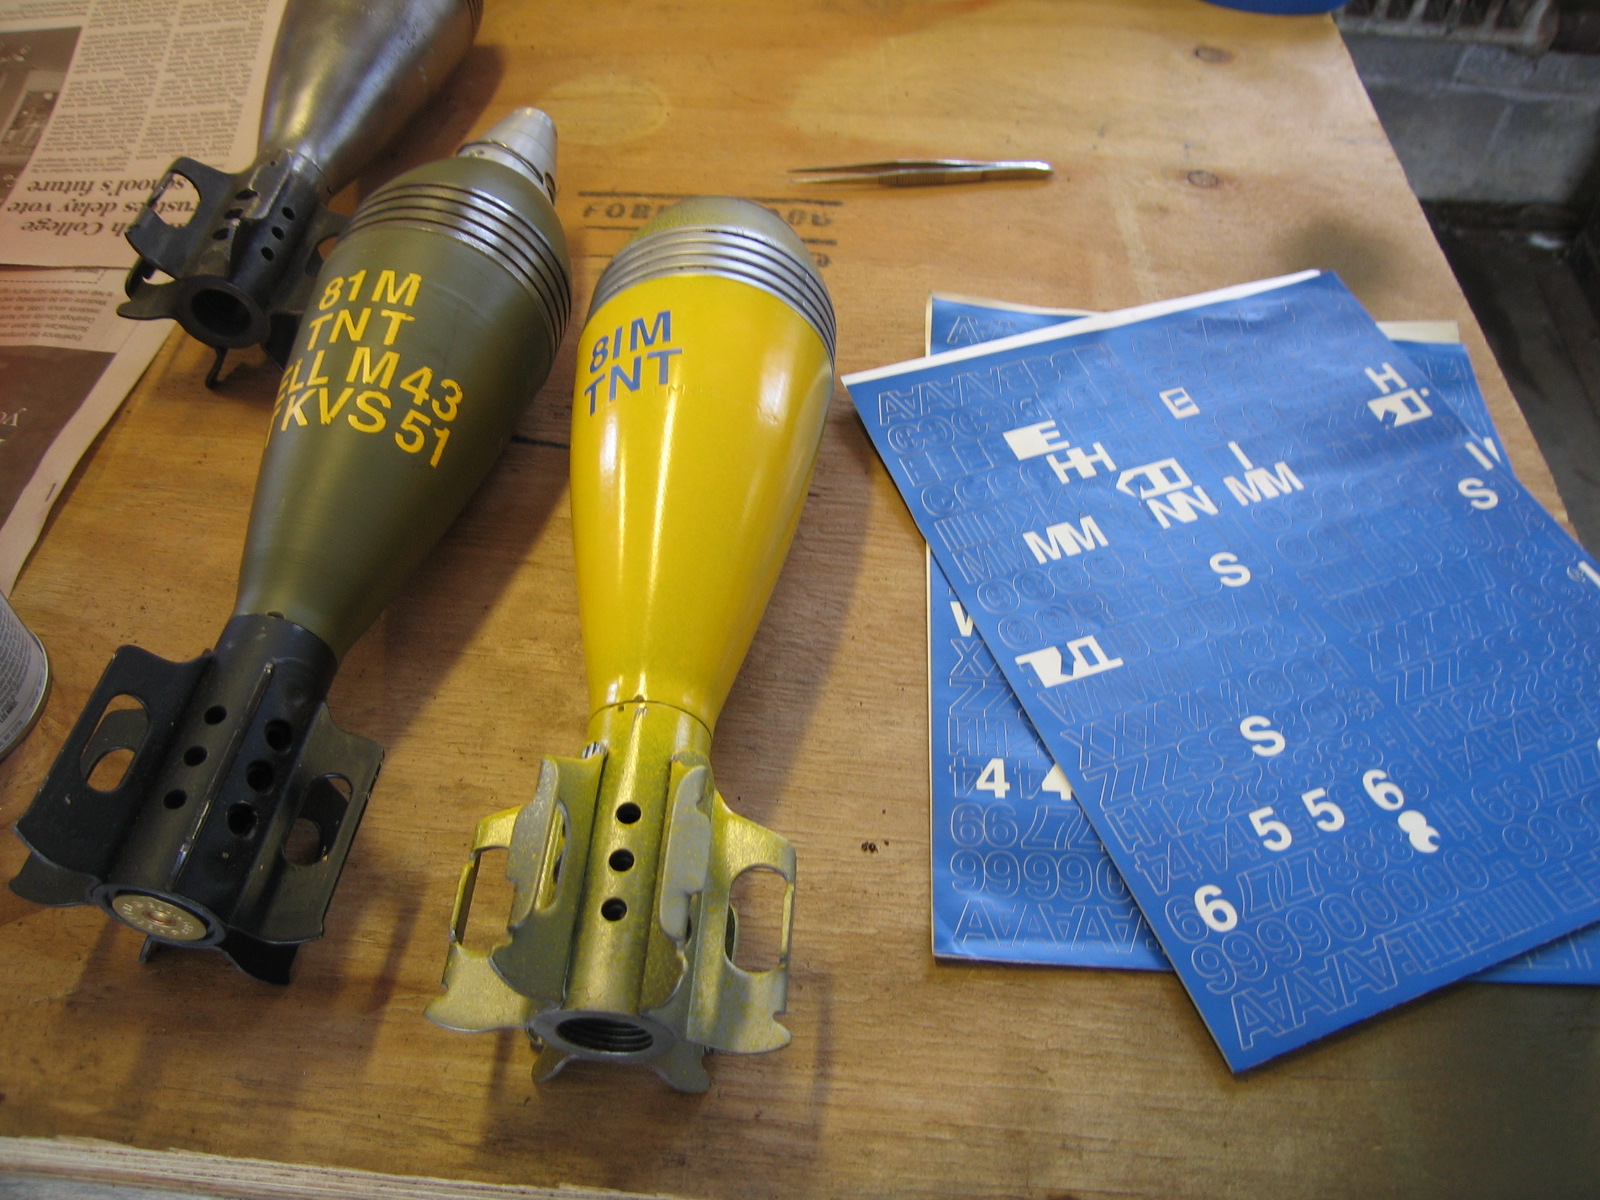
1/2” Cut Vinyl lettering -
Masking tape (buy the good blue stuff)
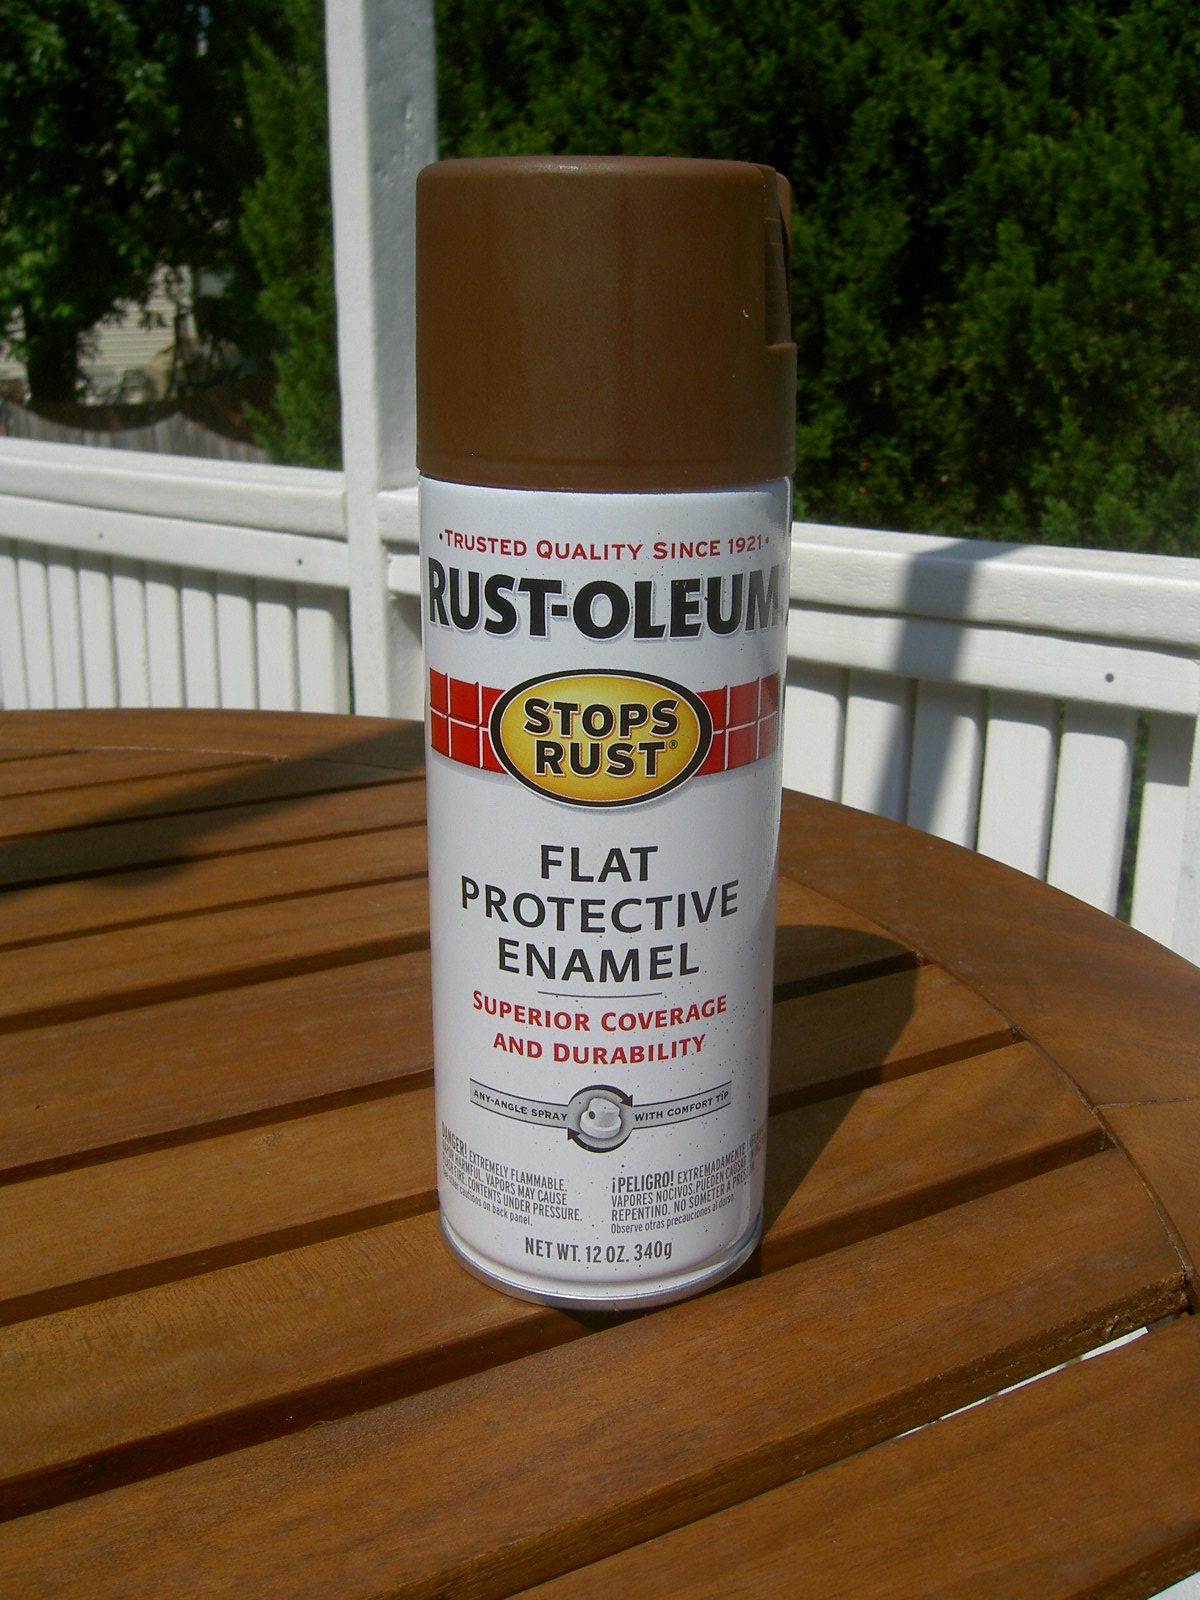
Testors Model Master Olive Drab ENAMEL spray paint
Testors Model Master Gloss Yellow ENAMEL spray paint
Black spray paint (Wallyworld is OK)
Testors Model Master flat lacquer clear coat
Paper towels
Newspaper
Tools needed:
Angle grinder
Wire cup brush
Vise
X-Acto knife
Tweezers (Nice to have)
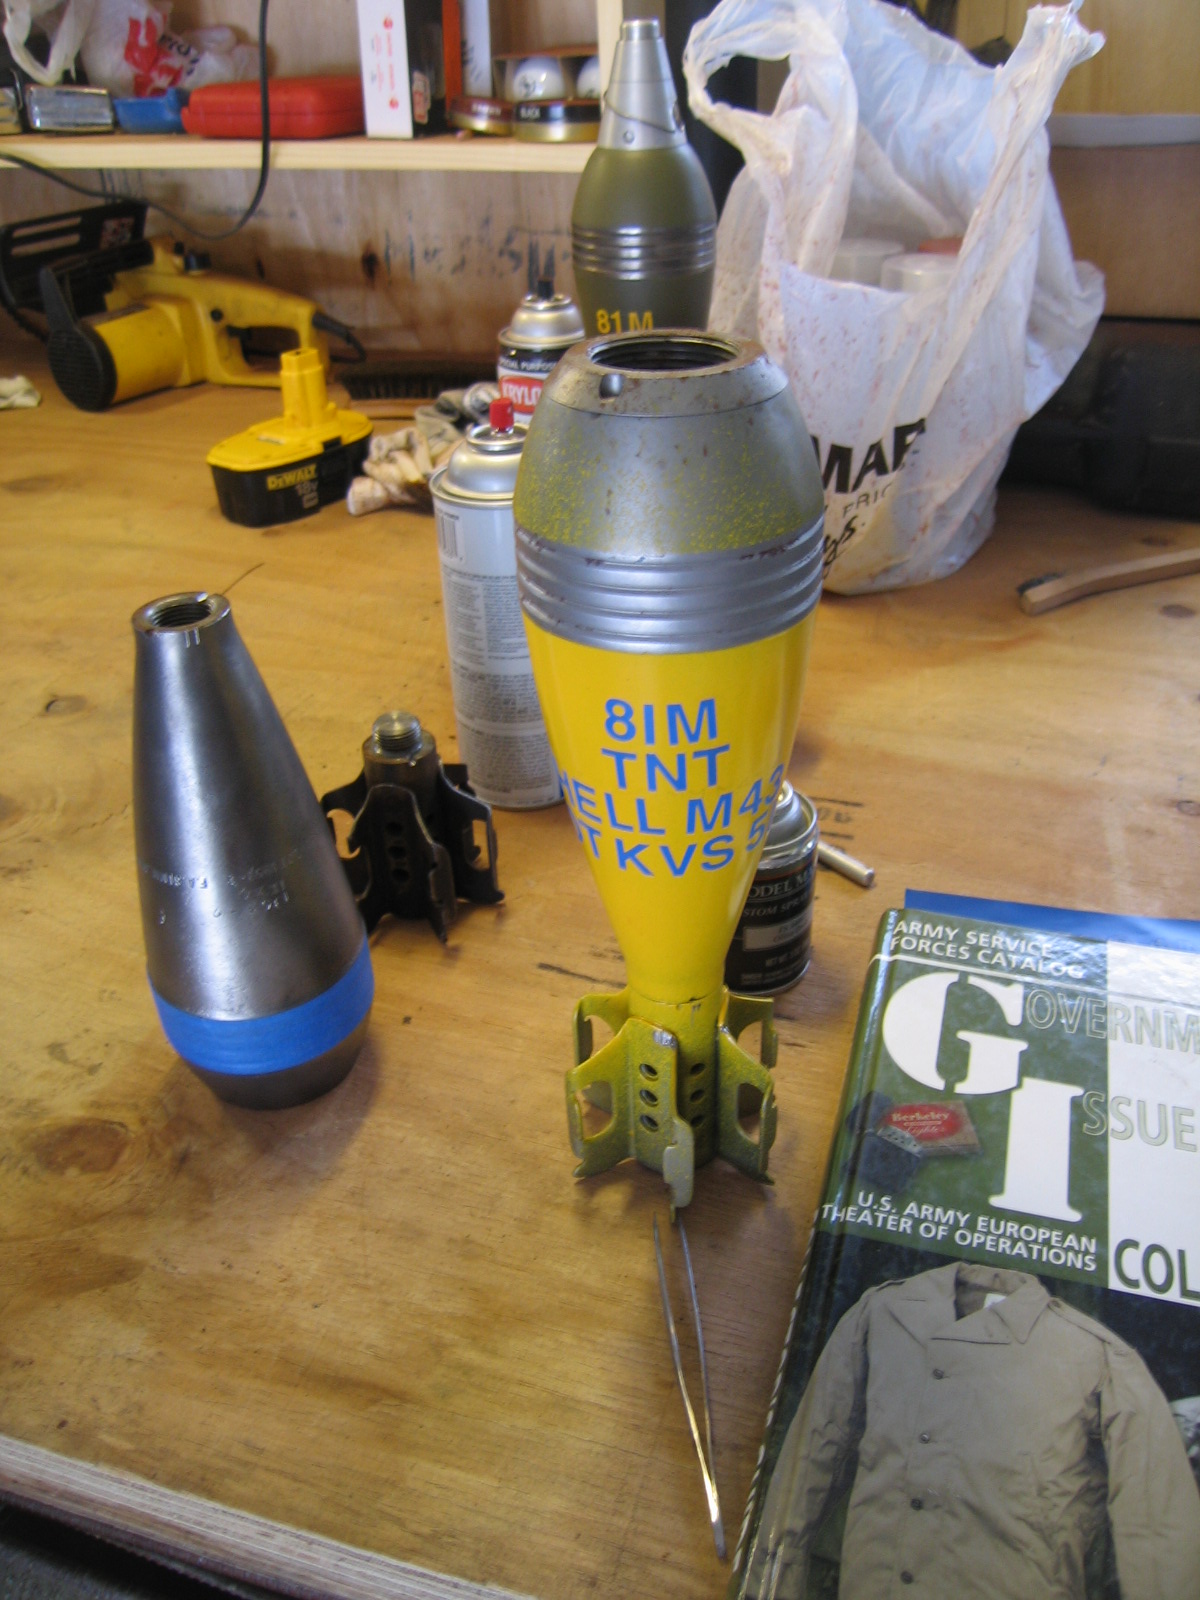
Starting the process – wire wheel the round, cleaning up any paint and rust. Wipe all dust and dirt off the round with a paper towel or rag to get a clean surface for the paint to adhere to. Mask the bourrelet with tape to prevent flash rusting and prevent overspray.
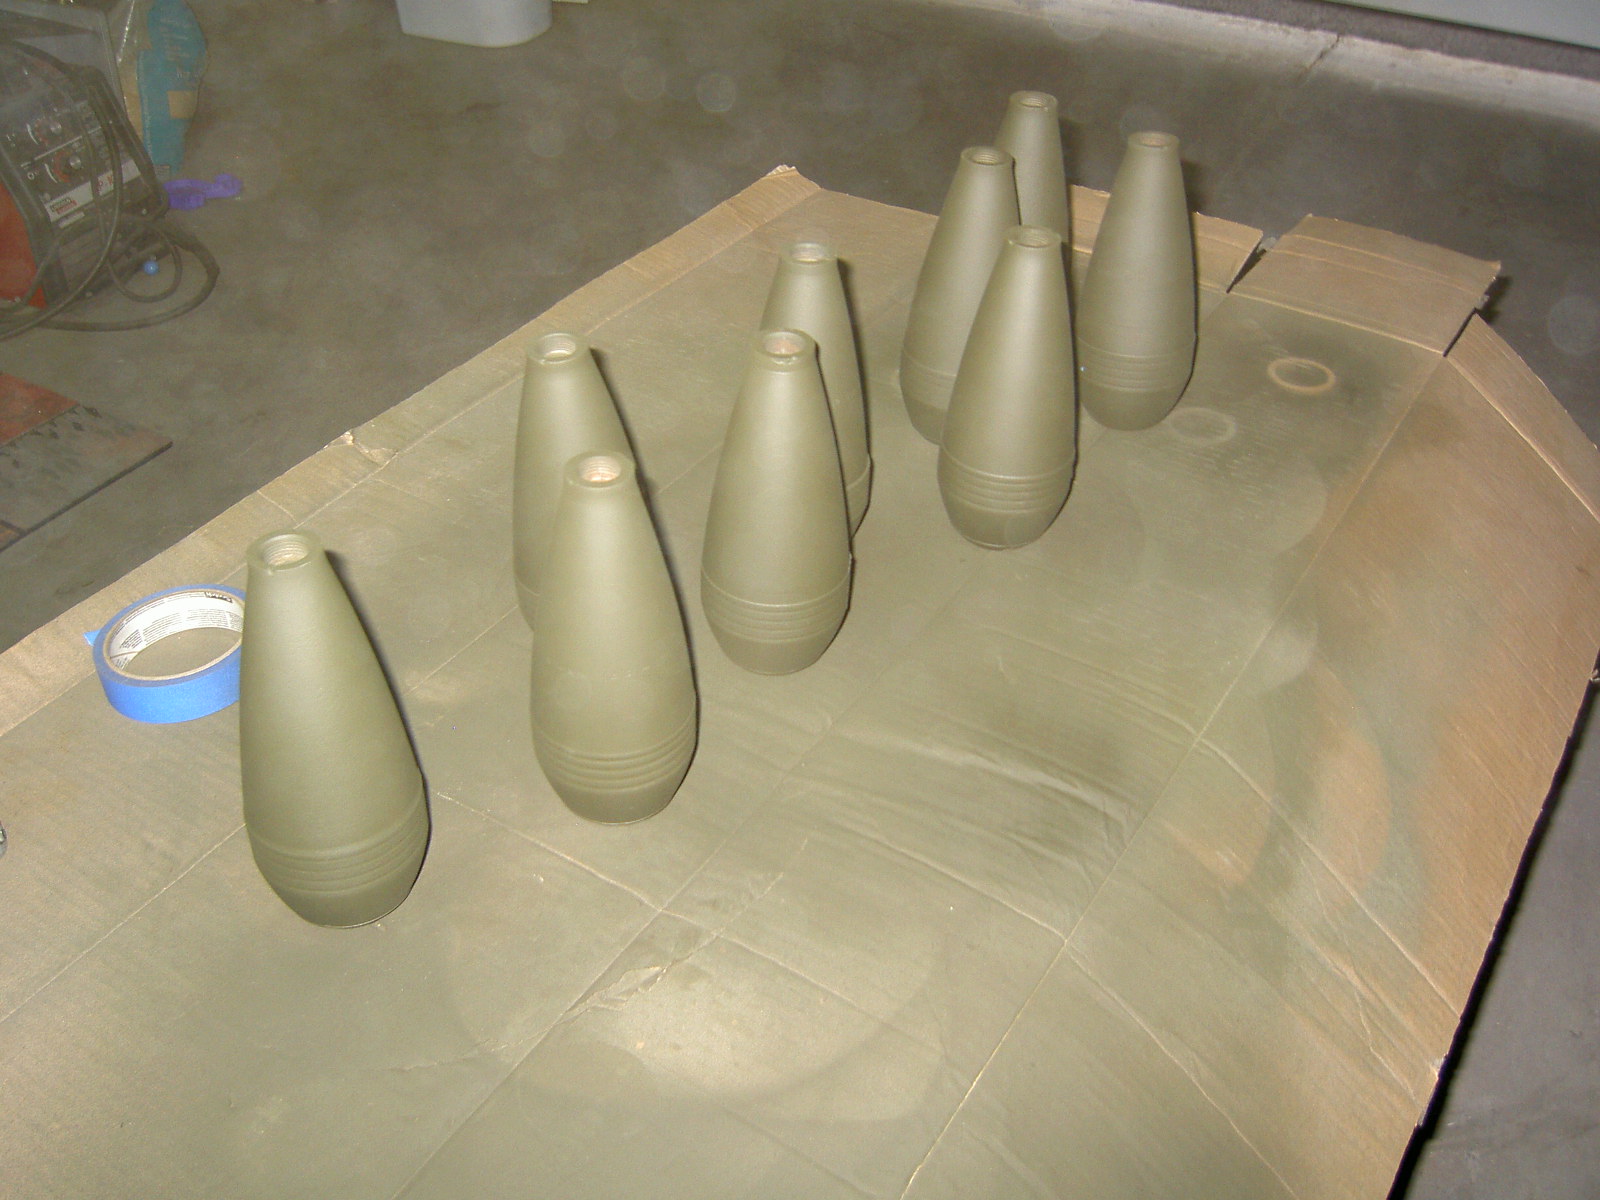
Move to a well ventilated area and spray ¾’s of the round below the bourrelets with a solid base coat of yellow. It will take several thin coats to get a solid finish. Yellow spray paint usually takes more coats to get the desired color density than other paint colors, so keep the coats light.
Make sure to buy ENAMEL paint since it dries harder, is more durable and more weather resistant than other choices.
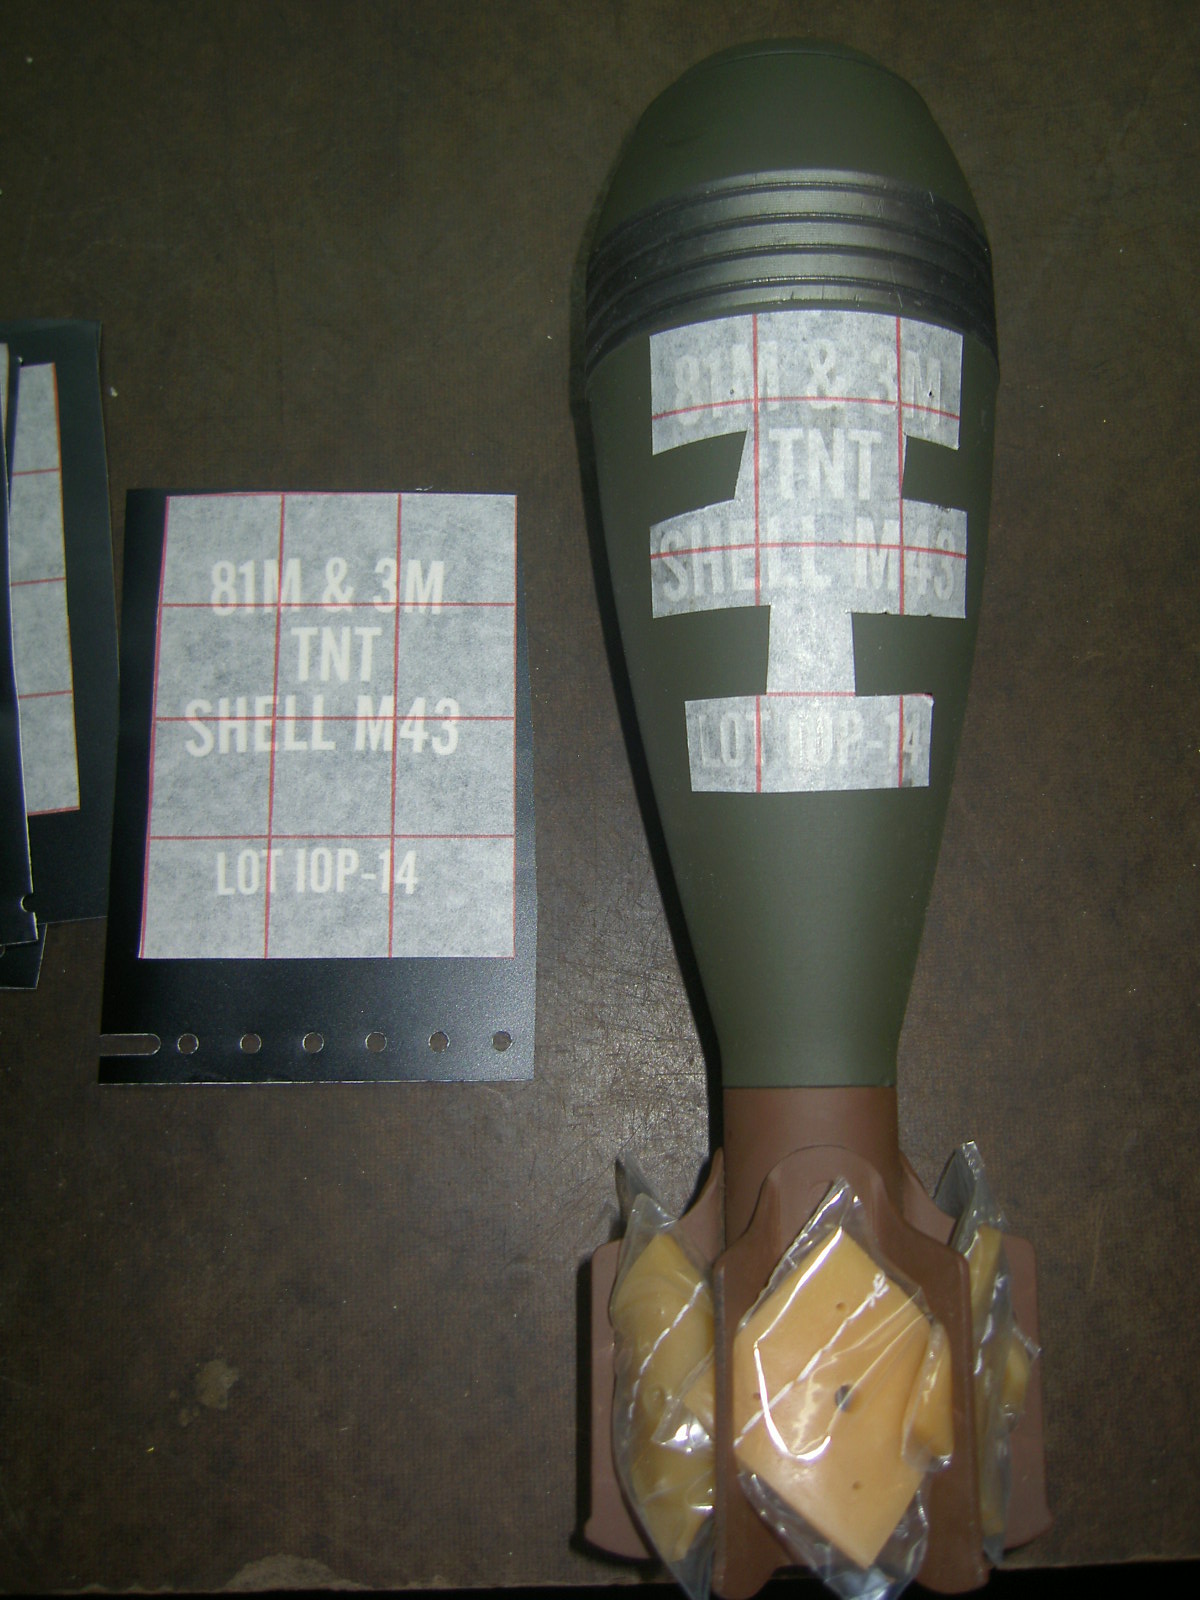
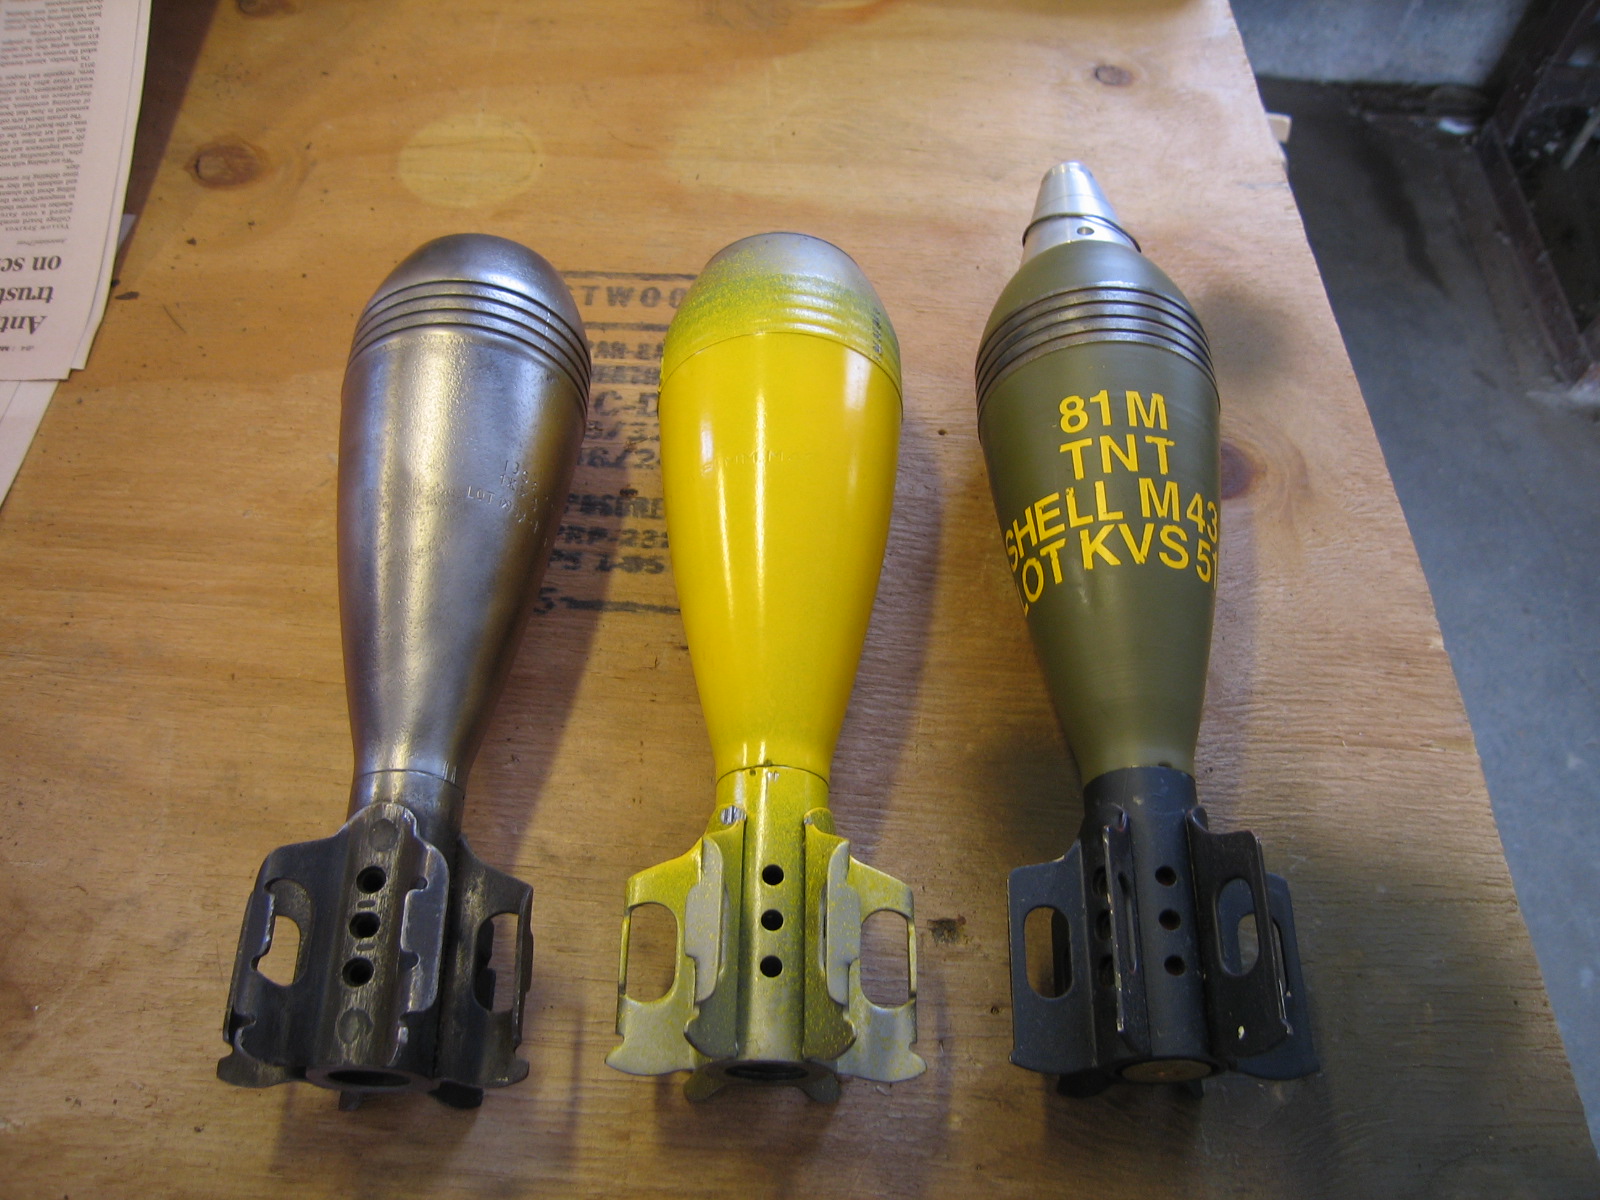
Freshly wire wheeled, base-coated in yellow, finished round.
Next – applying the lettering, working from the top down. 81M is the first line, apply the number 1 first, then the M and then the 8. Work from the center of the word to each side. Use an x-acto knife to remove the letter from the sheet and hold it while you apply and stick down the letter. This will help maintain the letters in their proper shape and help adhesion by not getting hand oils on the adhesive backing.Starting the top of the lettering ¼ inch down from the bottom of the bourrelets, eyeball it the best you can to keep it straight. Pick a reference point on the round, and imagine your centerline from there. The body is tapered – so using tape or other means of a straight-edge may not be helpful. Vinyl letters are cheap. Don’t be afraid to pull it off and start again. The letters L, T, M are the letters you will run out of first so be careful with those to avoid multiple trips to the store.
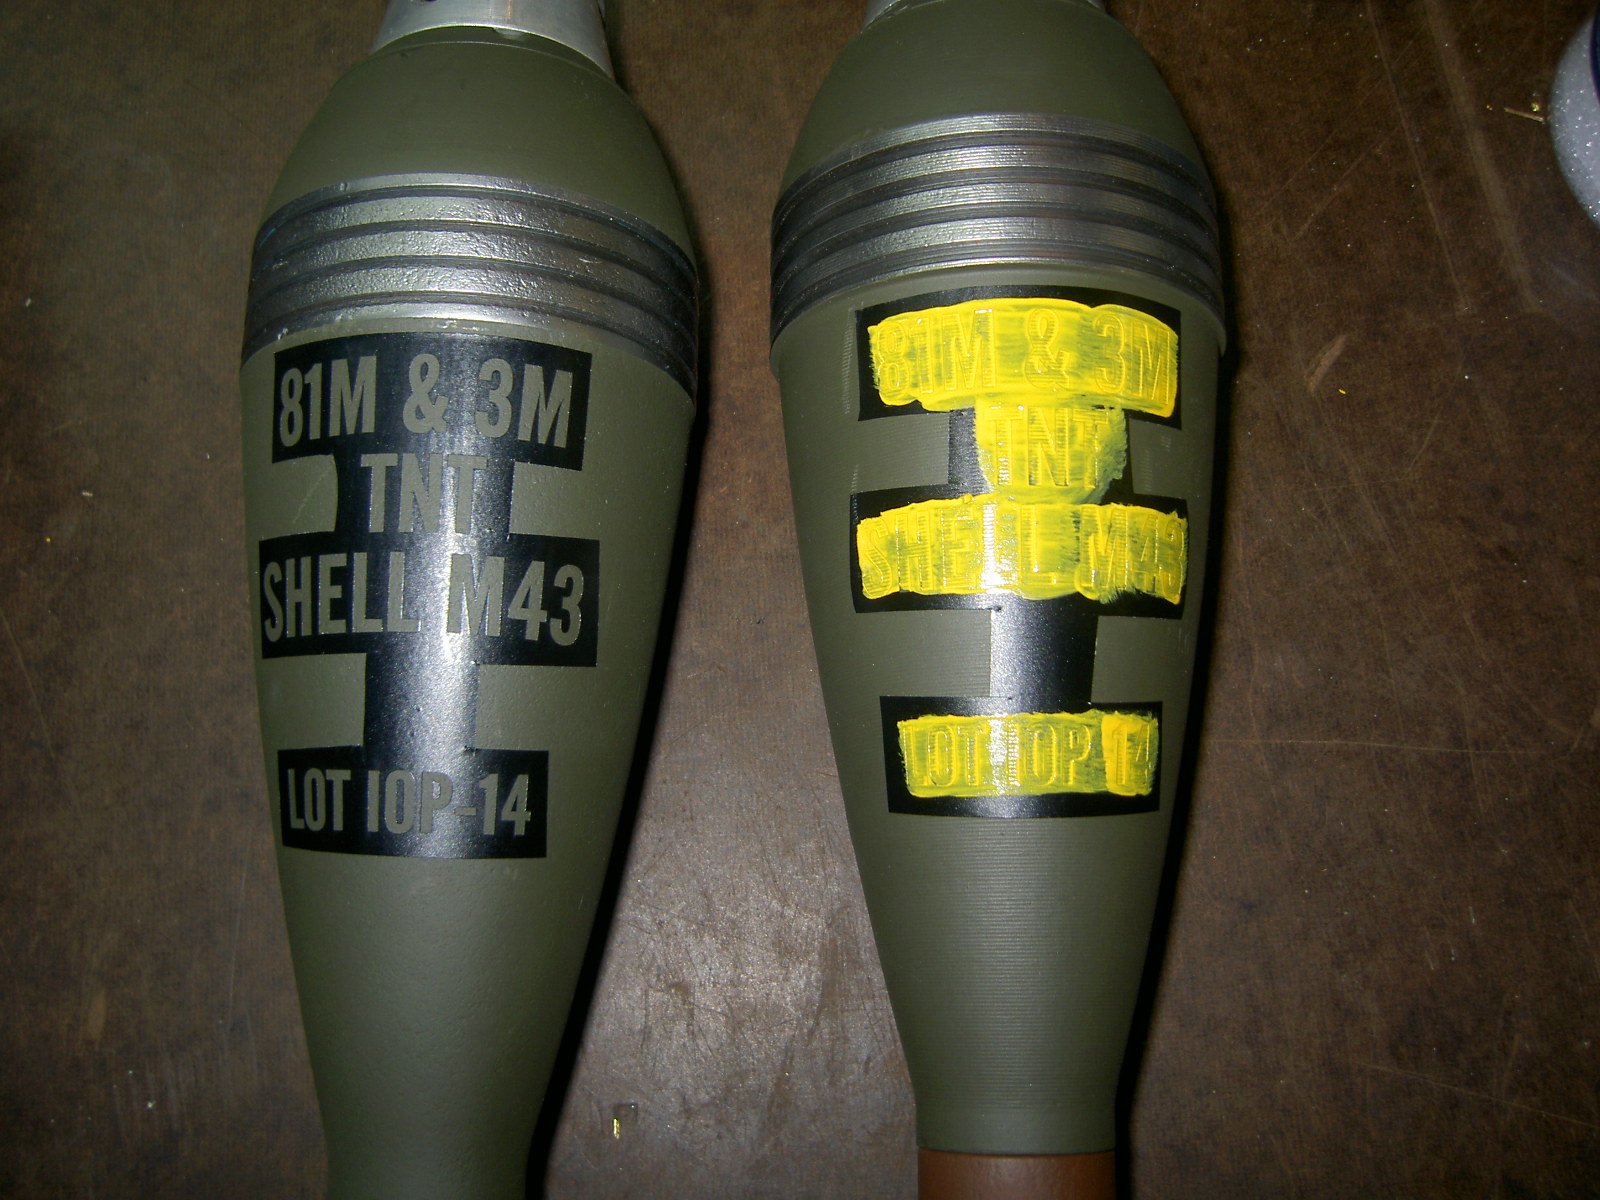
Then with the OD spray paint, hold the can a foot to a foot and a half away, spray the entire body of the round with several light coats. The OD color should take well, unlike the yellow, but there are more reasons to keep the coats light with OD. Light coats work the best to keep the OD from seeping underneath the stencils. Your results may vary due to tool markings from the turning process on the round, as well as any stampings in the round. A little paint getting under the stencil may help give the lettering the “military stamped” look.
Once the OD paint is dried (24 hours) – remove the tail section if possible – if not mask above the seam between the tail section and body, wrapping the body in newspaper to prevent overspray. Then spray the tail section in enamel flat back paint. Once completed, let dry thoroughly, remove all masking tape and lettering by hand or with an x-acto knife. The x-acto knife is useful in removing the lettering. Clear coat the round with Model Masters clear flat lacquer.
Good luck – it may take some time.
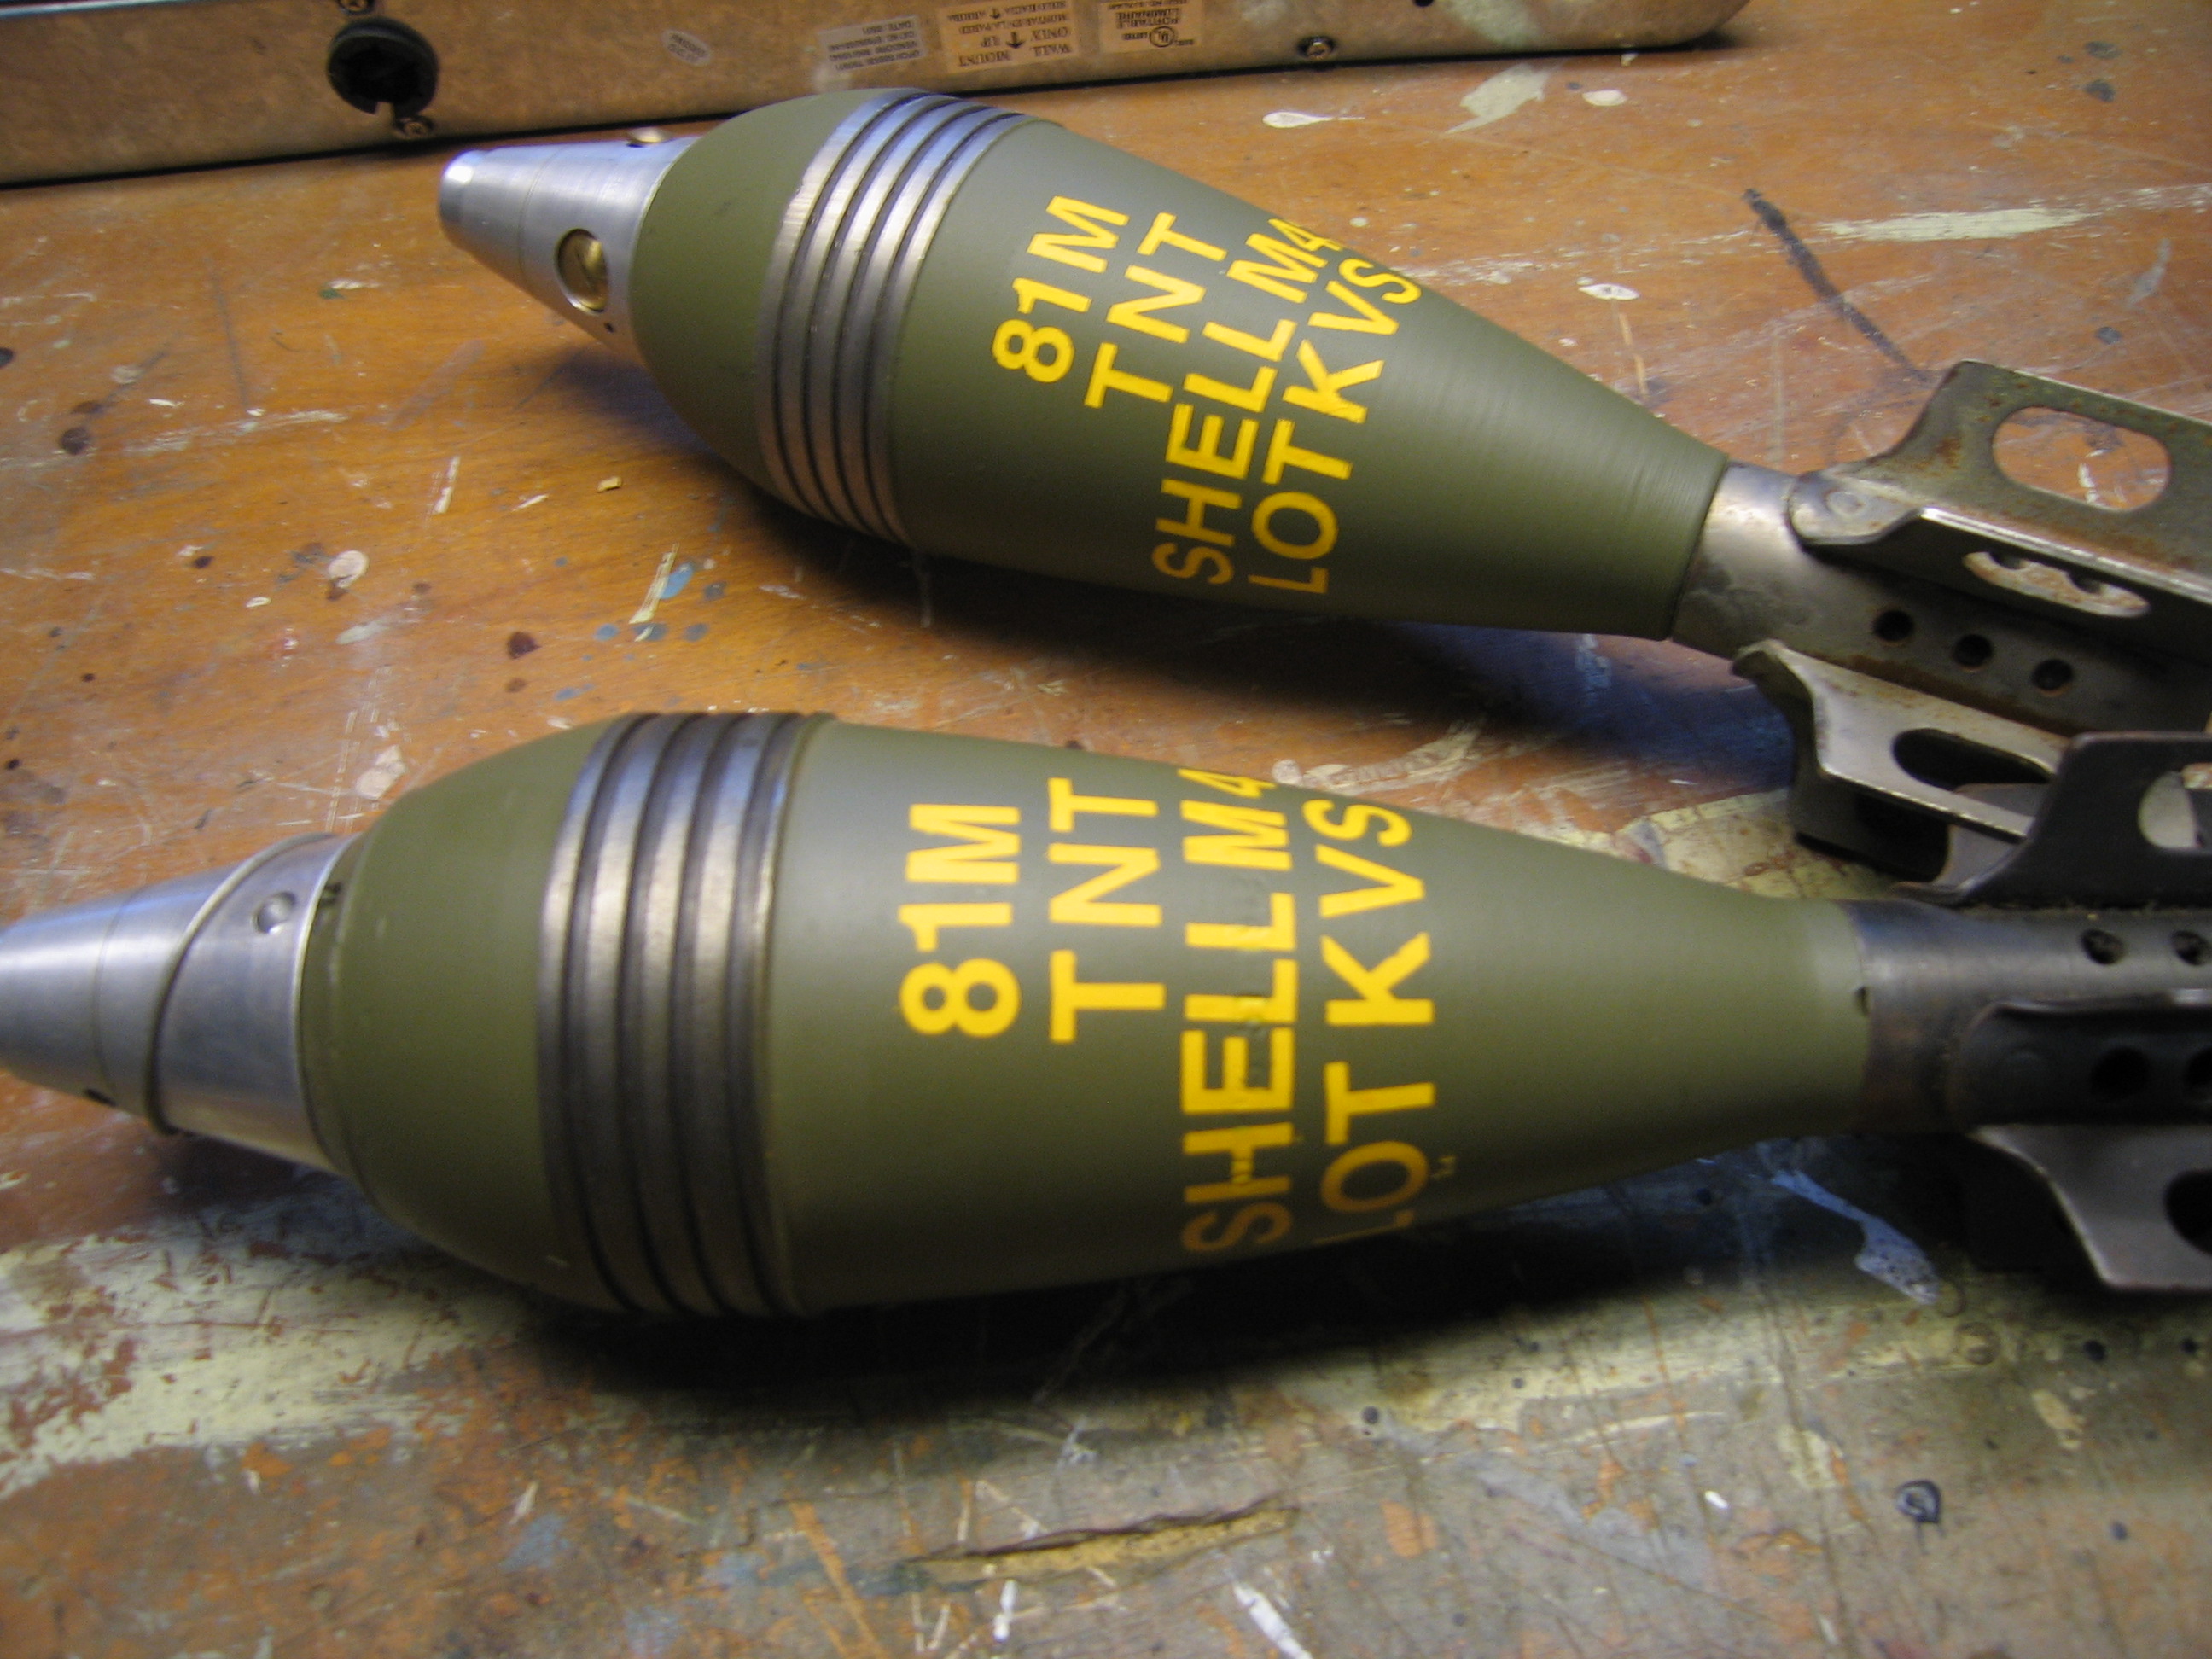
Finished products.