Auto-Ordnance Semi-Auto Thompson M1 Review
Review Date: 11/26/2012
Updated: 7/23/2013
Author: Brandon Szymanski
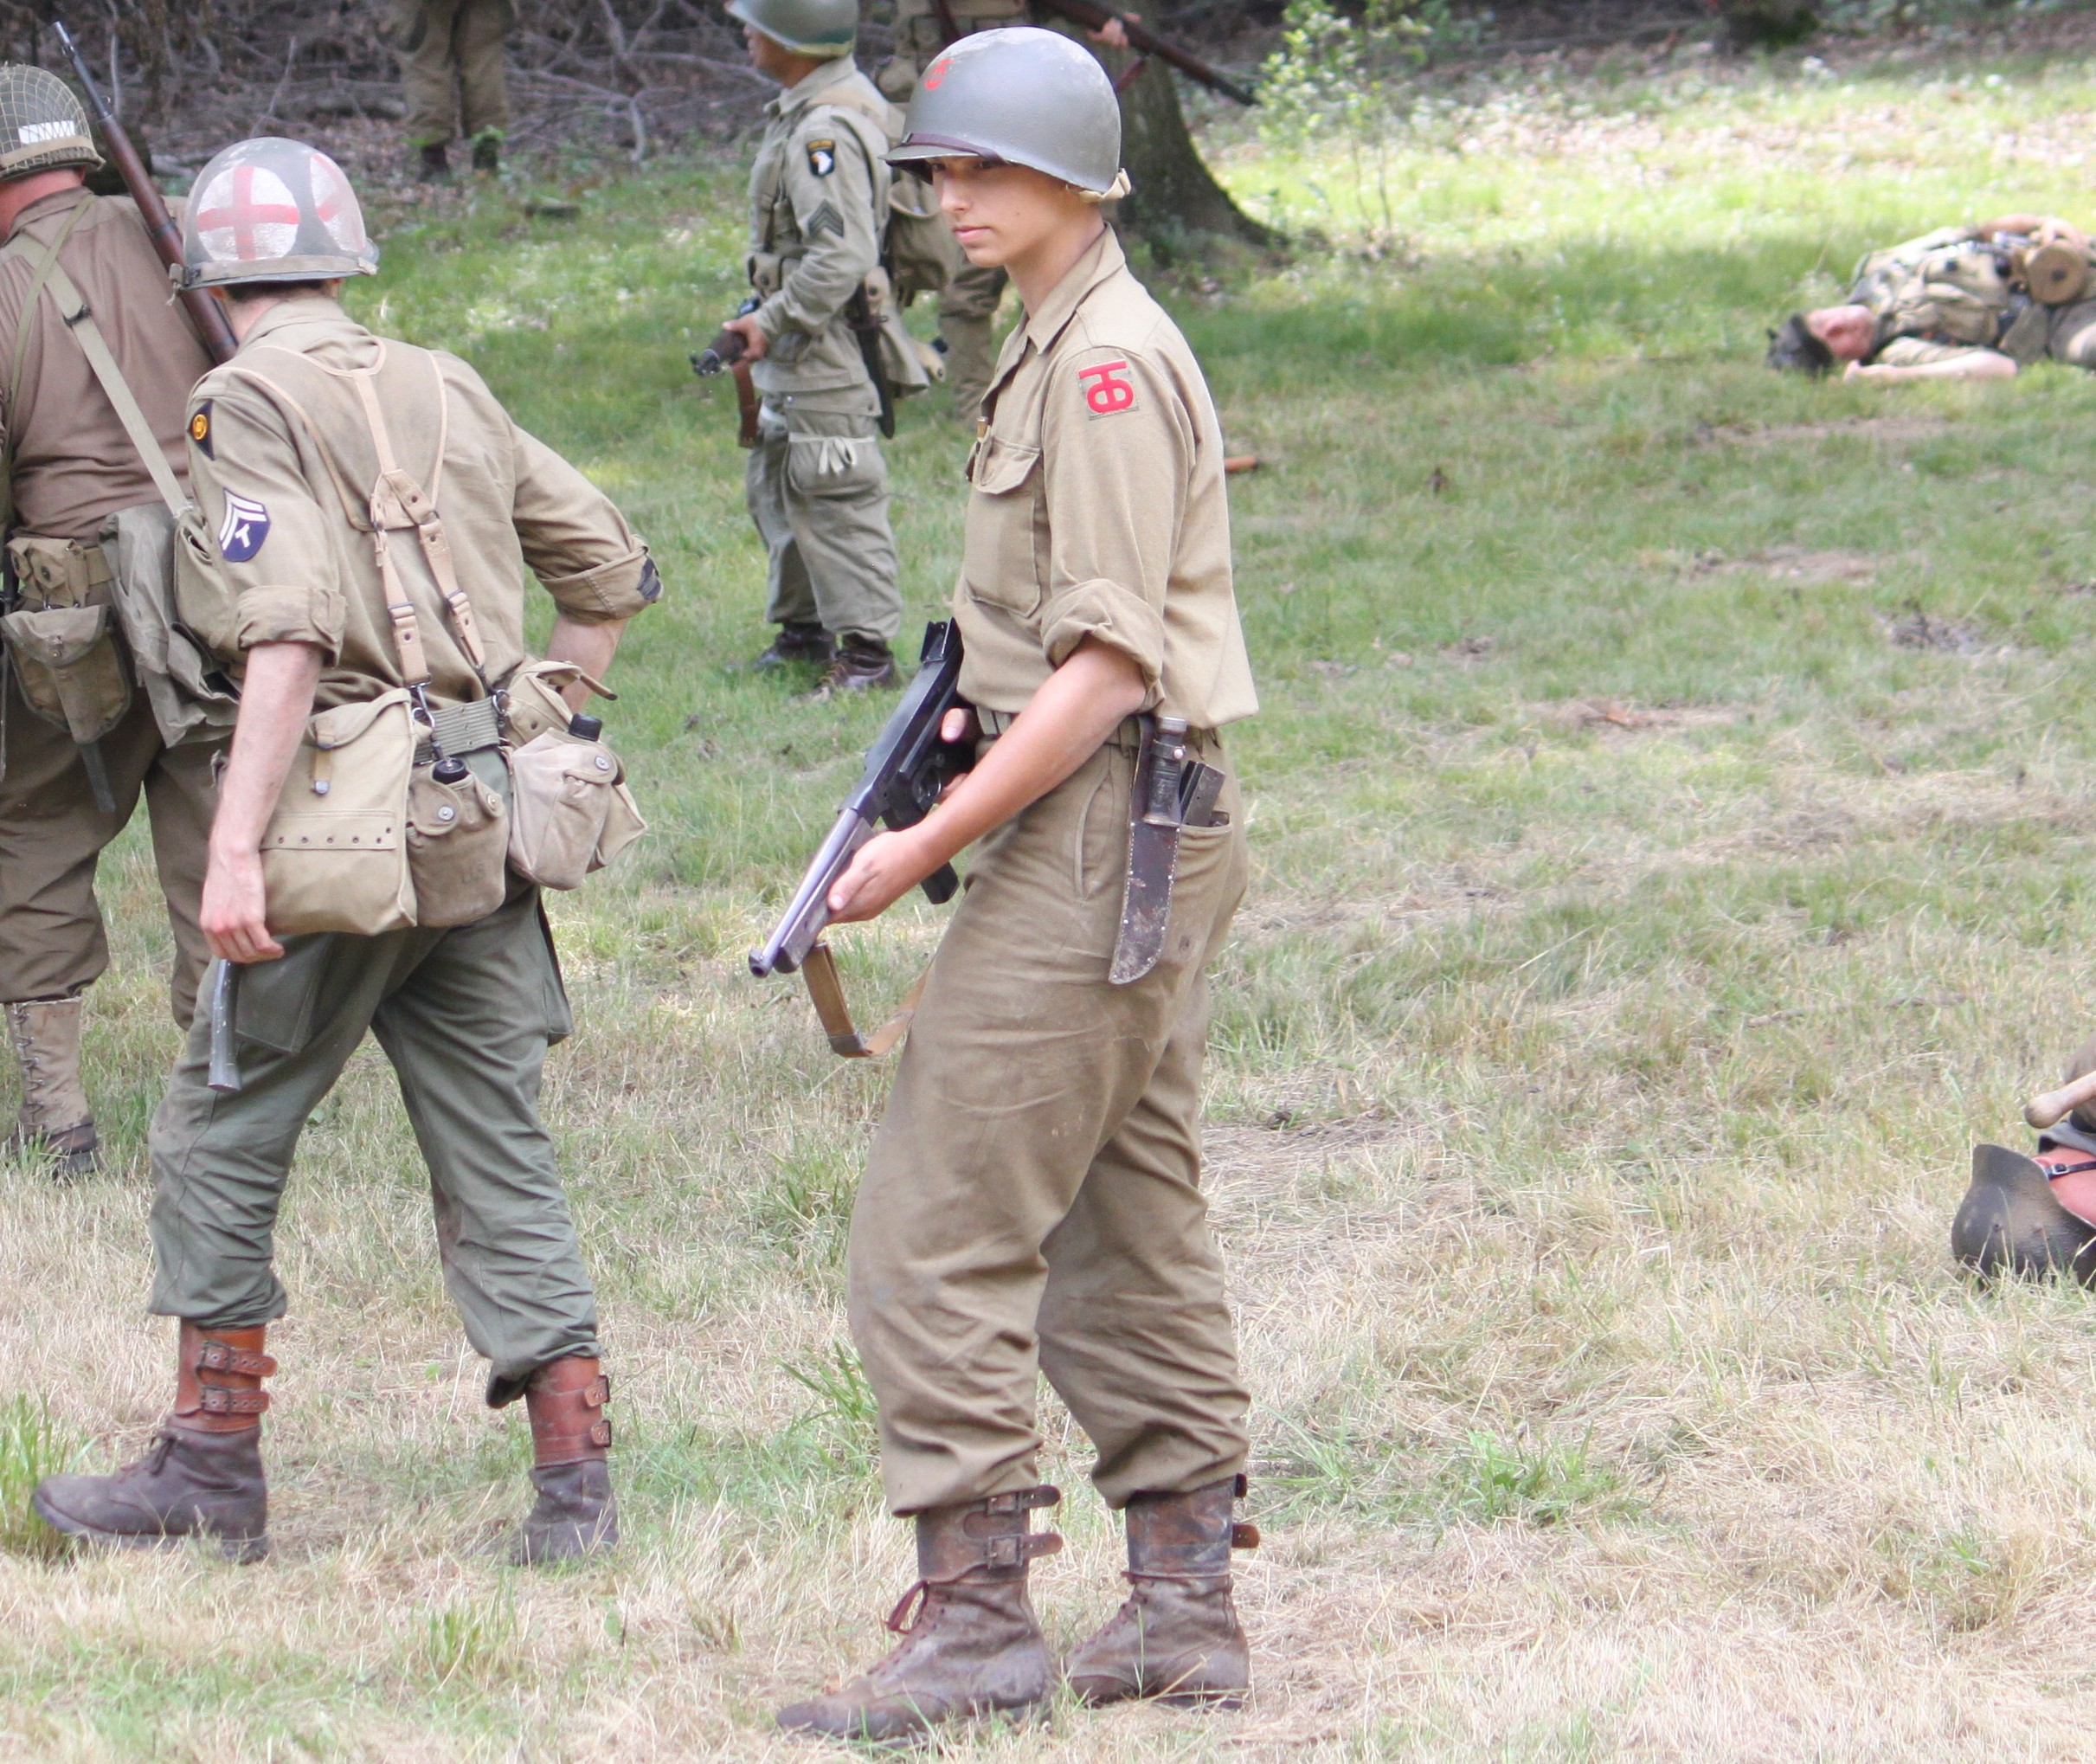
After five days of front line fighting, three airborne infantrymen of the 17th airborne division, take a break before going back for a rest, on the outskirts of Essen, Germany. Left to right: Pvt. William H Sandy, Charlottesville, VA.; Sgt Dehaven Nowlin, Goshen KY.; and Pvt Howard Fredericks, Los Angeles, CAL.507th Parachute Regiment, 17th Airborne Division, Near Essen, Germany.
10 April, 1945
Photographer Sgt T J Austin 168
Ah, the Thompson, the Tommy Gun, the gun that any of us reenactors have loved since we first laid eyes on it. It has been a personal favorite of mine ever since I was a kid watching Capt. Miller put it to good use on the D-DAY beach landings in Spielberg’s Saving Private Ryan. Ever since then I was hooked. Thanks to Auto-Ordnance (Kahr Arms) the dream of owning one of these pieces of history has become a reality for many reenactors.
Here are some observations and thoughts to consider when purchasing one of these guns.
Background:
First off, let me say that no “replica” of something will ever be perfect, but with that in mind it is important to weigh how close something is compared to the original prior to purchasing.Kahr Arms / Auto Ordnance offers two basic styles:
- “M1”-which looks closer to the M1A1, but is of the WW2 improved M1 type (charging lever on side, smooth barrel)
- "M1927” which is of the original 1921 / 1928 style (charging lever on top, finned barrel with Cutts compensator)
To further complicate the matter, the Kahr M1927 comes in two versions.
- A 1928 style upper with a 1928 lower with detachable buttstock.
- A 1928 style upper with a M1 lower and non detachable buttstock.
- A M1 type lower and stock on a 1928 style upper is farby.
Barrels are offered in both 10.5 (correct) and 16 inch (megafarb) lengths.
There are also a number of other options.... Here's a summary of their offerings in table form.
A Guide to Kahr/Auto Ordnance Semi-Auto Thompsons
Barrel Length (Inches)
Receiver (Steel/Aluminum)
Stock Style
(Detachable/Non)Price
(MSRP)Recommended?
TA510D
10.5 finned
Aluminum
No Stock
$1,284
No
TA5100D
10.5 finned
Aluminum
No Stock
$1,543
No
TA5
10.5 finned
Aluminum
No Stock
$1,377
No
T1
16.5 finned
Steel
Non-Detachable
$1,420
No
T1100D
16.5 finned
Steel
Non-Detachable
$2,001
No
T150D
16.5 finned
Steel
Non-Detachable
$1,668
No
T1D
16.5 finned
Steel
Non-Detachable
$1,548
No
T5
16.5 finned
Aluminum
Non-Detachable
$1,286
No
T5100D
16.5 finned
Aluminum
Non-Detachable
$1,699
No
T1B
16.5 finned
Steel
Detachable
$1,853
Yes
T1B100D
16.5 finned
Steel
Detachable
$2,435
No
T1B50D
16.5 finned
Steel
Detachable
$2,112
No
T1-C
16.5 finned
Steel
Non-Detachable
$1,393
No
T1SB
10.5 finned
Steel
Non-Detachable
$2,053
No
T1BSB
10.5 finned
Steel
Detachable
$2,554
Yes
TM1
16.5 smooth
Steel
Non-Detachable
$1,334
Yes
TM1C
16.5 smooth
Aluminum
Non-detachable
$1,206
No
M1SB
10.5 smooth
Steel
Non-Detachable
$1,970
Yes
-Information compiled from the Auto Ordnance website
Yellow Highlights Indicate Recommended Guns for WWII Reenacting
- Prices displayed above are MSRP. You should be able to find a gun for less than MSRP. My gun is a TM1, I paid $1,109.81 including tax.
- All SBR’s (Short Barreled Rifles, 10.5 inch barrels + stocks) need an ATF Form 1 and a $200 tax stamp.
With this in mind, the M1927 with the detachable buttstock and the M1 were my two options.
It was a clear choice.
I specifically purchased the TM1 since I was planning on putting a Philadelphia Ordnance Blank Only Barrel.
- By starting with a 16 inch barrel from the factory, rather than a 10.5 inch barrel, it did not classify as a SBR - therefore no $200 tax stamp + lengthy transfer.
- The M1927 with the detachable buttstock would have an extra $400 added to the price tag.
- The Philadelphia Ordnance Blank Only barrel is an ATF approved device that when installed, looks like a 10.5 inch barrel, is capable of firing blanks, but does not classify the weapon as a SBR.
The Review
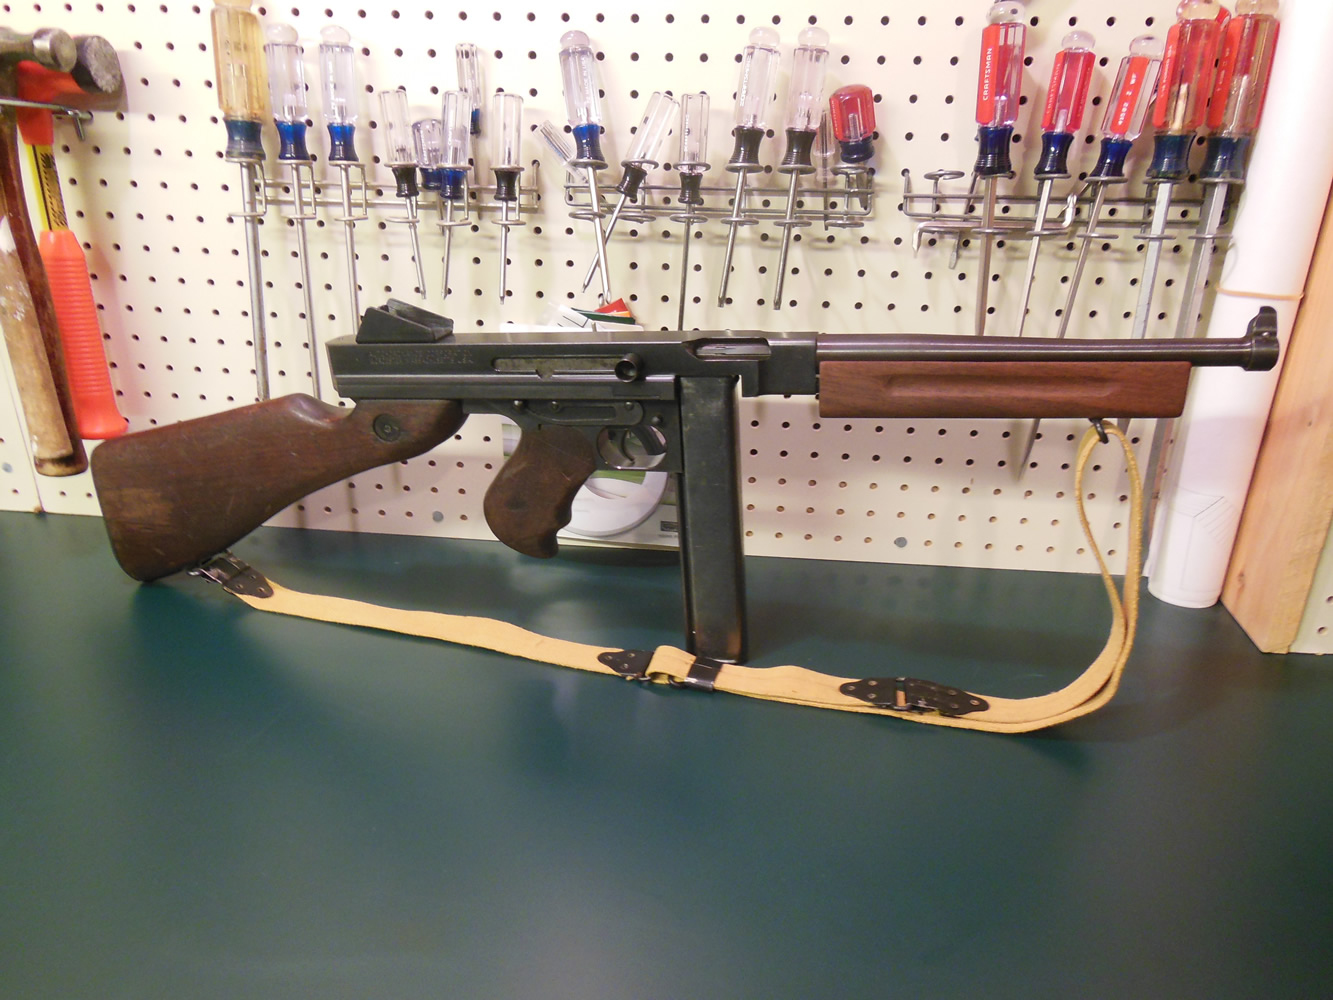
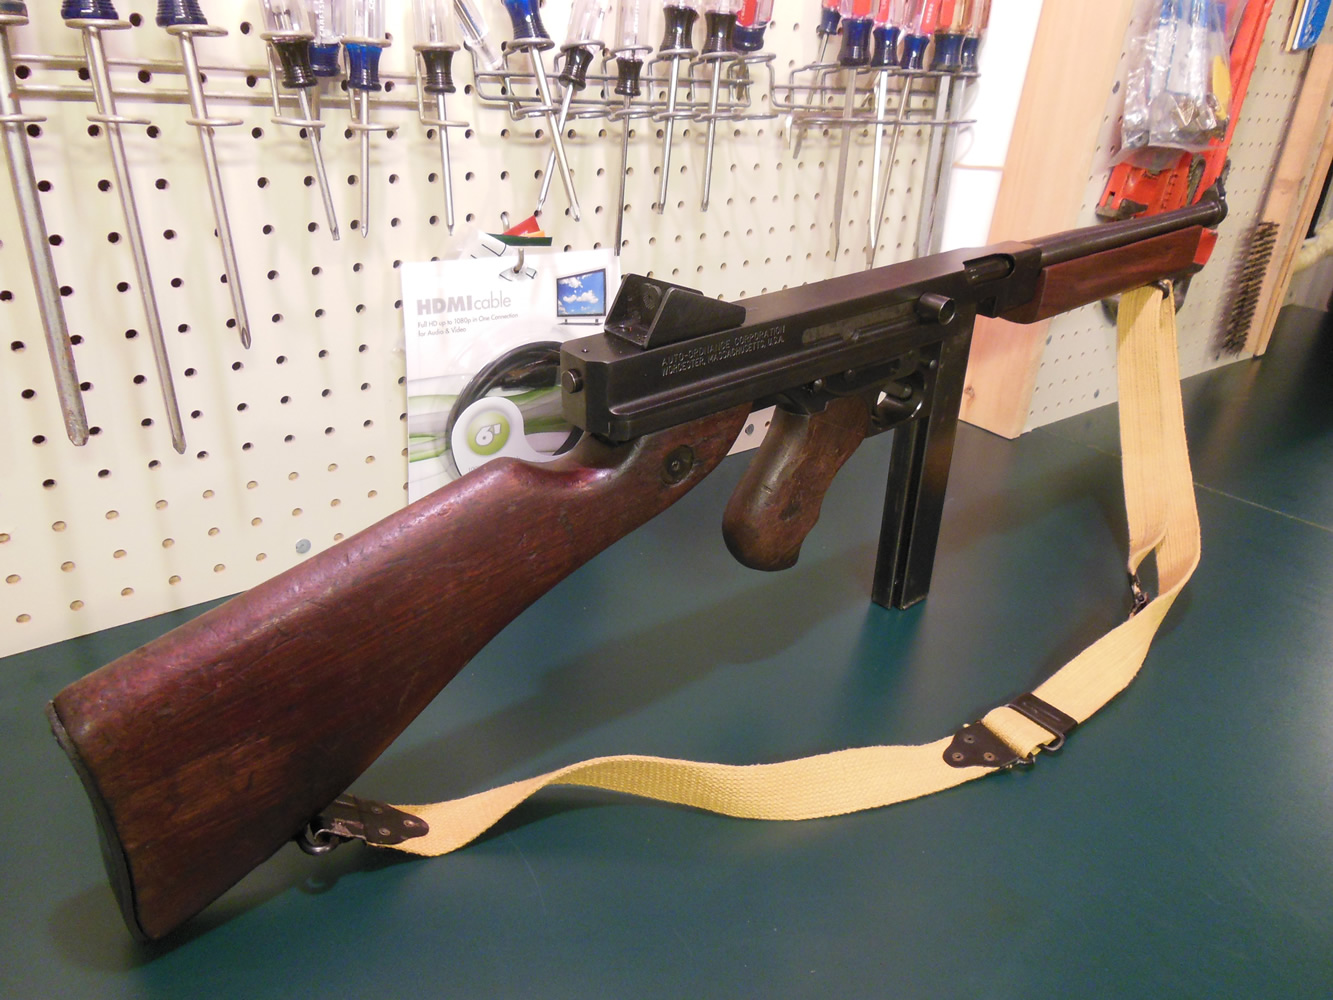
As I said before this is called the Thompson M1 by Kahr/Auto-Ordnance, but is really of the M1A1 style because of the M1A1 style rear sight and the cross bolt in the stock. Changing each of these parts to the correct M1 style will therefore give it the M1 look, but I am satisfied with the M1A1 look
Of note, I have replaced the Auto Ordnance pistol grip and buttstock with original USGI furniture.
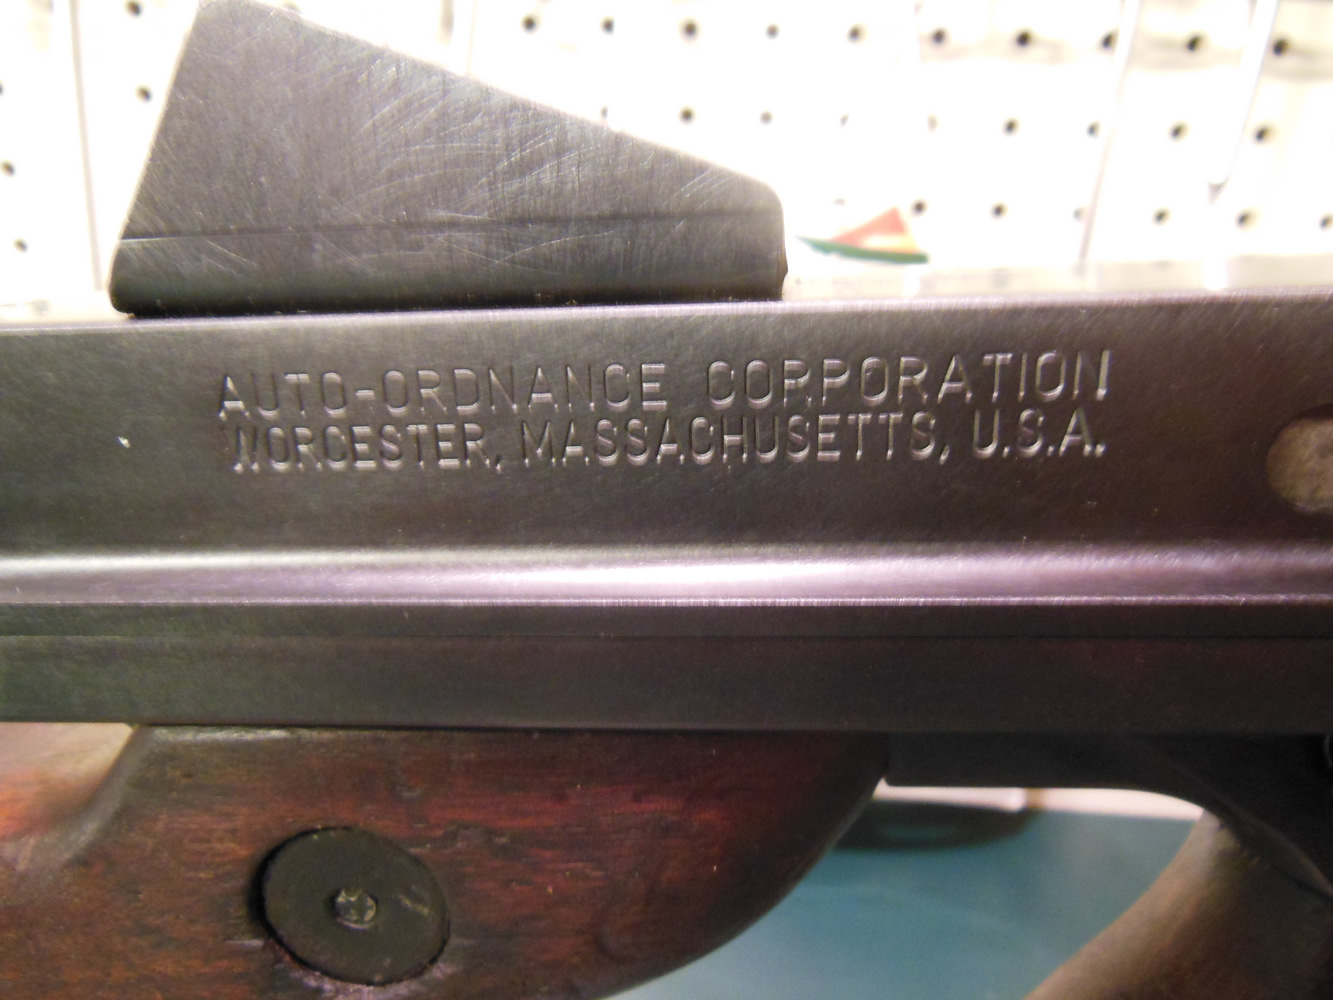
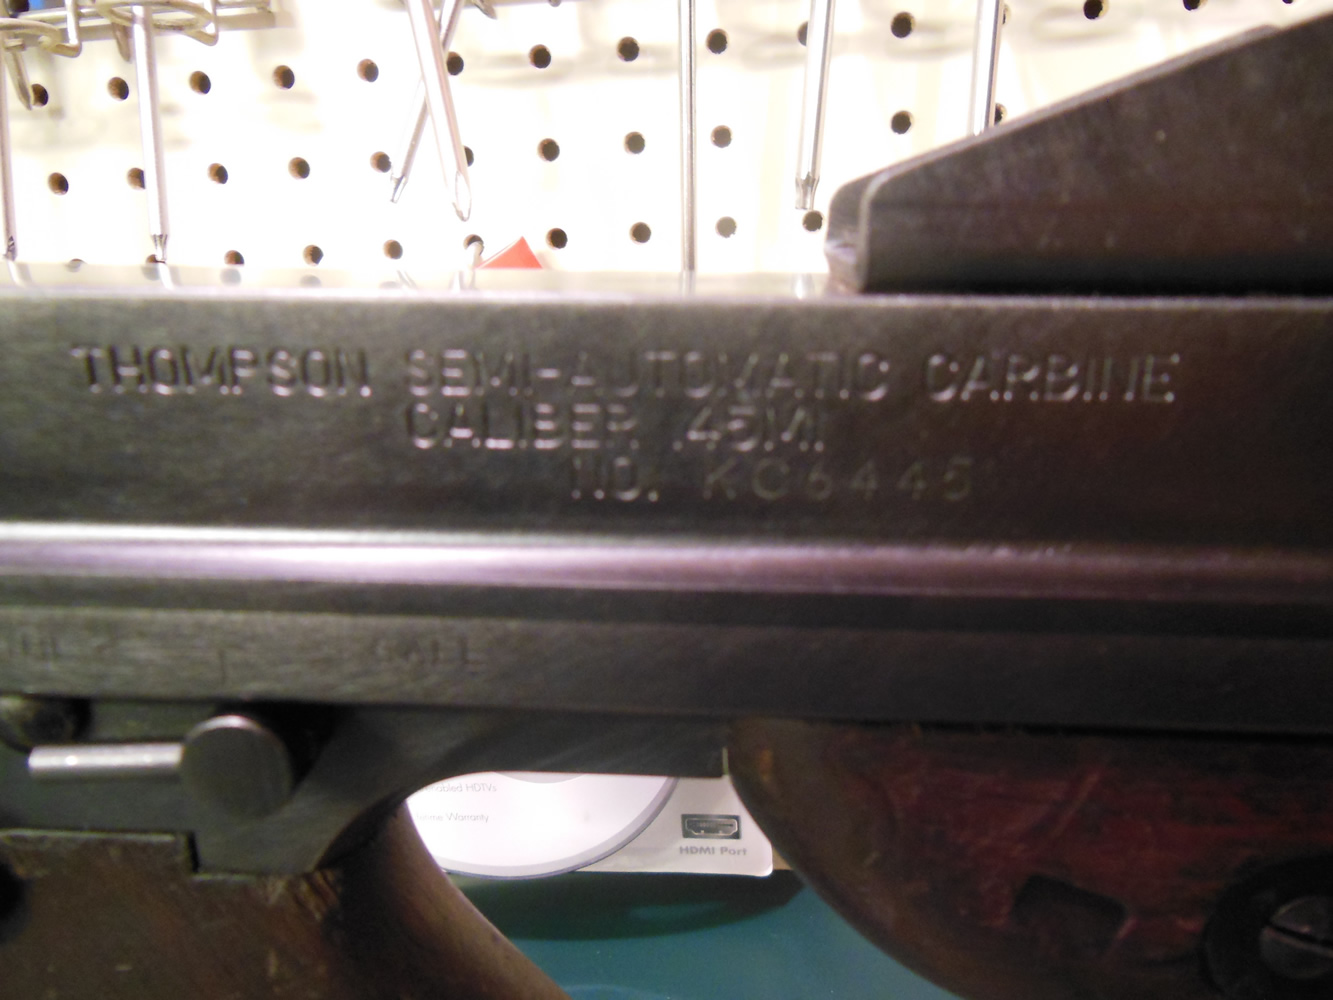
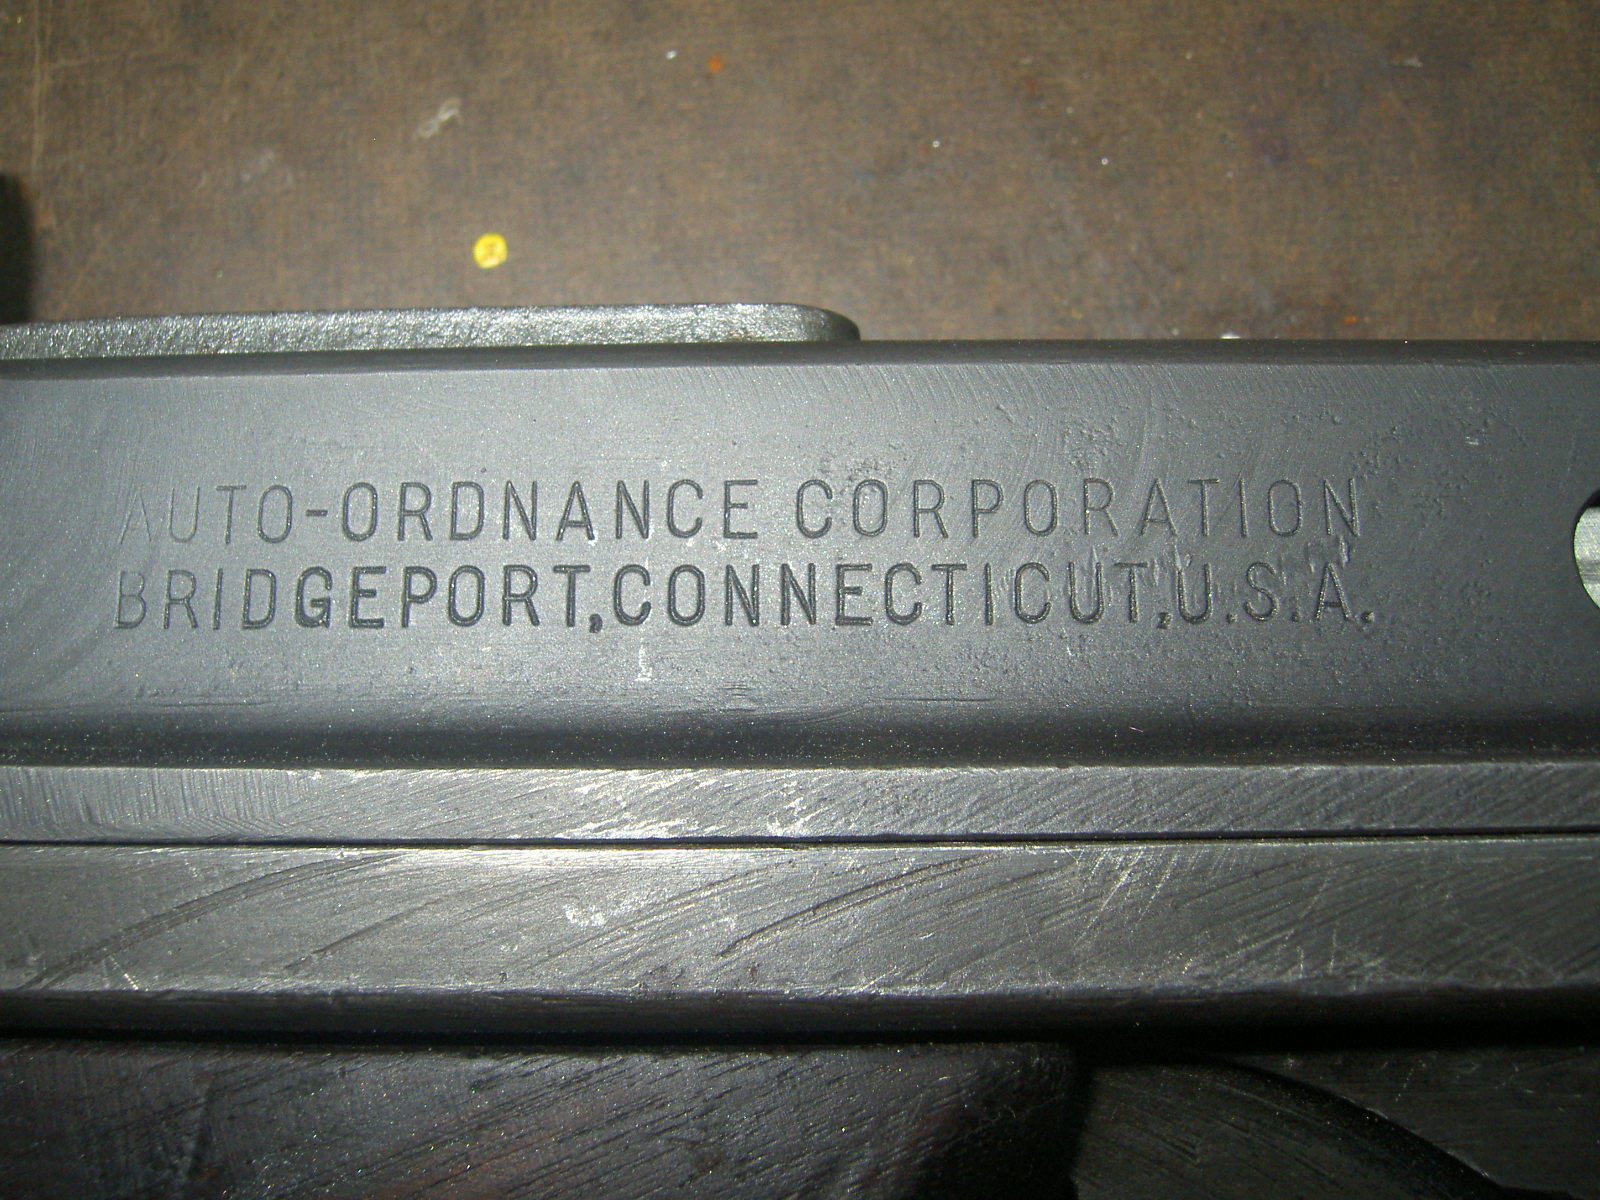
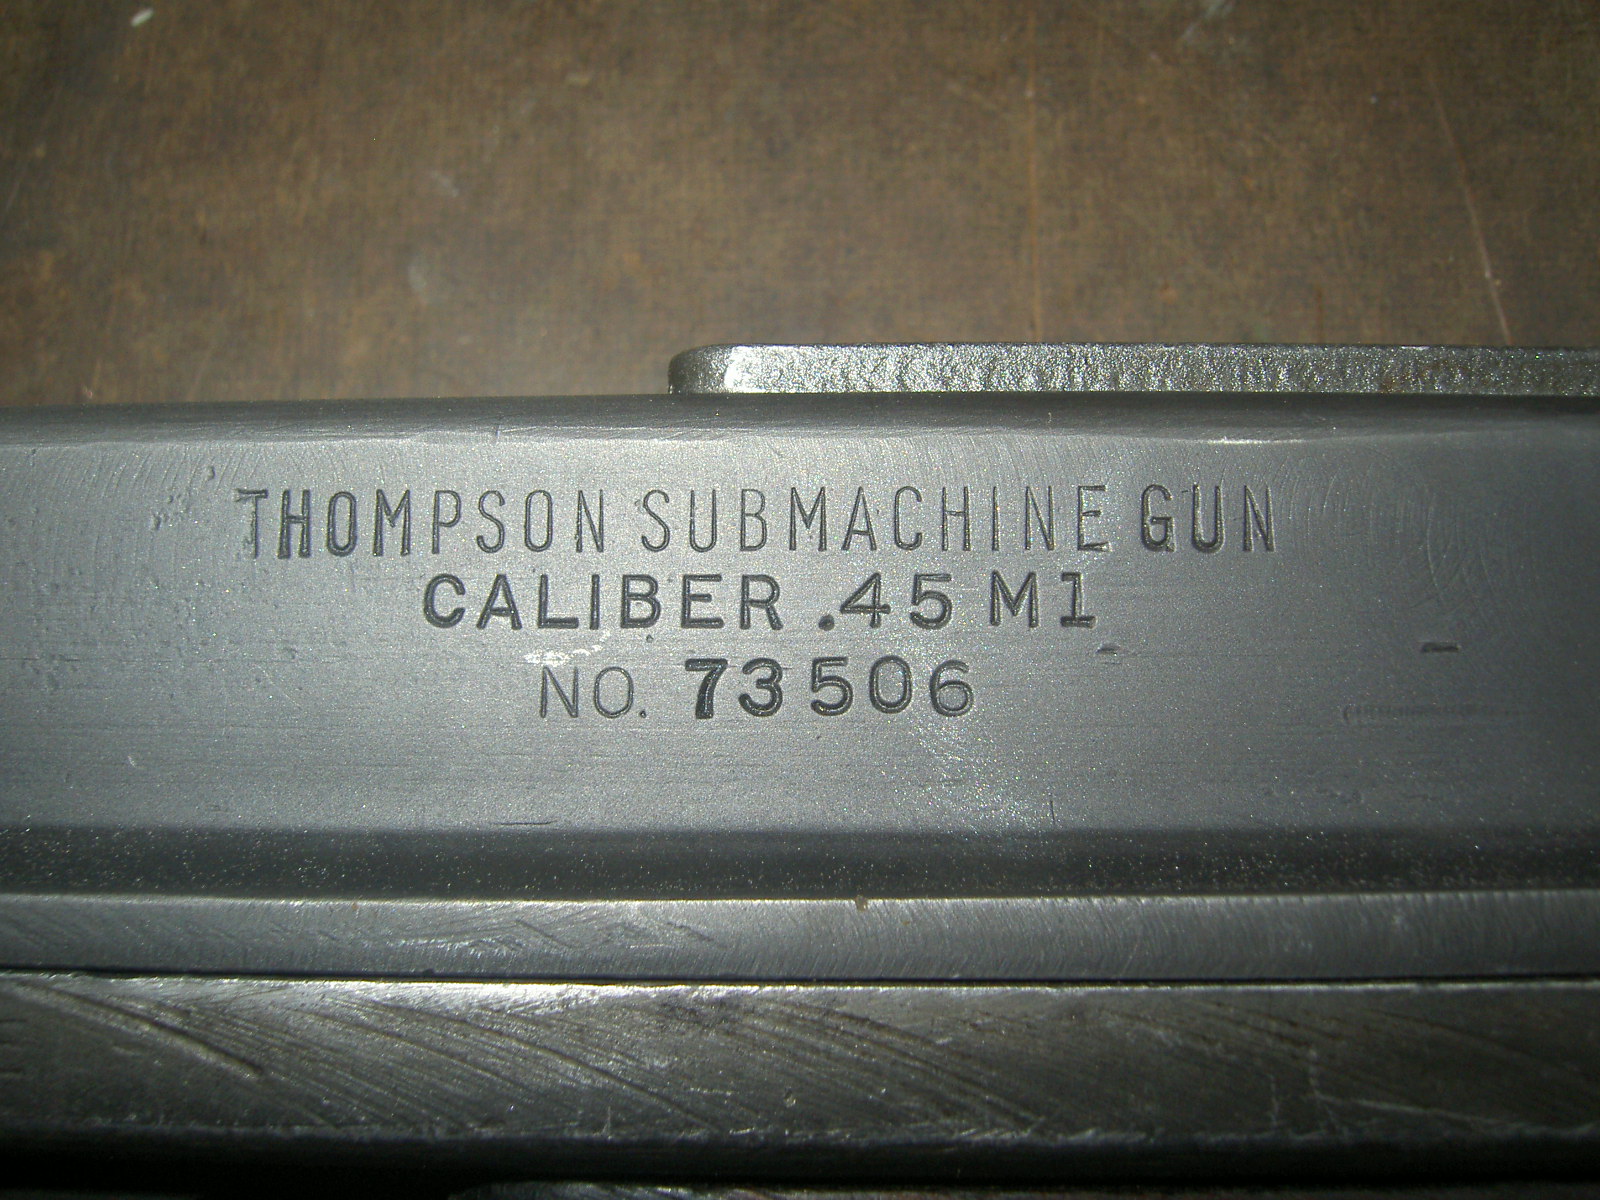
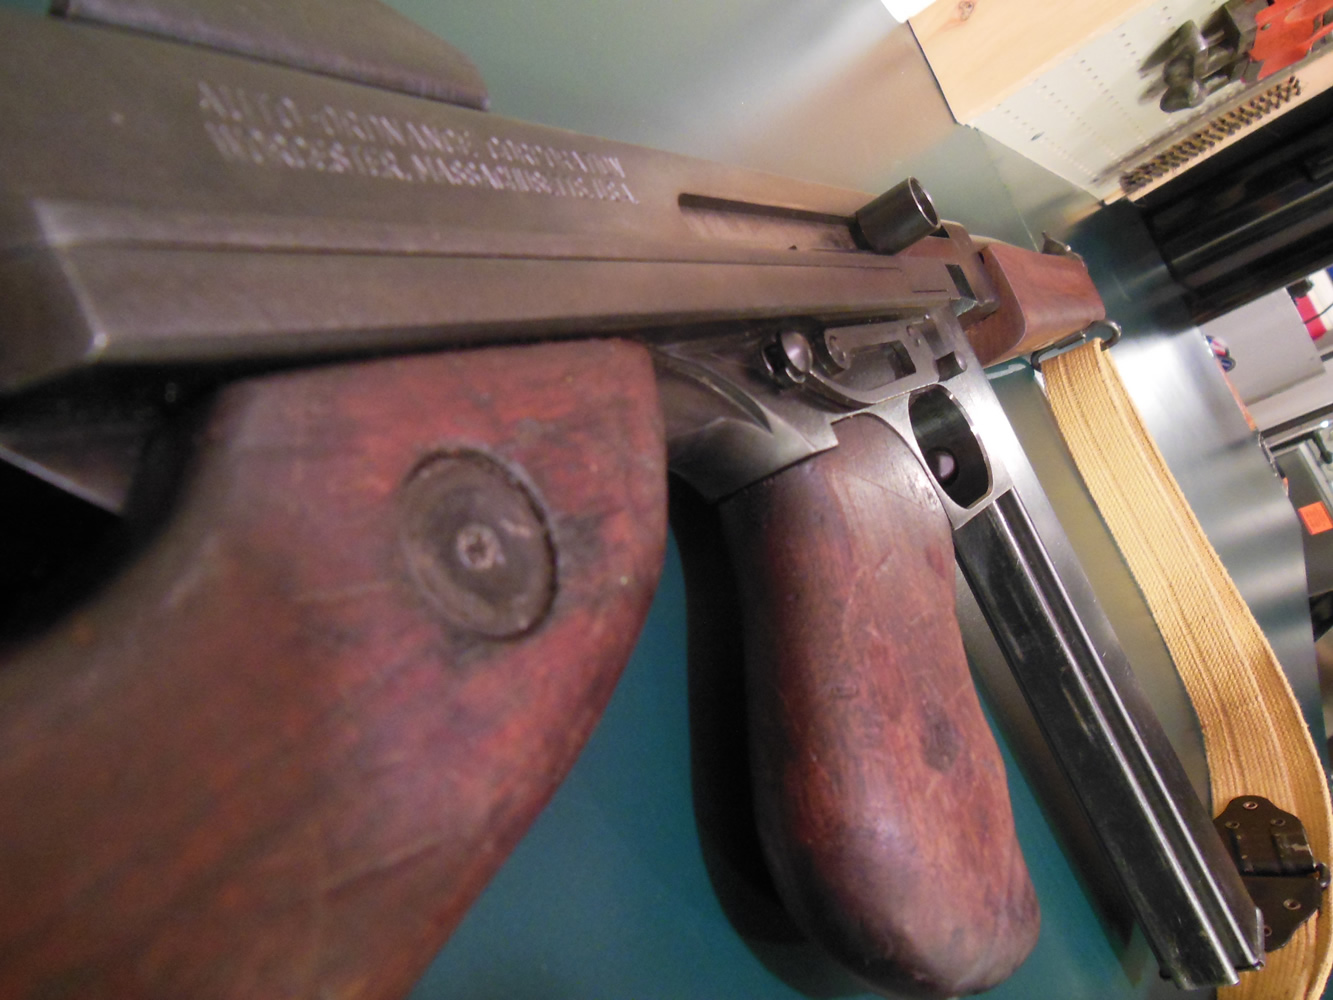
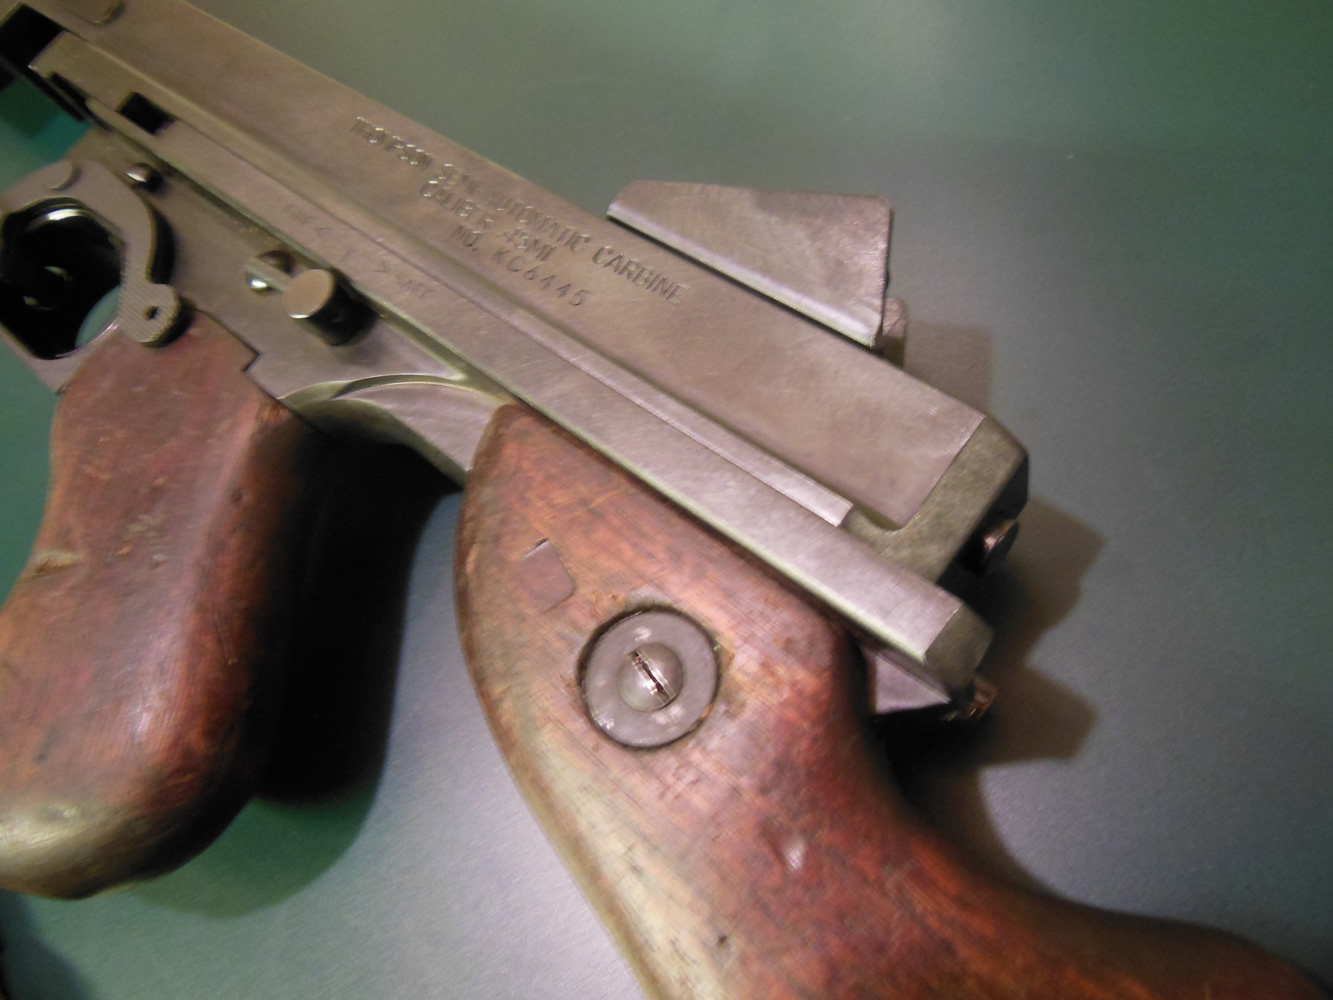
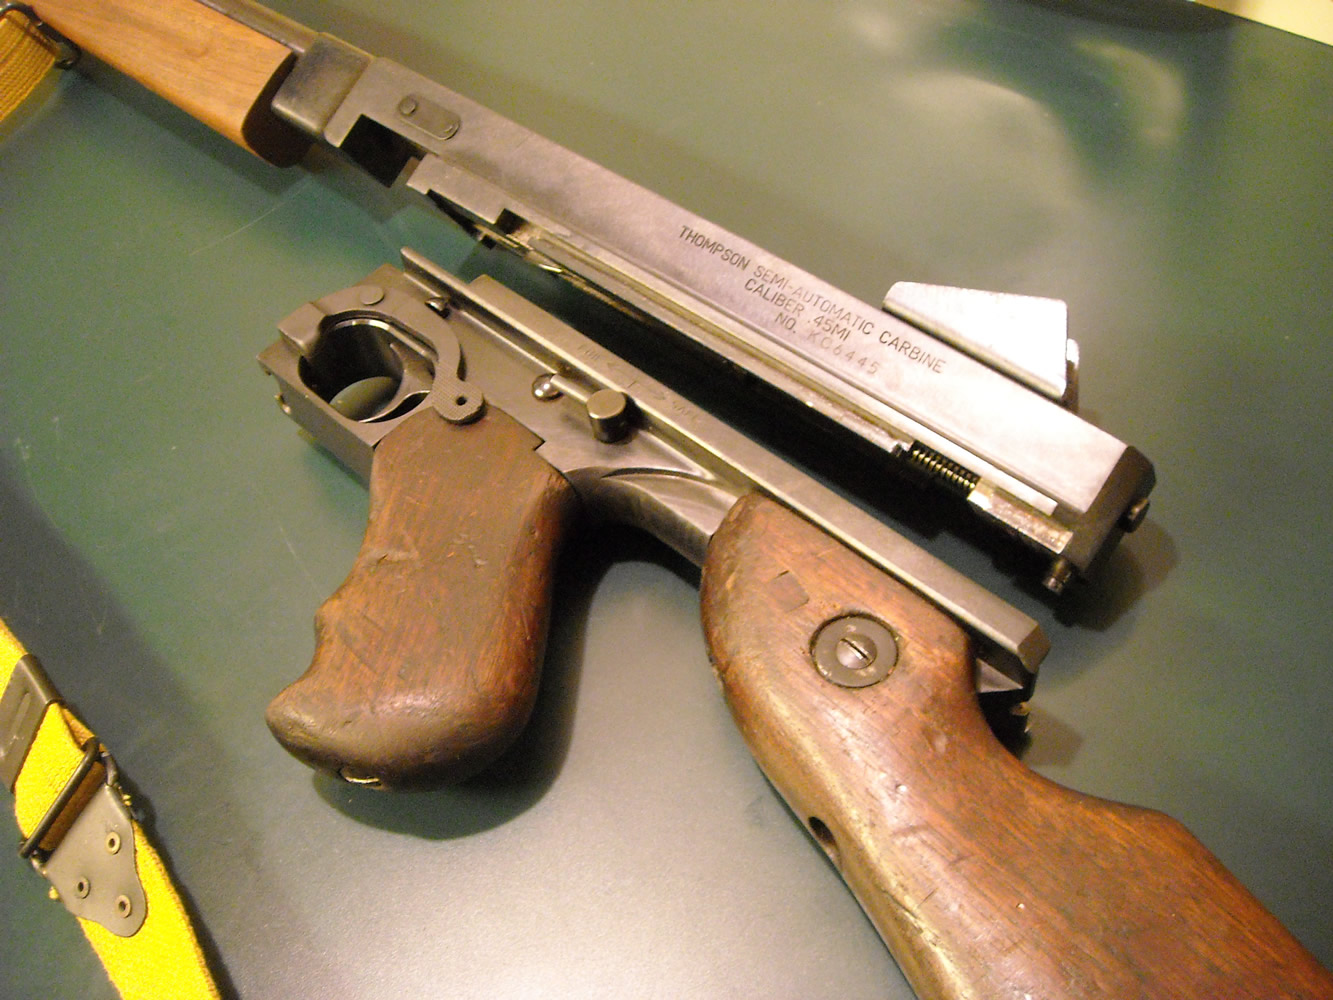
Comparison of markings:
Repro top, Original bottom.
The markings are nicely styled like the originals, yet changed to reflect current maker location as well as nomenclature. The new markings are engraved rather than roll stamped like the originals.
I would have preferred that the left side of the receiver was marked “Thompson Semiautomatic Carbine” instead of Thompson submachine gun, which would be more historically correct.
The Auto Ordnance Thompsons do have the "Bullet Logo" on the top of the receiver. It is smaller in size than that of originals.
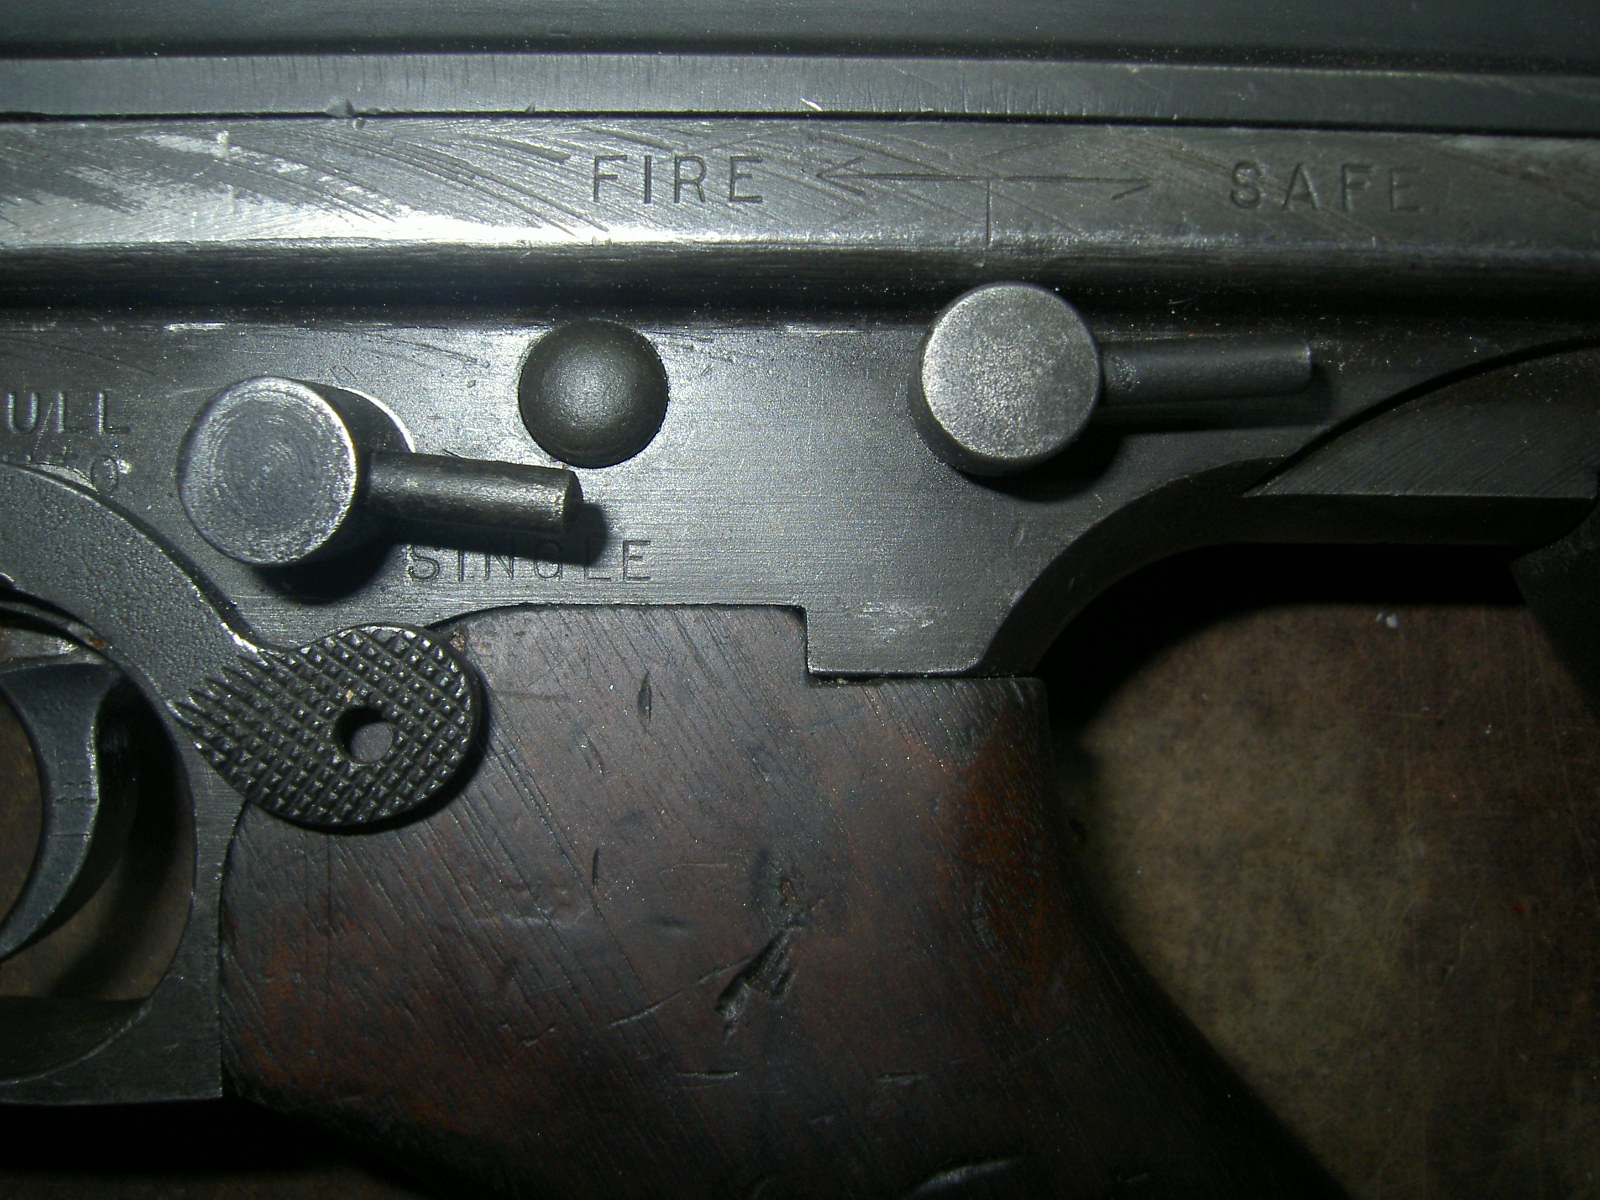
US Military Thompson Submachine Guns are marked with a US Property mark, of several different styles on the receiver heel behind the rear sight. There other military proof marks and inspection marks on original examples that are not replicated on the civilian production semi autos.
Furthermore, the lowers lack the selector switch entirely - therefore lack the Full Auto / Semi Auto selector markings.
Original example below
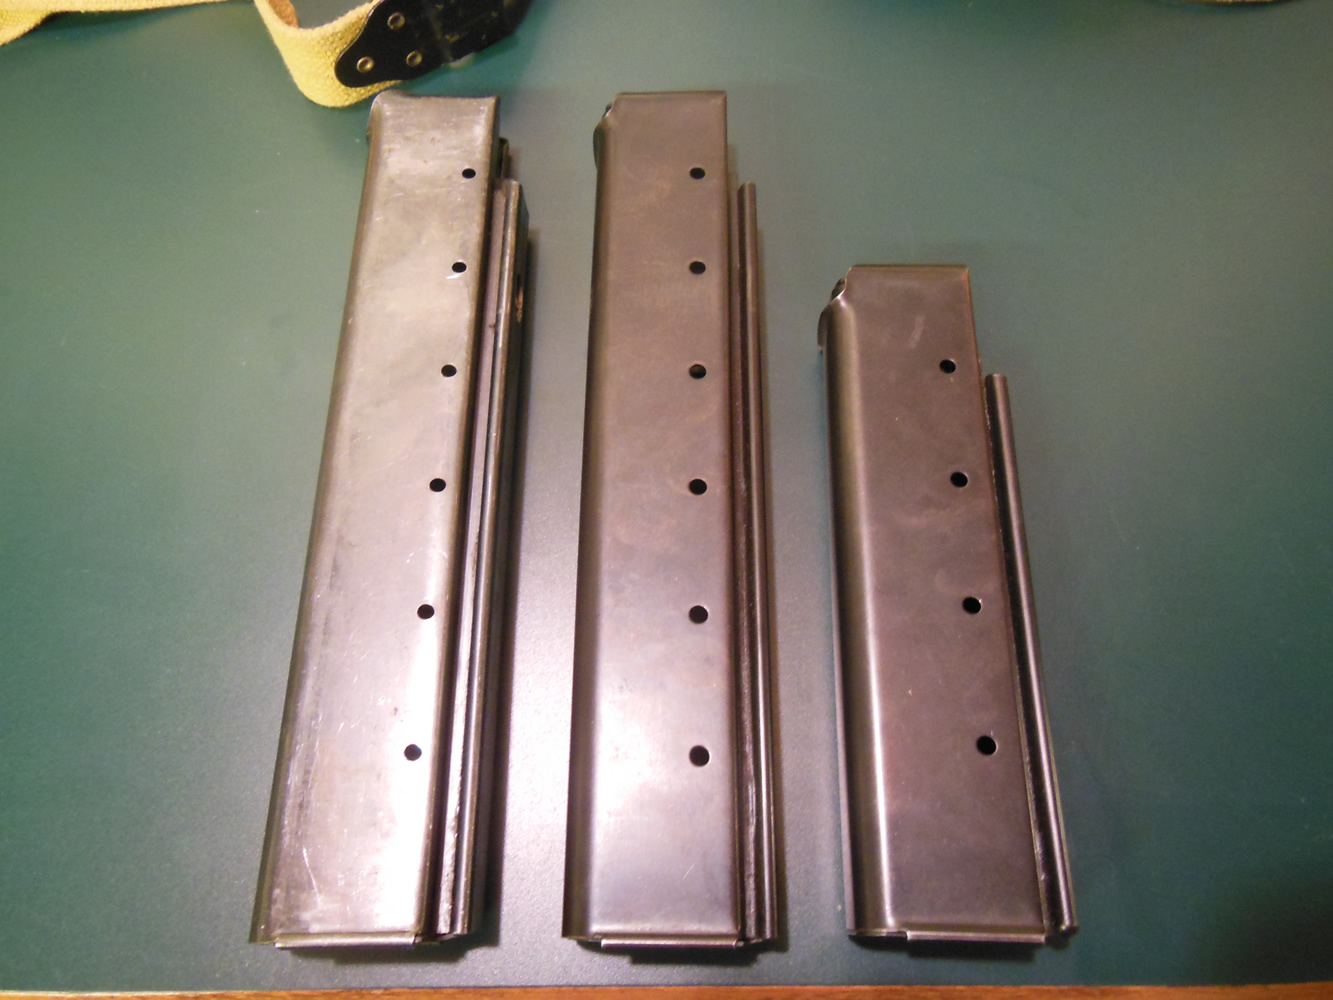
Comparison of Magazines:
Kahr provides one 30-round magazine with the gun.
Left, original, Center, Kahr 30, Right, Kahr 20.
Comparison of magazine markings, AO/Kahr (no markings) top, USGI bottom.
Kahr offers 30 round magazines for sale for $70 each and 20 round magazines for $30.
Why the substantial difference in price? We'd all love to know...
The problem with the Kahr Thompsons is that they do not take original magazines without modification. For the shooter this is fine, who will only probably need one extra to have fun at the range, but for the reenactor who needs six extra to fill a SMG bag it is too much to pay.
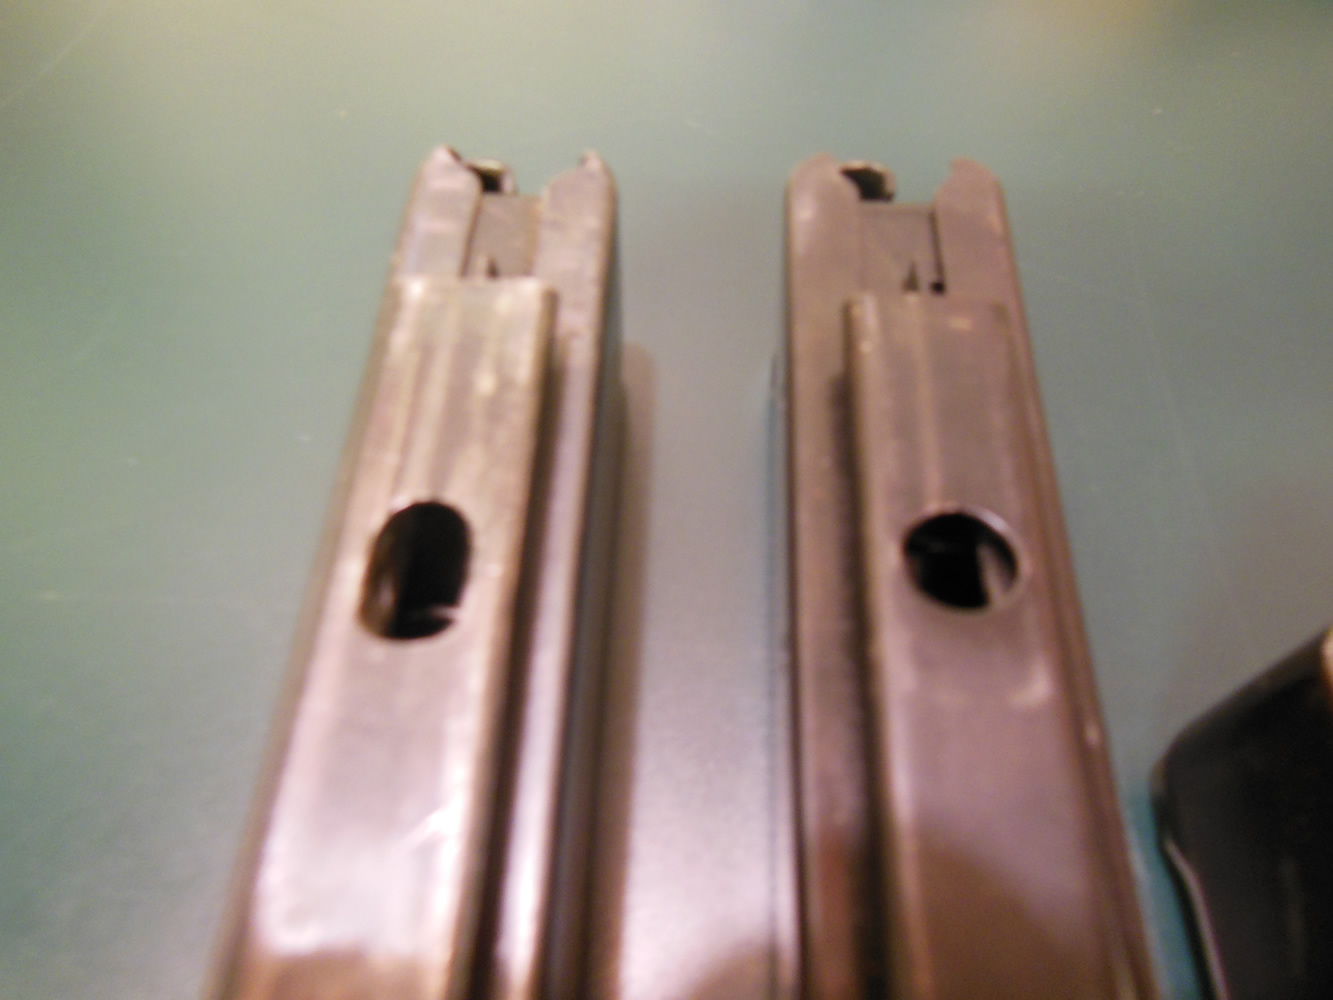
The magazine catch hole is set slightly higher on the AO Thompson than on the original. Original magazines can be modified to work with the AO magazine catch. Inversely, the magazine catch can be made to accept original, unmodified magazines.
A photo showing a modified original magazine, left, and Kahr 30, right. The GI magazine catch hole was simply extended upwards t accommodate the AO mag catch.
Barrels:
The barrel as installed from the factory was 16 inches long.
Not much to say here except that if you use this for reenacting you will be instantly deemed a FARB. DON’T USE THE 16 INCH BARREL FOR REENACTING. If your state does not allow SBR’s, then a blank only barrel from Tommygunner.com or Philadelphia ordnance is your ticket. Sure it costs extra money, but reenacting is expensive and if you can’t afford it you probably shouldn't’t buy the gun in the first place.
Sights:
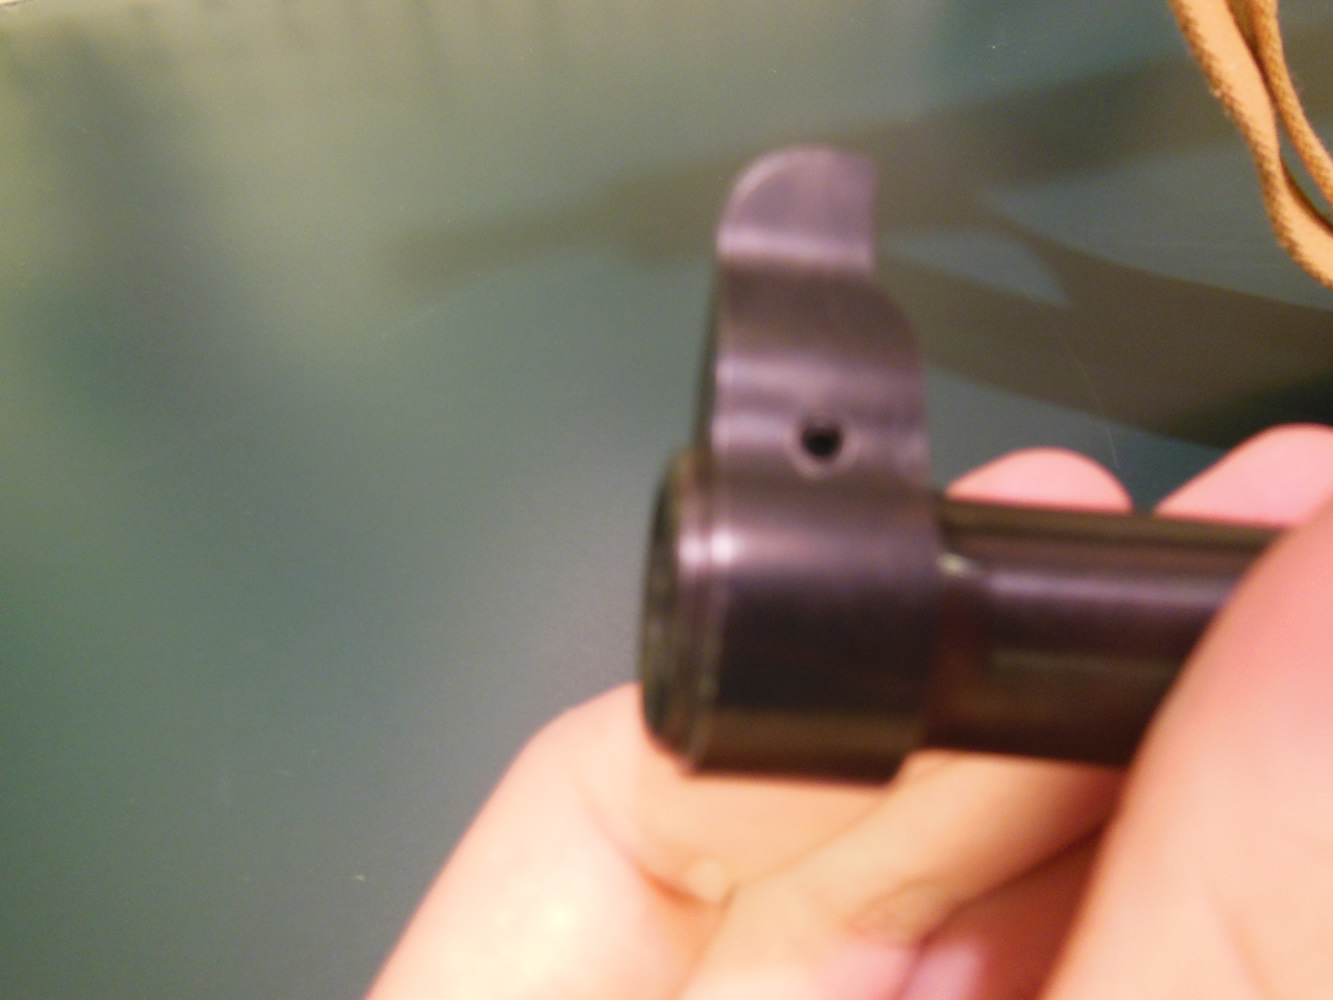
The sights, front and rear are USGI in style, both in shape and construction. The front sight is press fit onto the barrel and not threaded as on the 1928 types.
The front sight is held on with a roll pin, rather than a solid pin as on USGI guns. It would have cost AO 60 cents a pop for a hardened dowel pin vs the 2.5 cents for a roll pin... and that's at retail prices from McMaster Carr.
The rear sight is held in place with screws and red-locktite, not the correct rivets that would have been used to hold them in place.
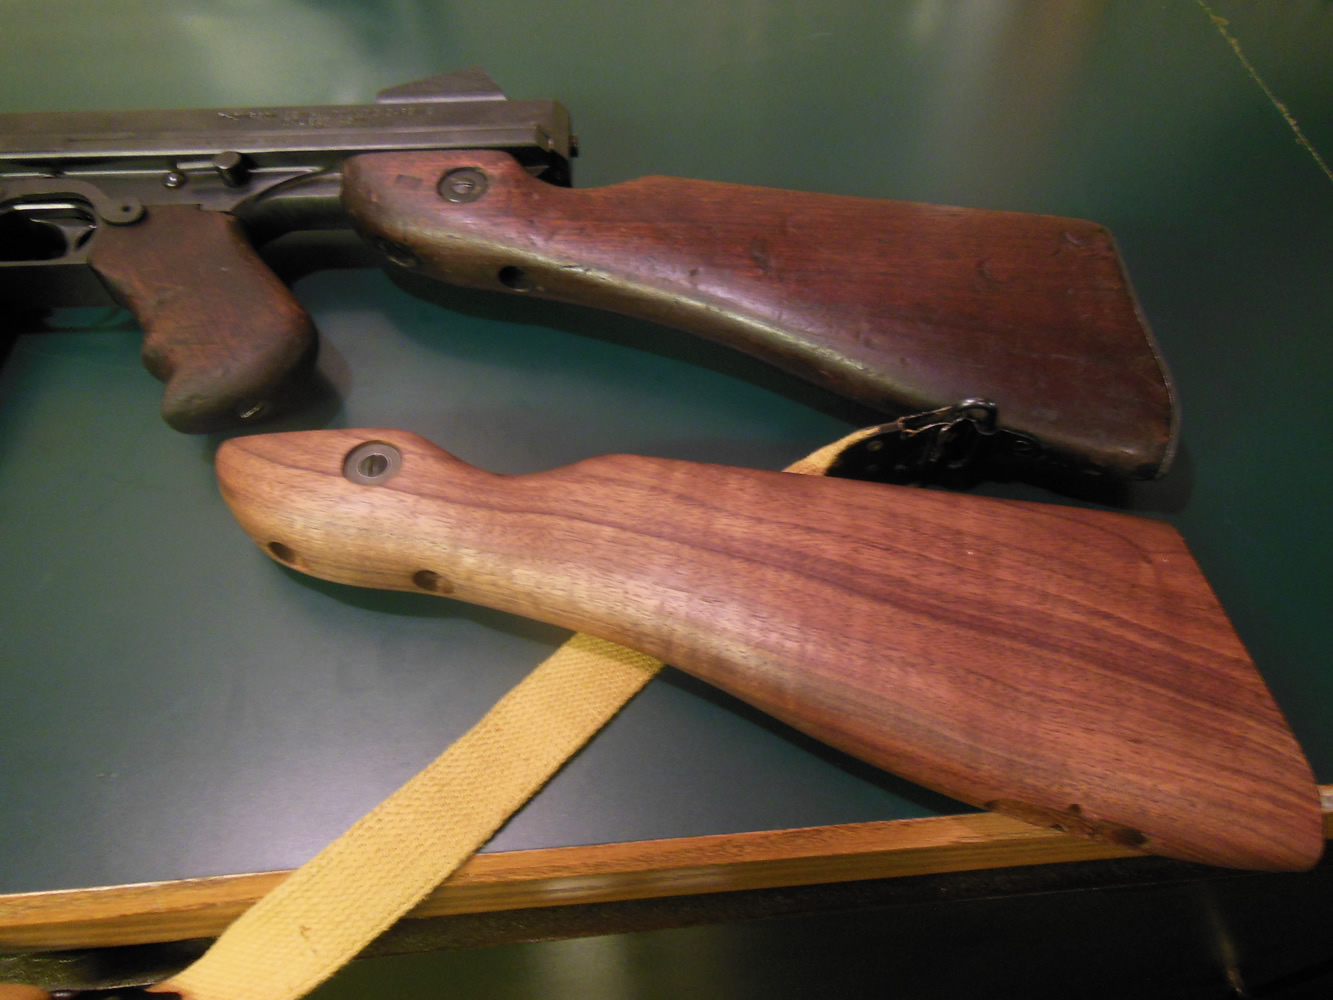
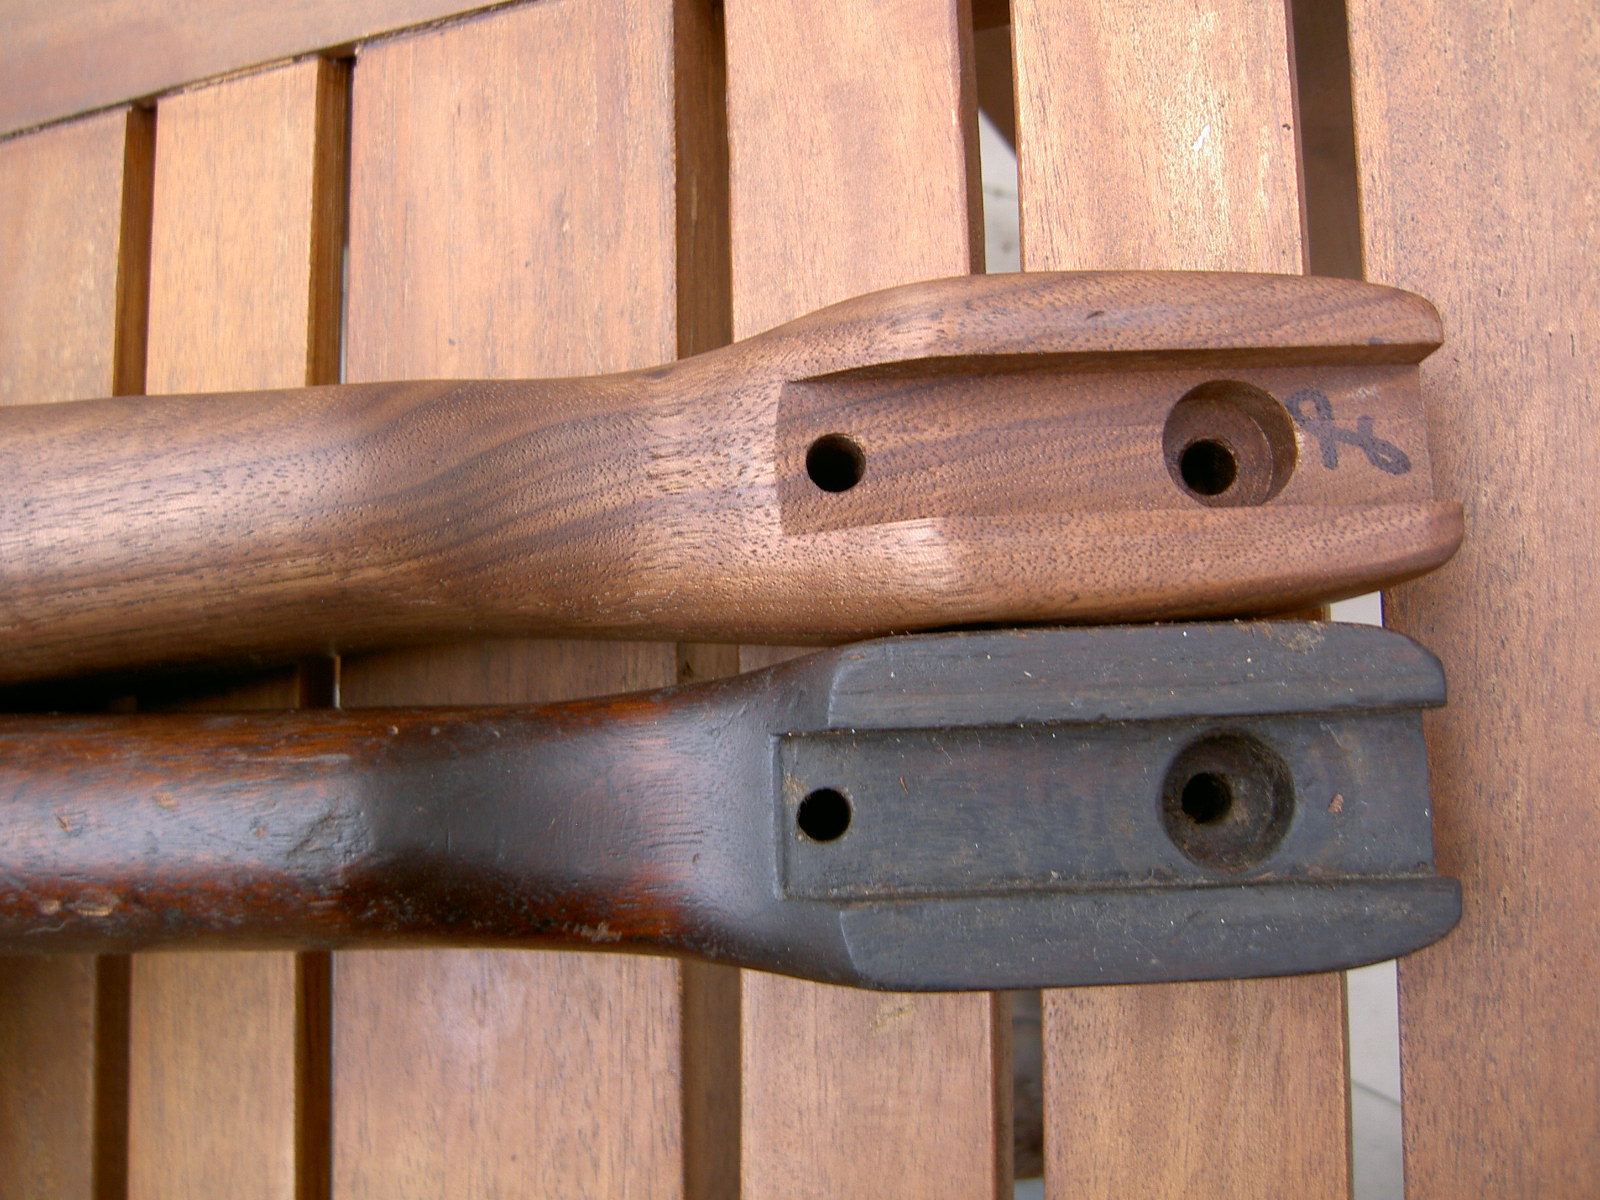
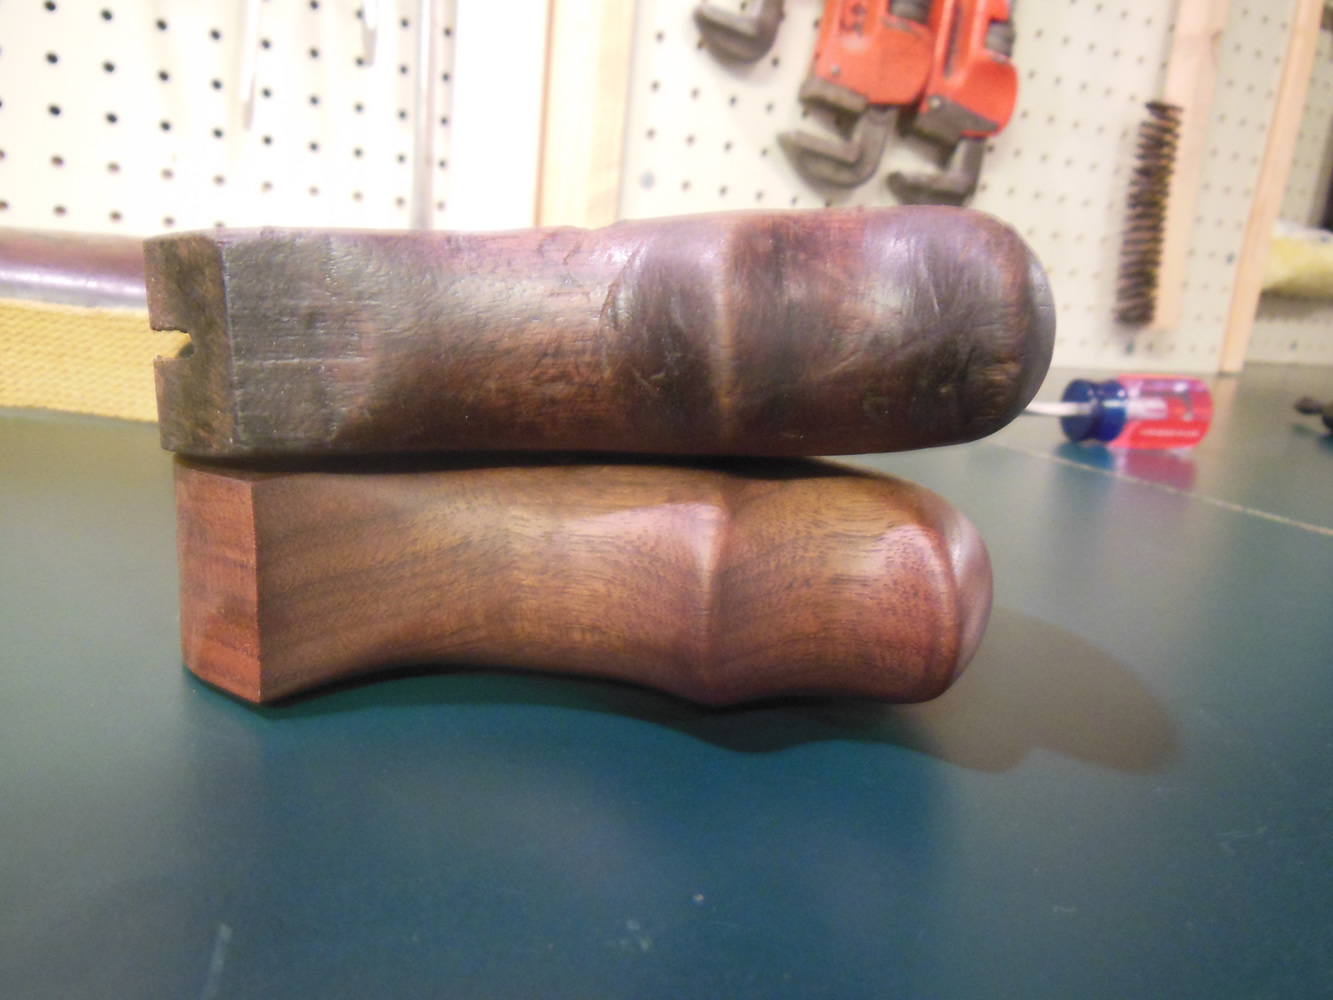
Furniture:
The wood that was on this gun was beautiful, but I want a war gun damn it, not a show piece.
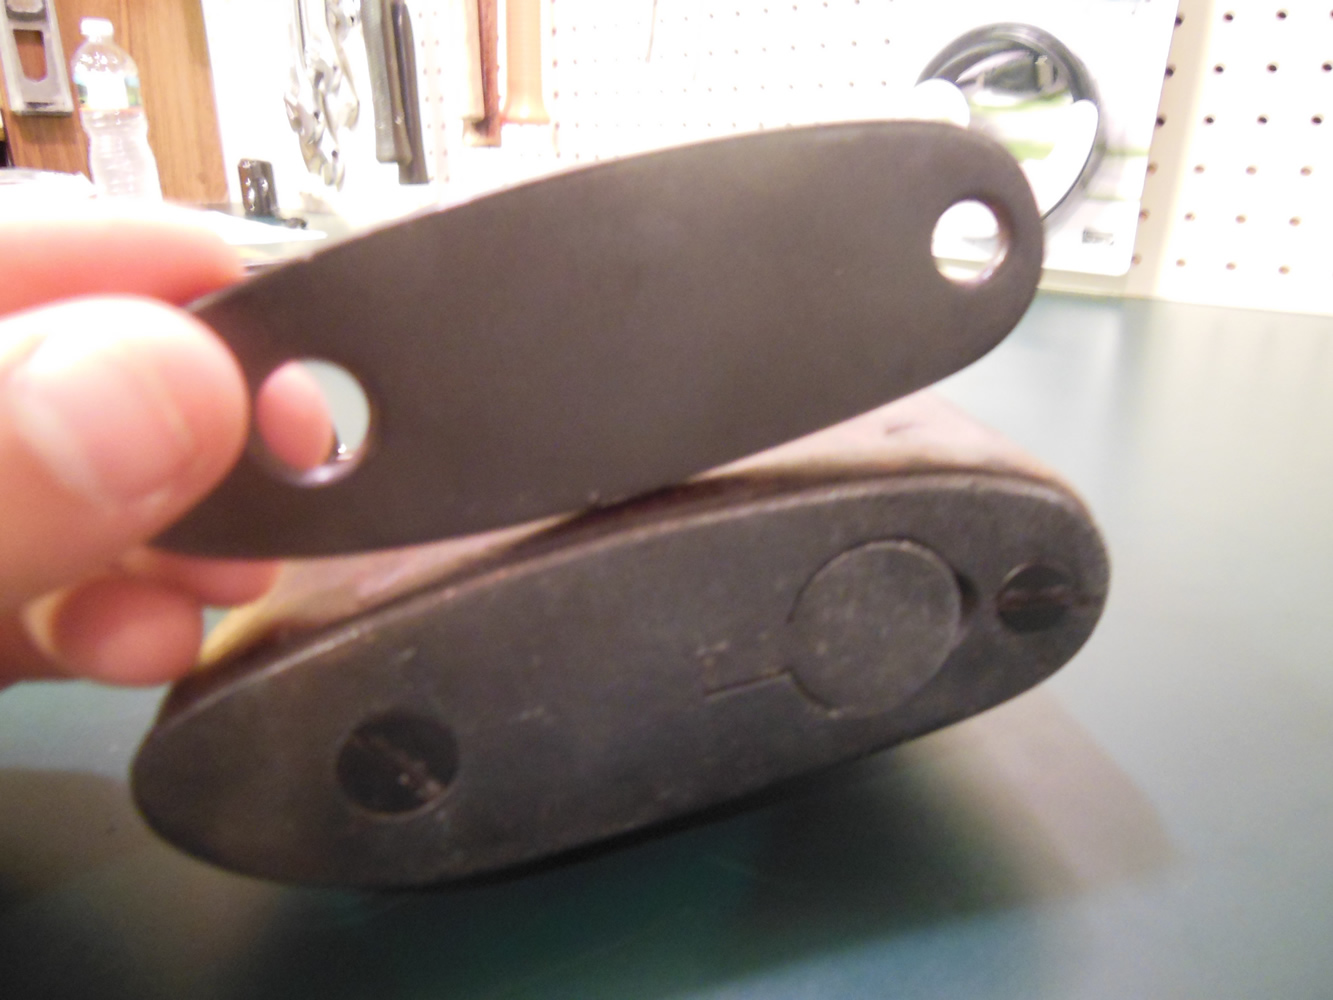
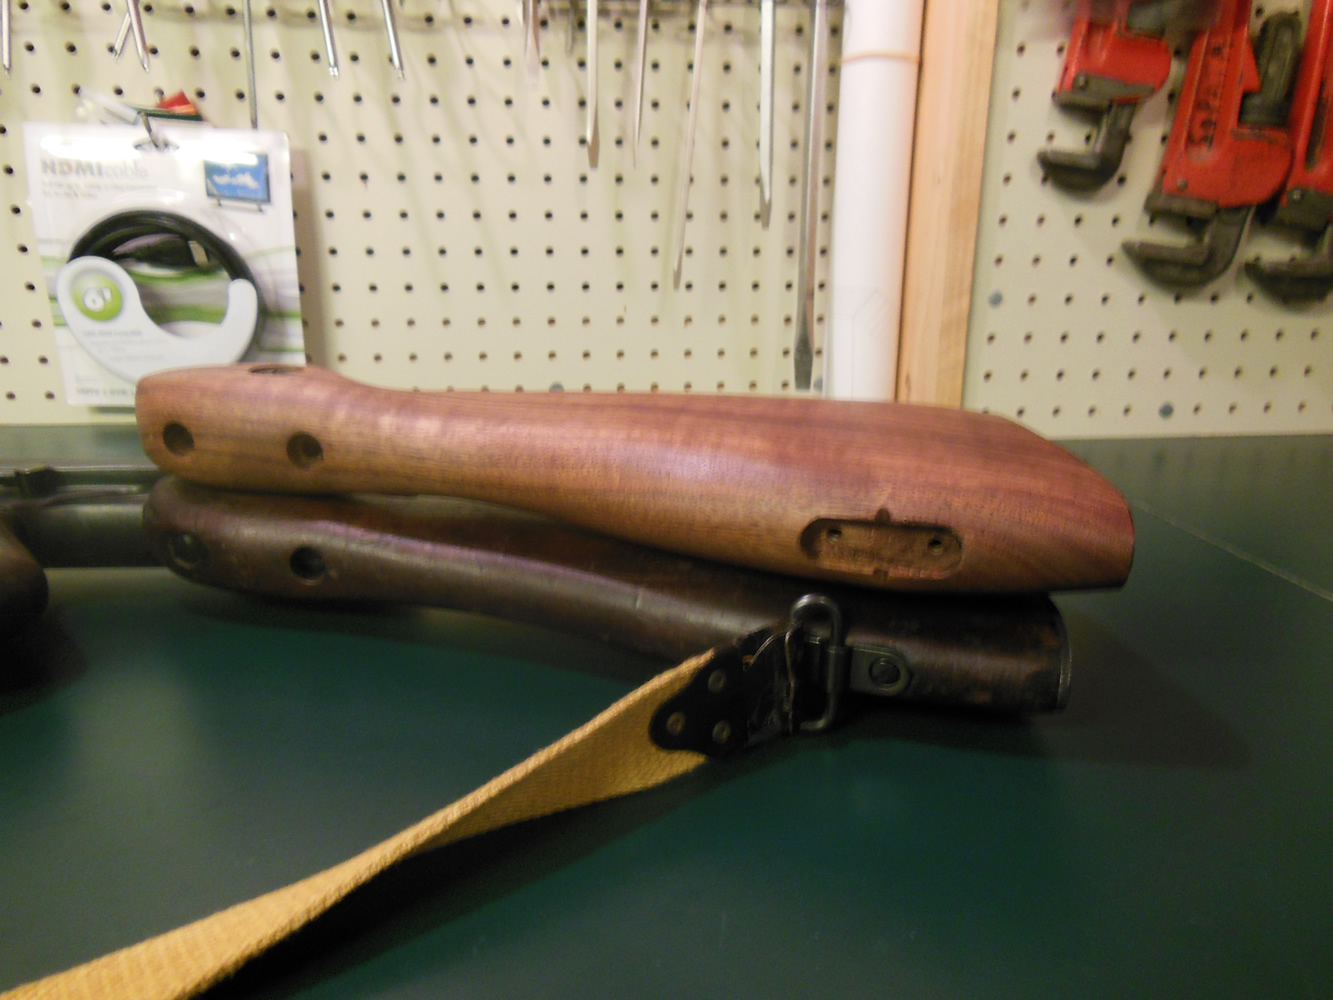
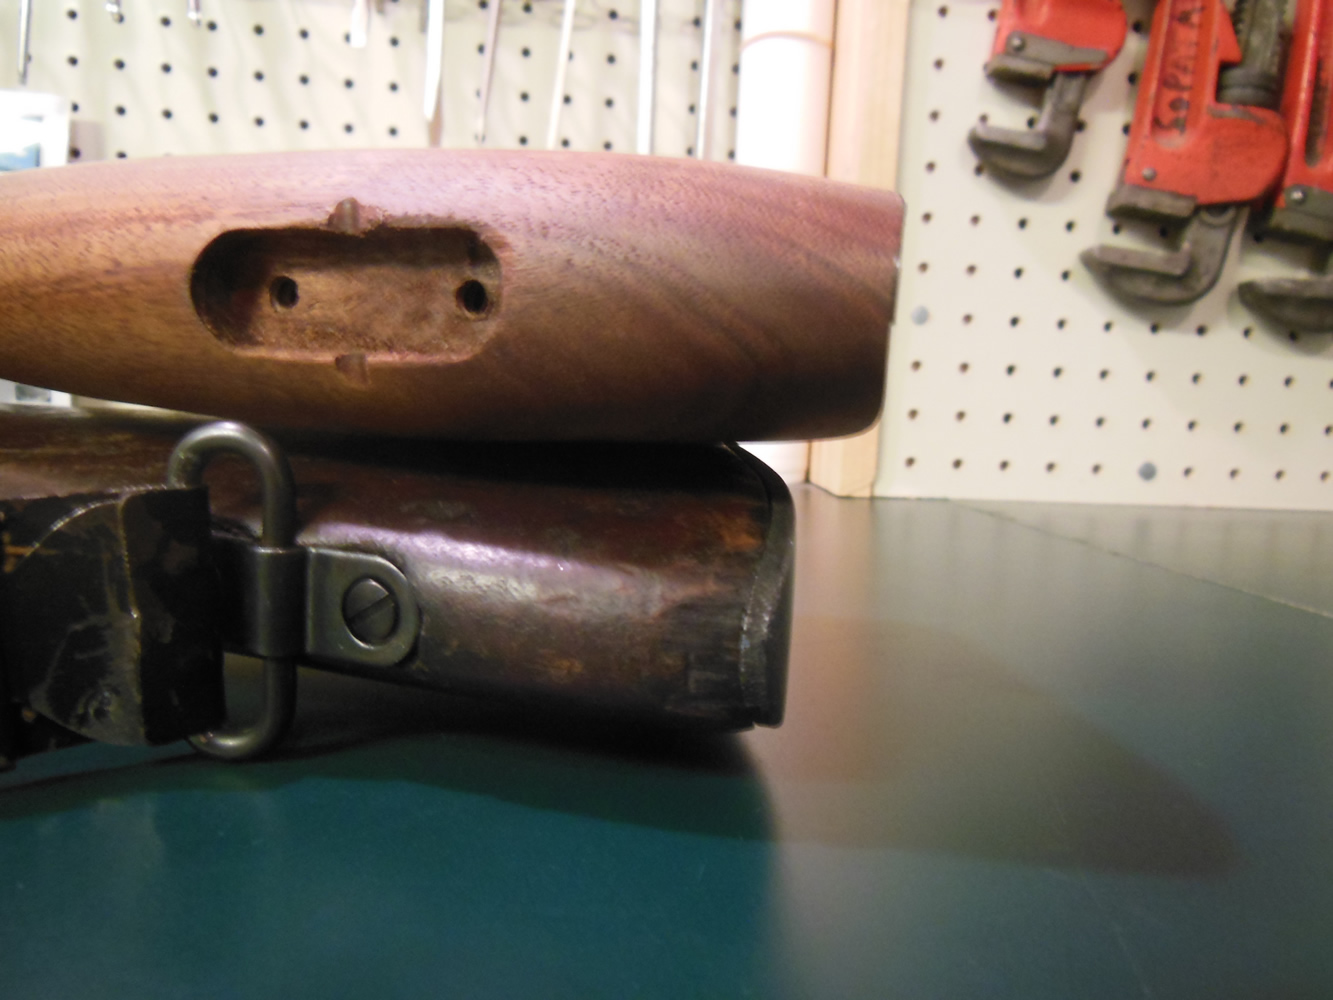
While very attractive as supplied from the factory, when compared to original USGI furniture, the new wood is significantly different in contour and size. Furhtermore, the new stock was not inletted for a GI type buttplate / trap.
With this, I choose to replace it; the picture above shows an original USGI stock and pistol grip on the gun. As of now I am still looking for an original fore grip to replace the one on the gun with.
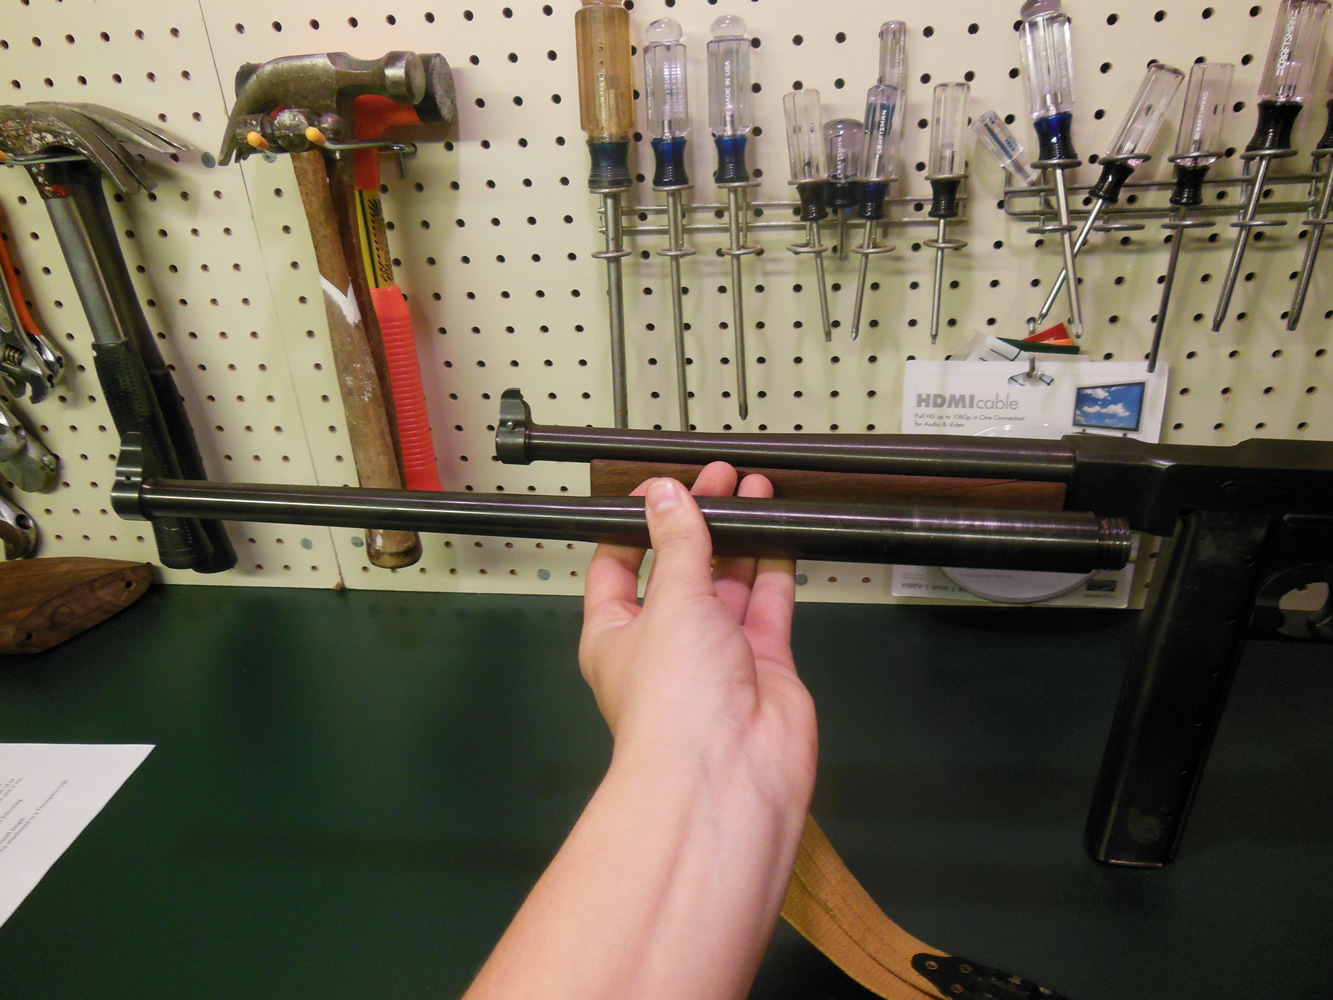
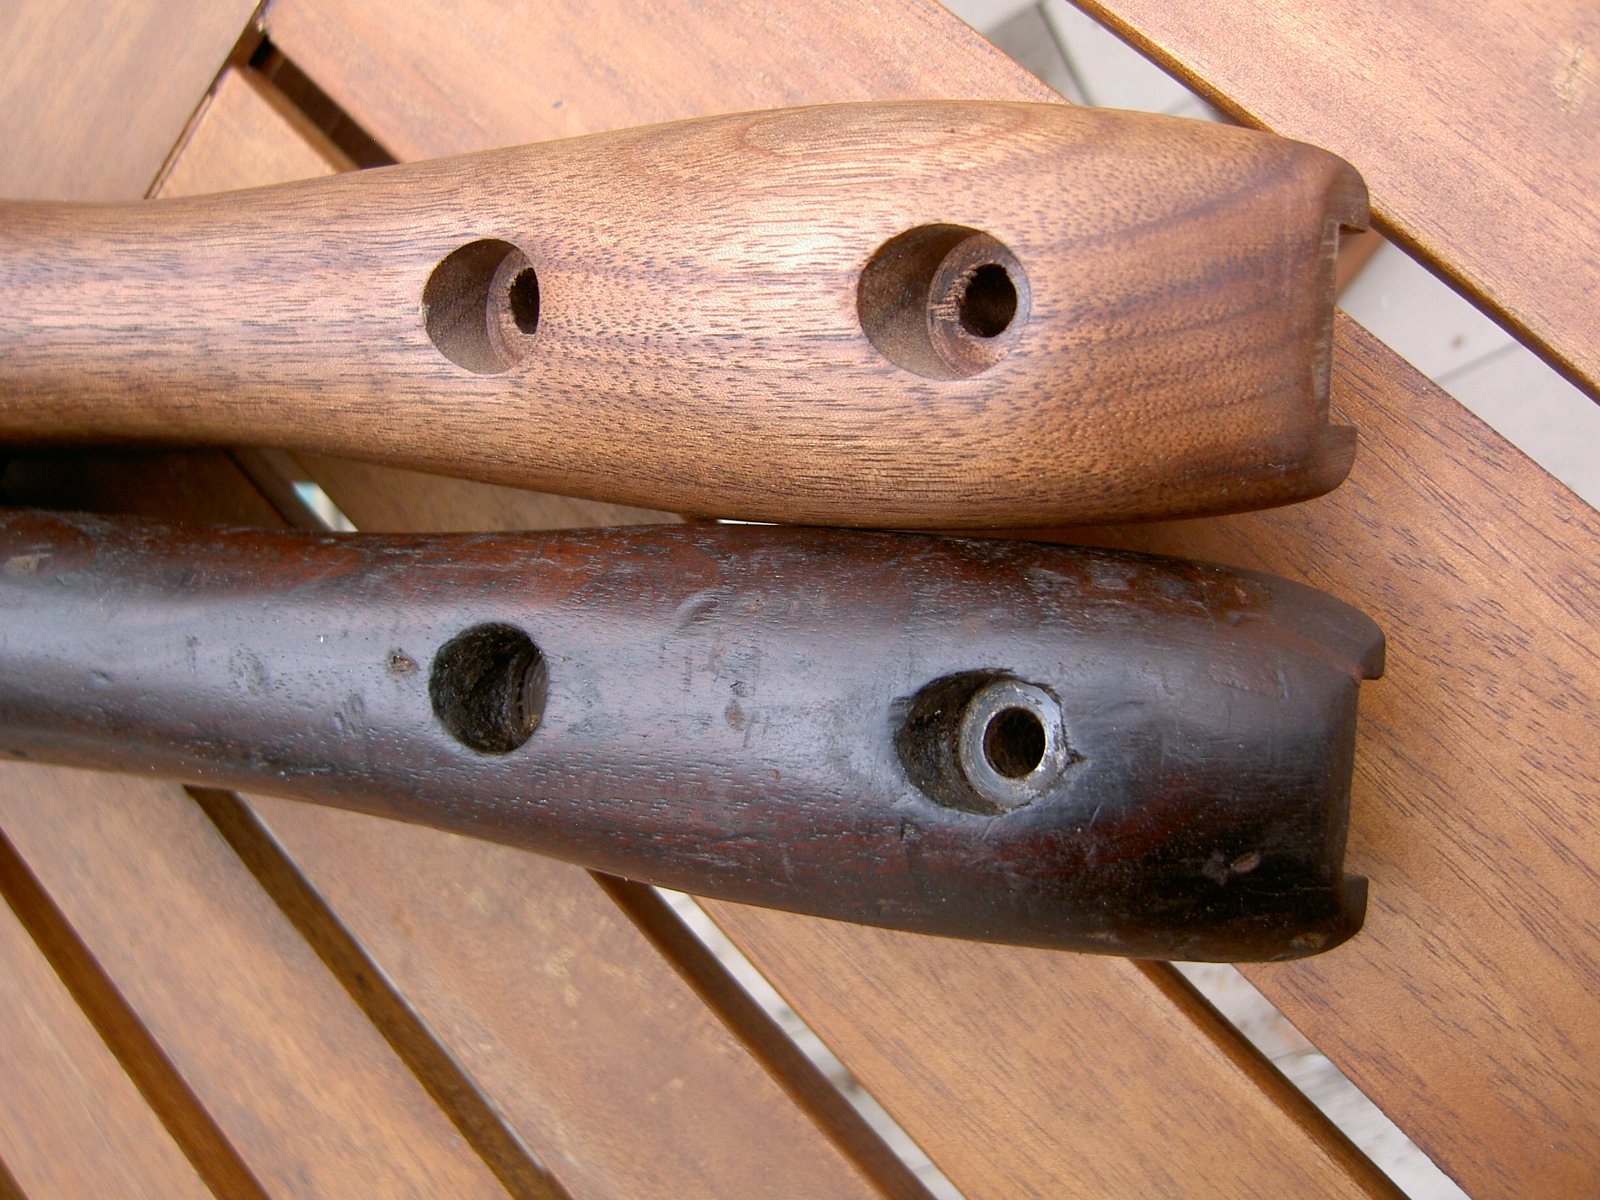
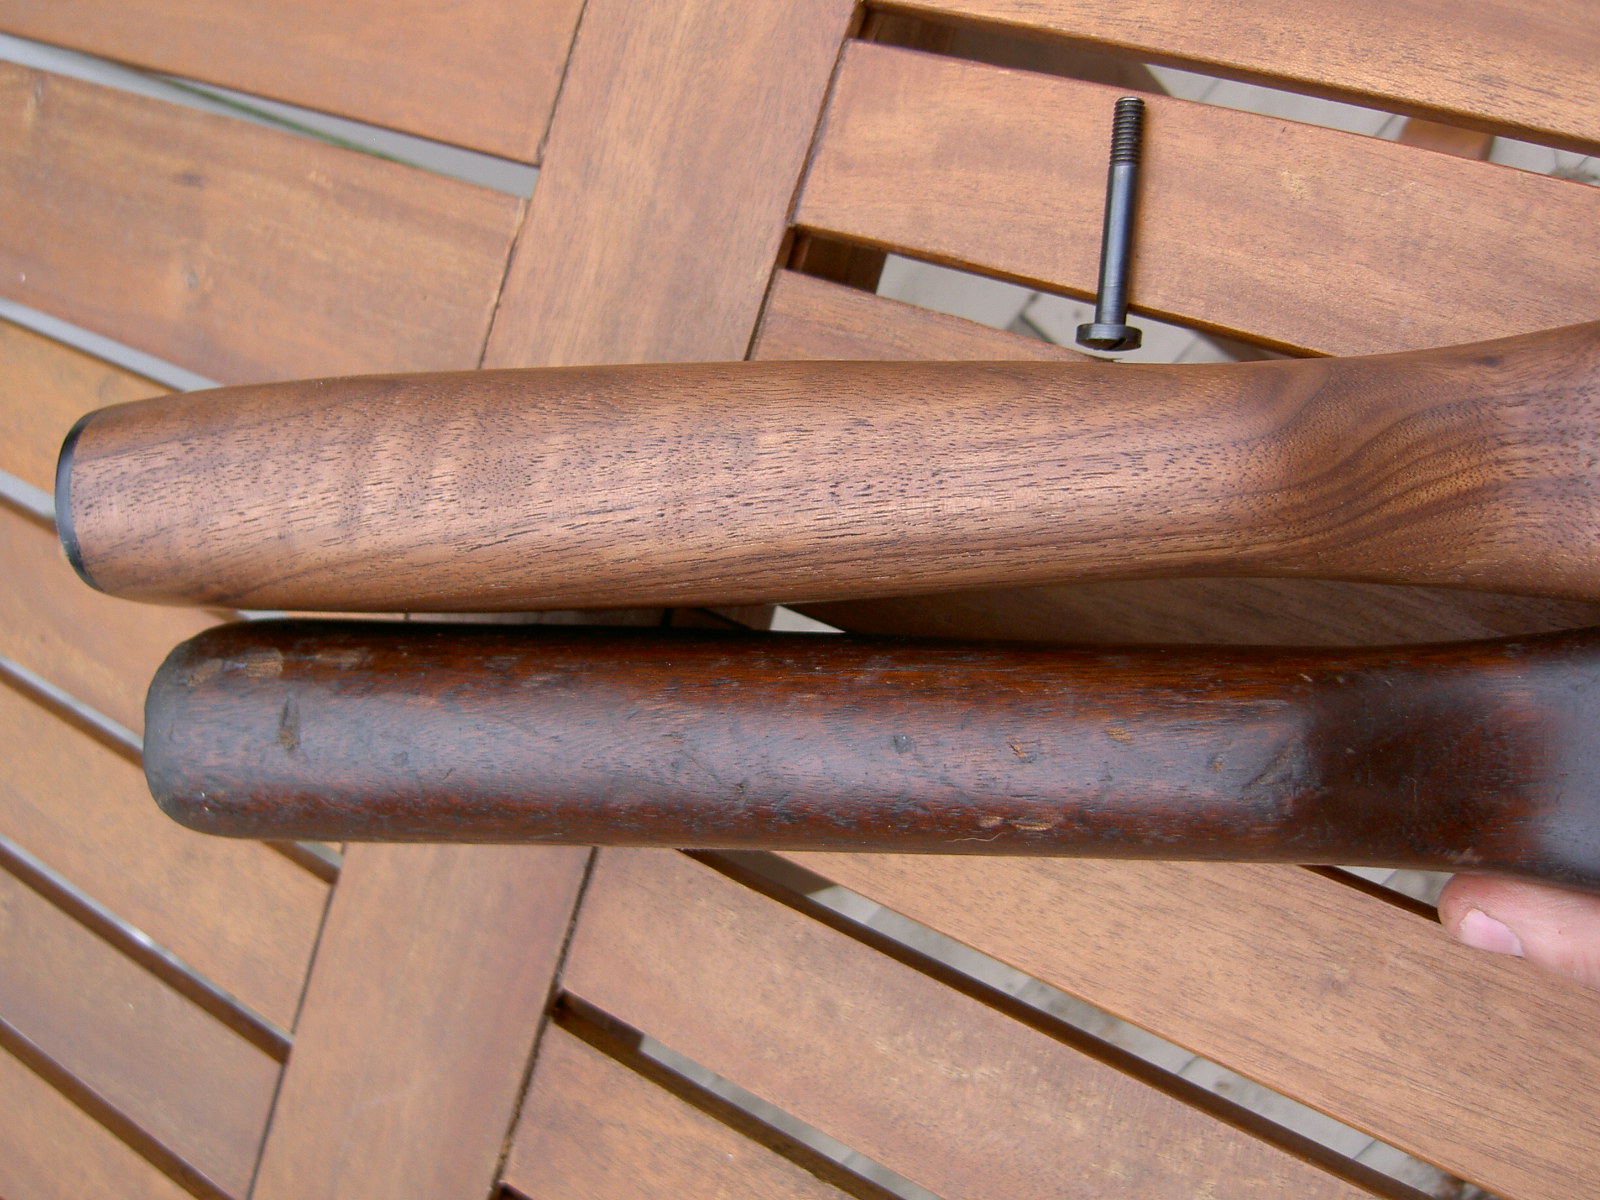
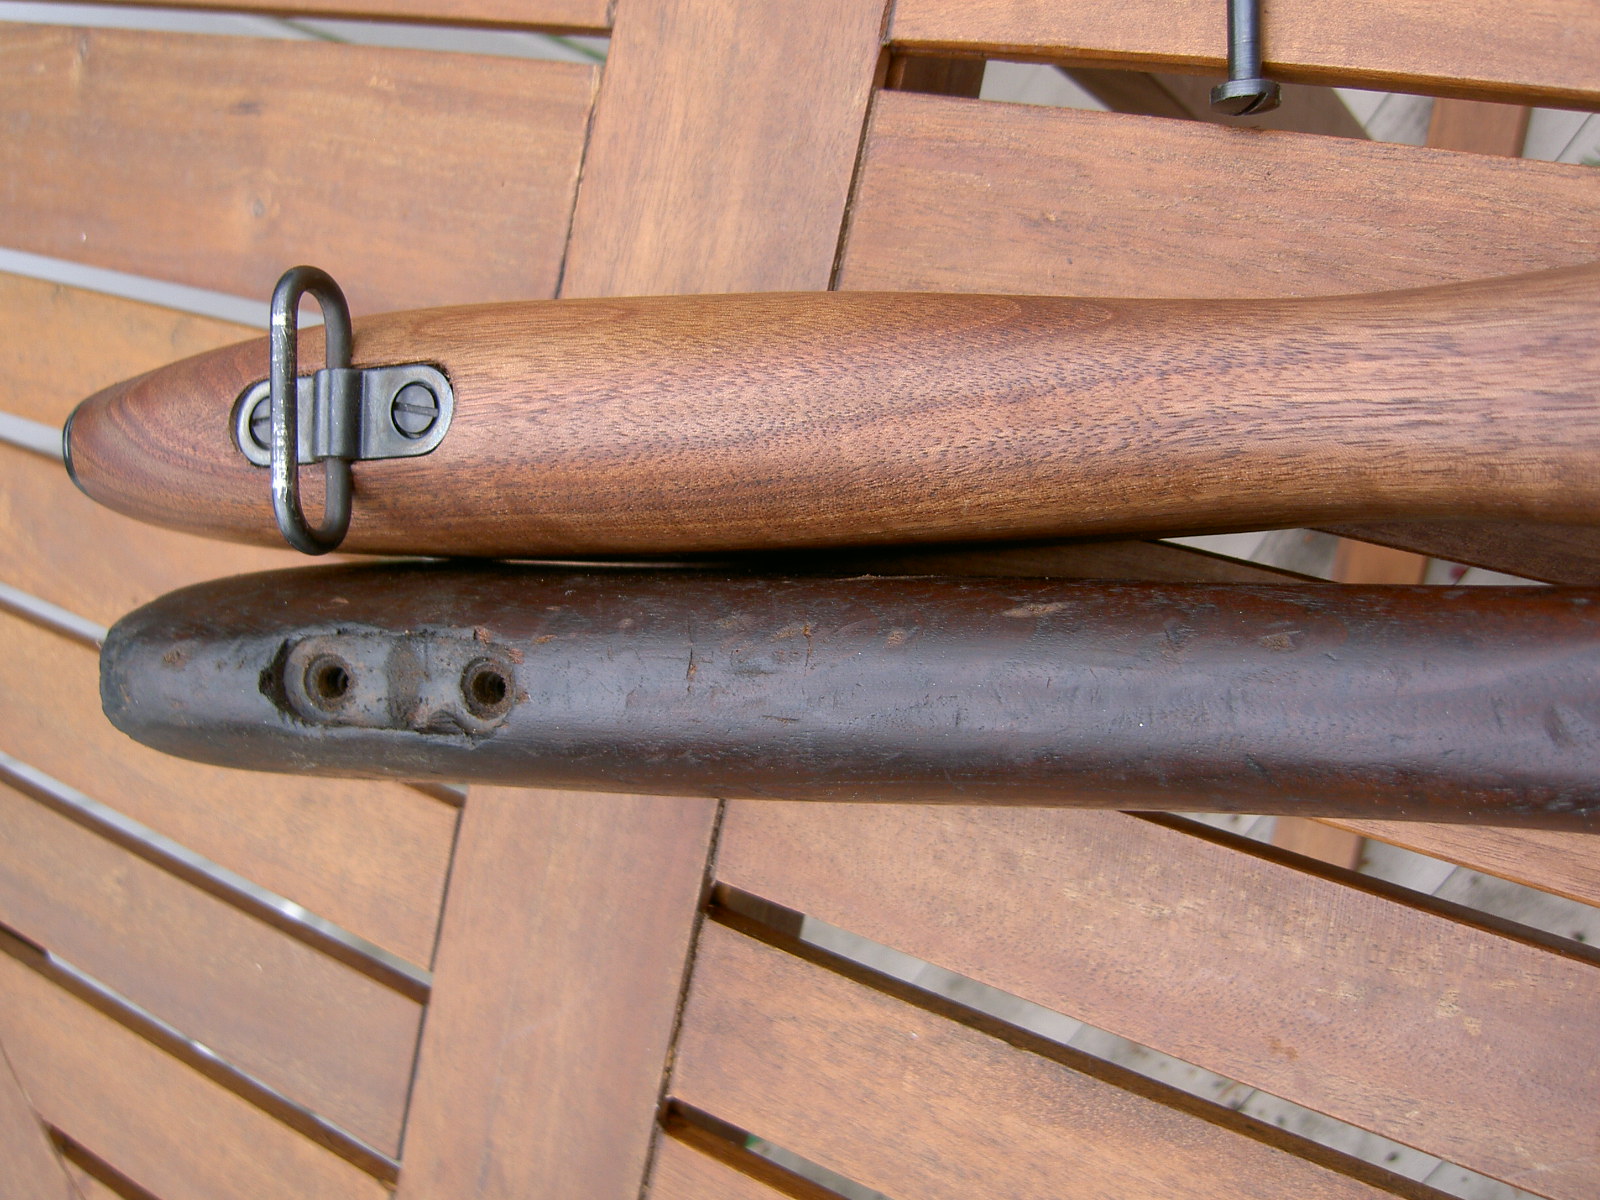
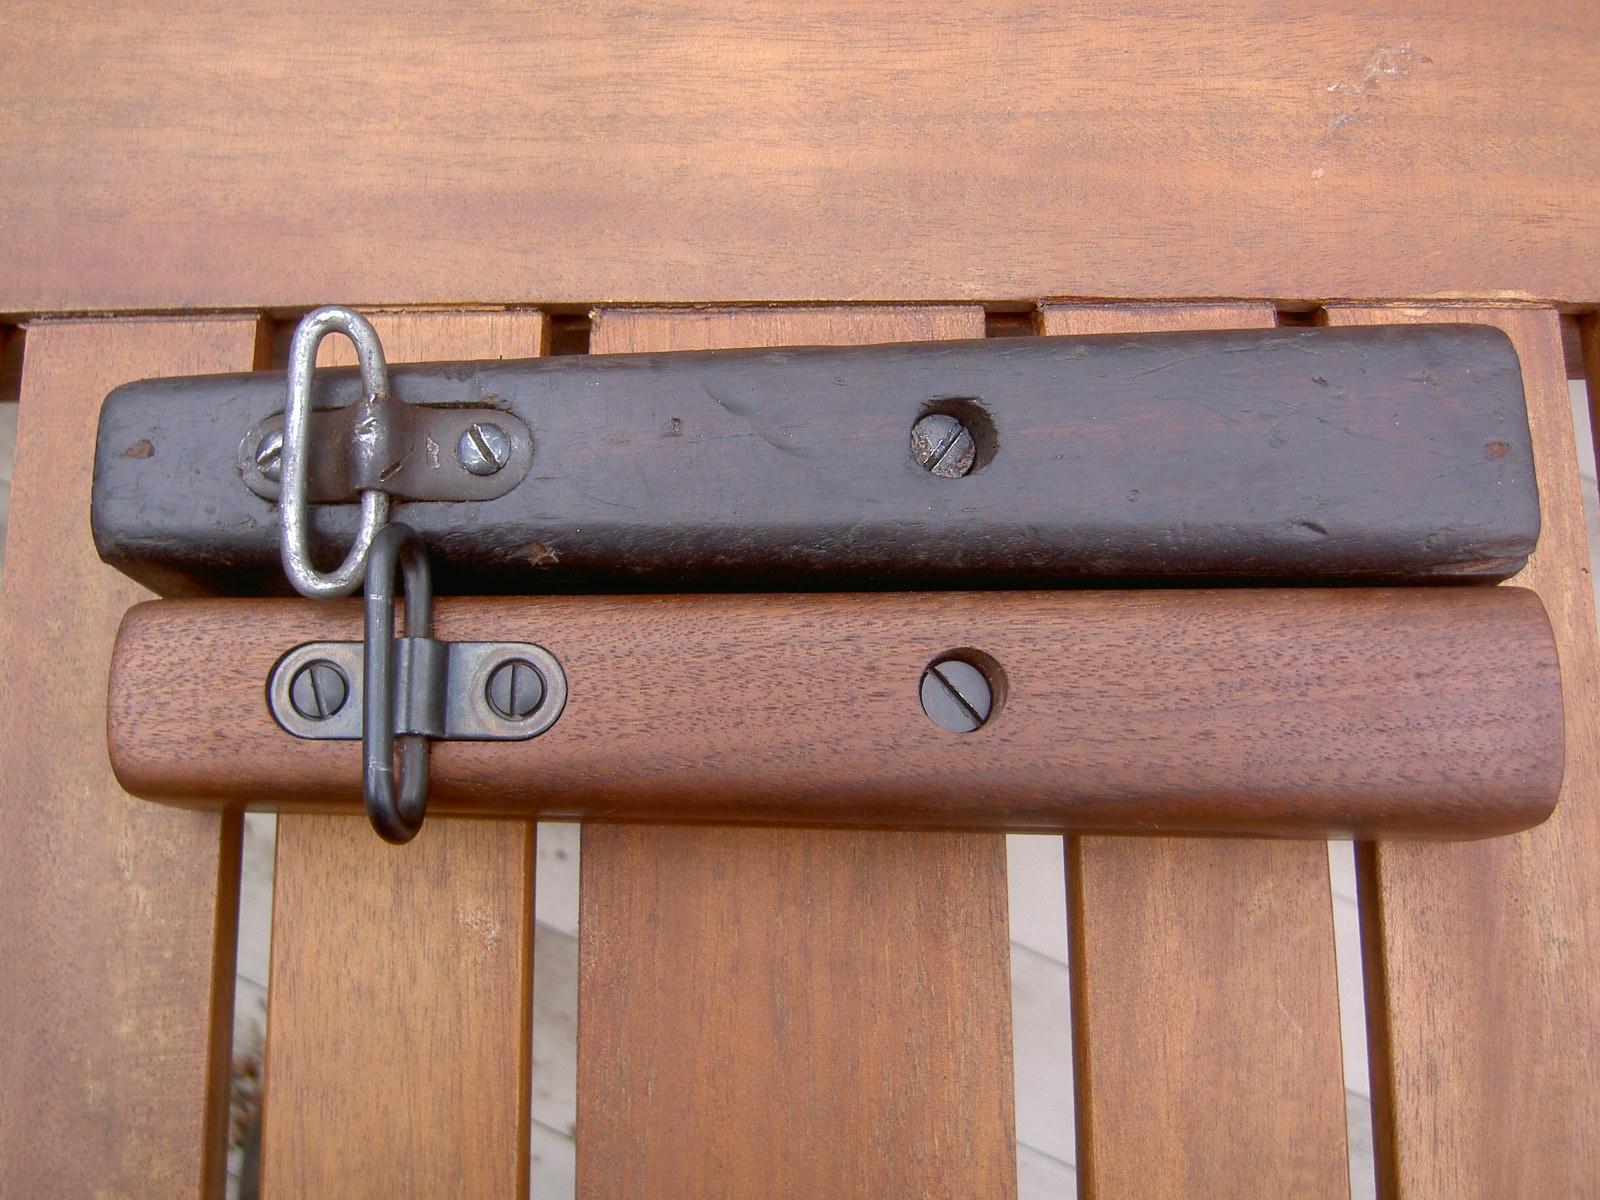
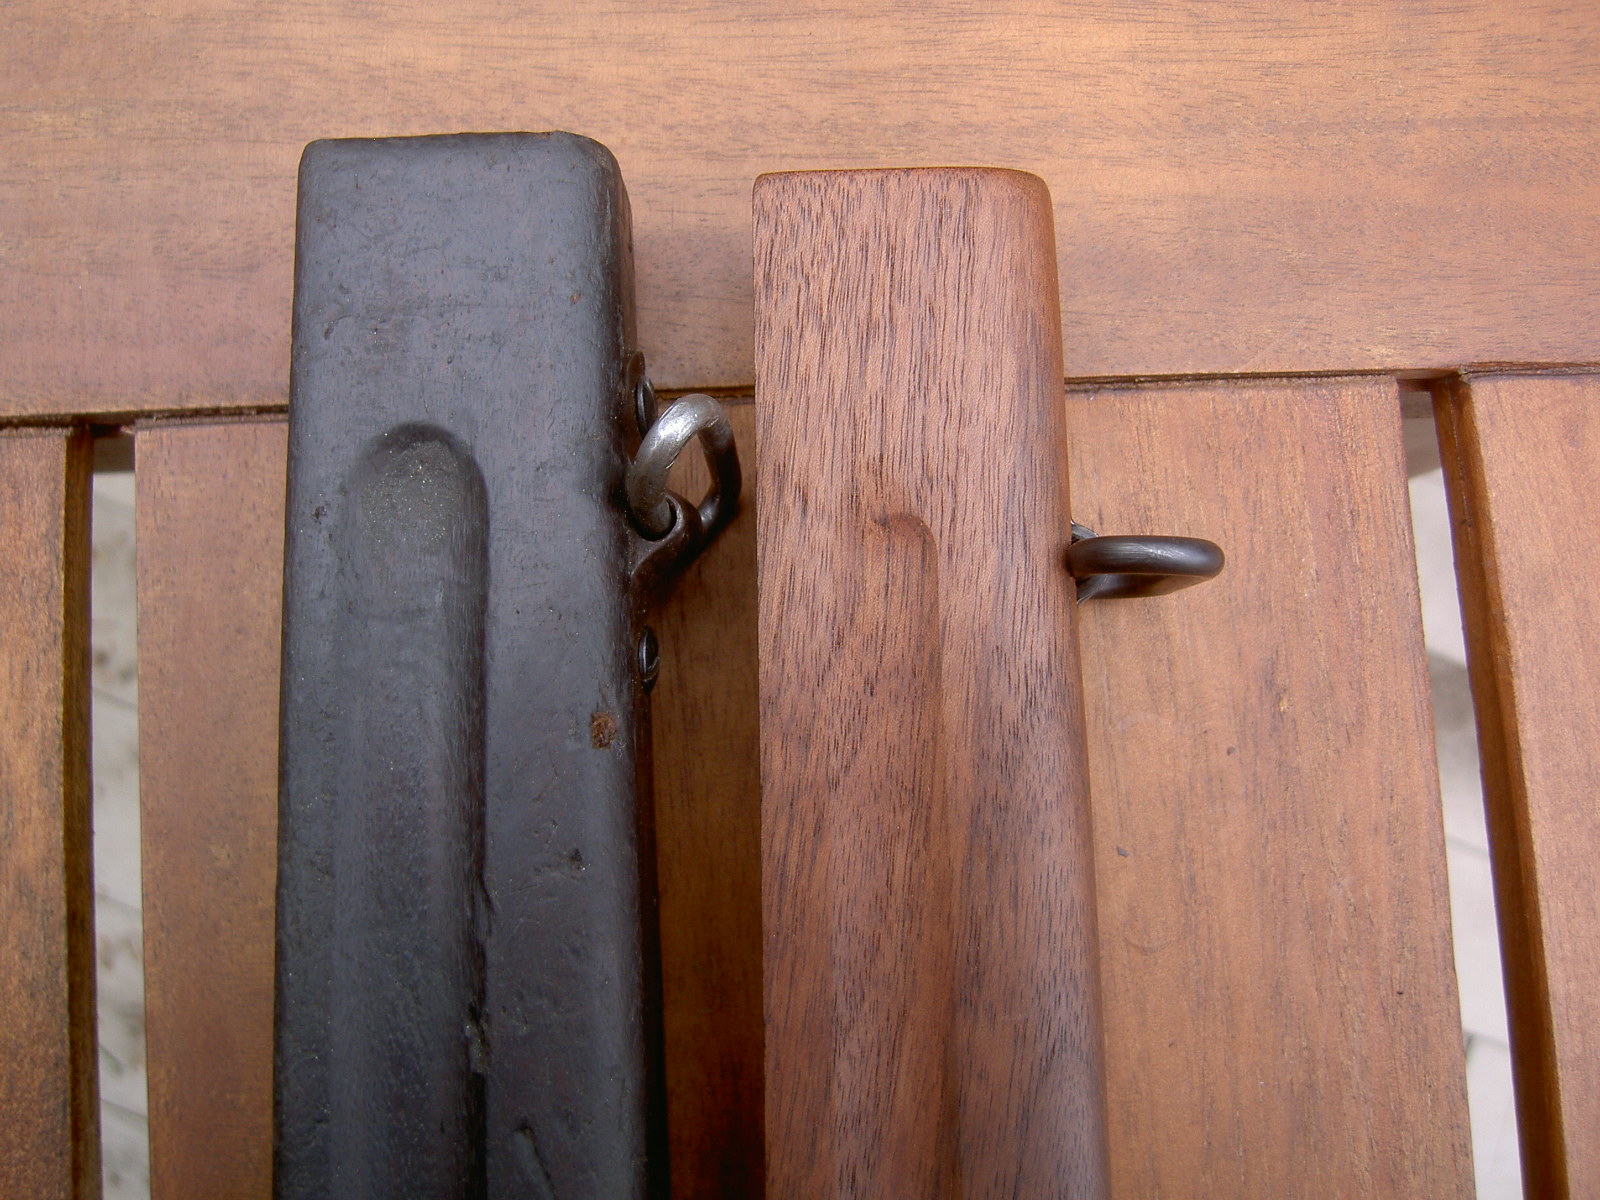
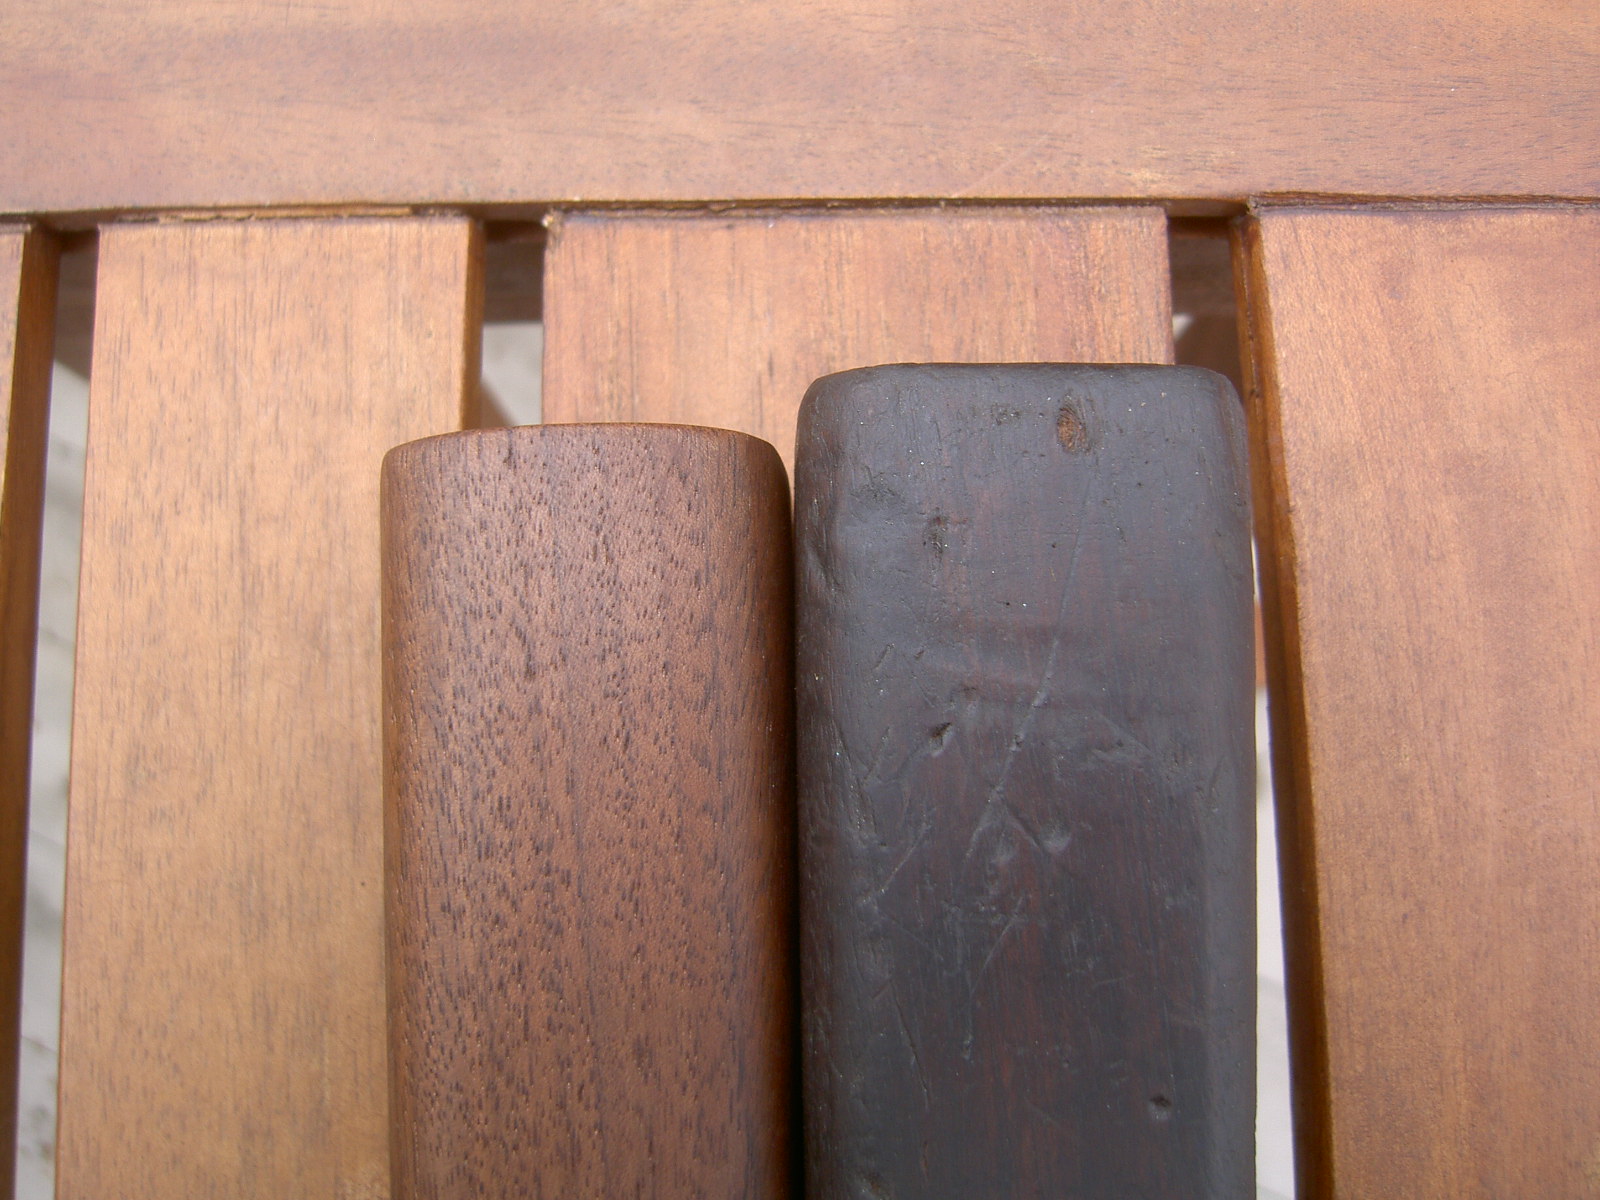
These pictures show the repro stock in comparison with the original. The reproduction that came with the gun is about ¾ inches longer than the original.
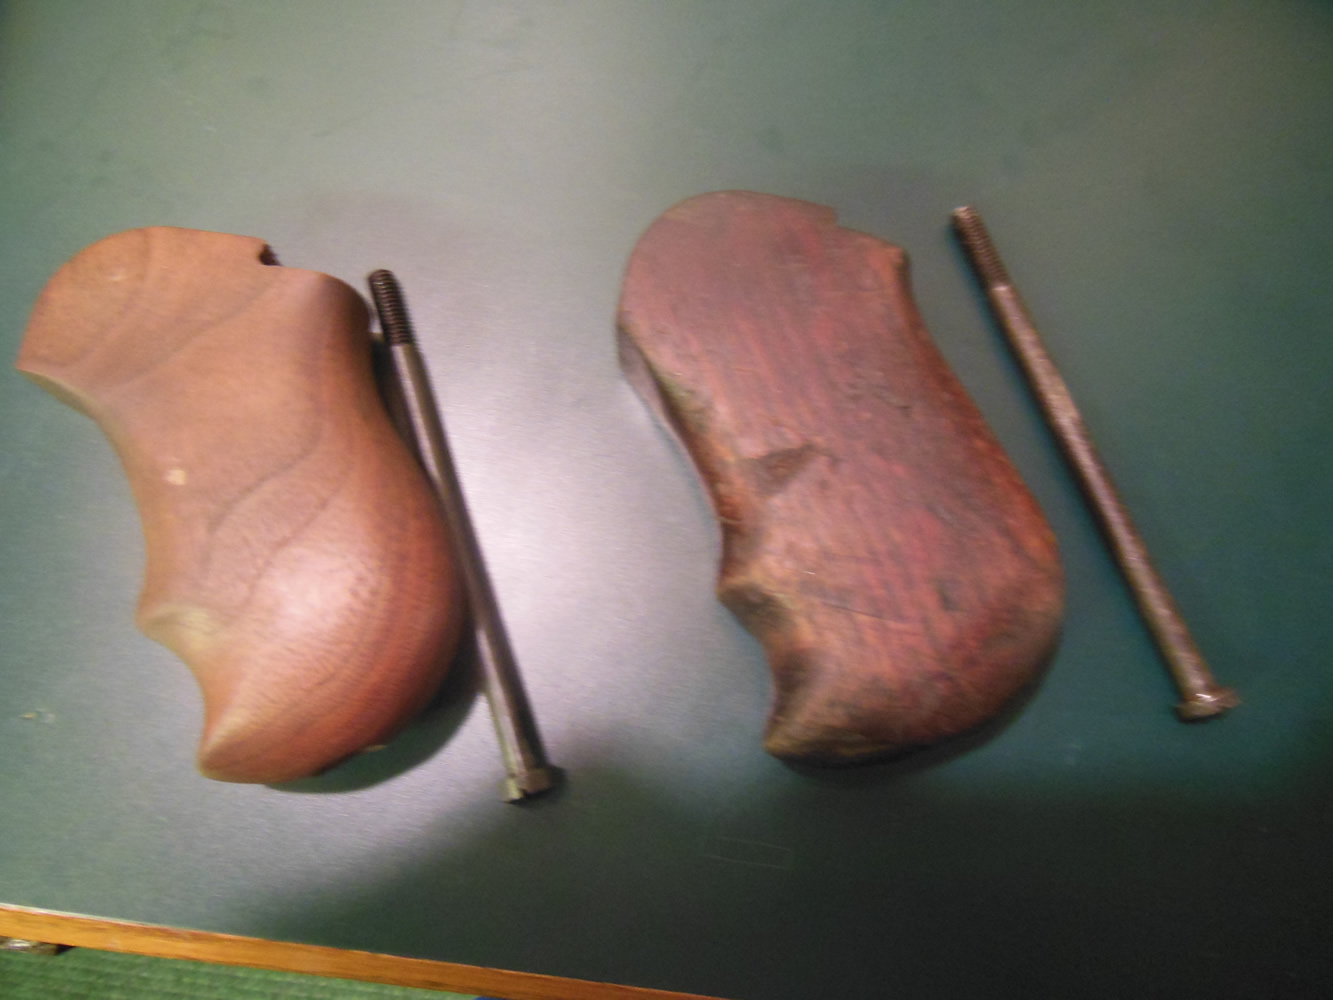
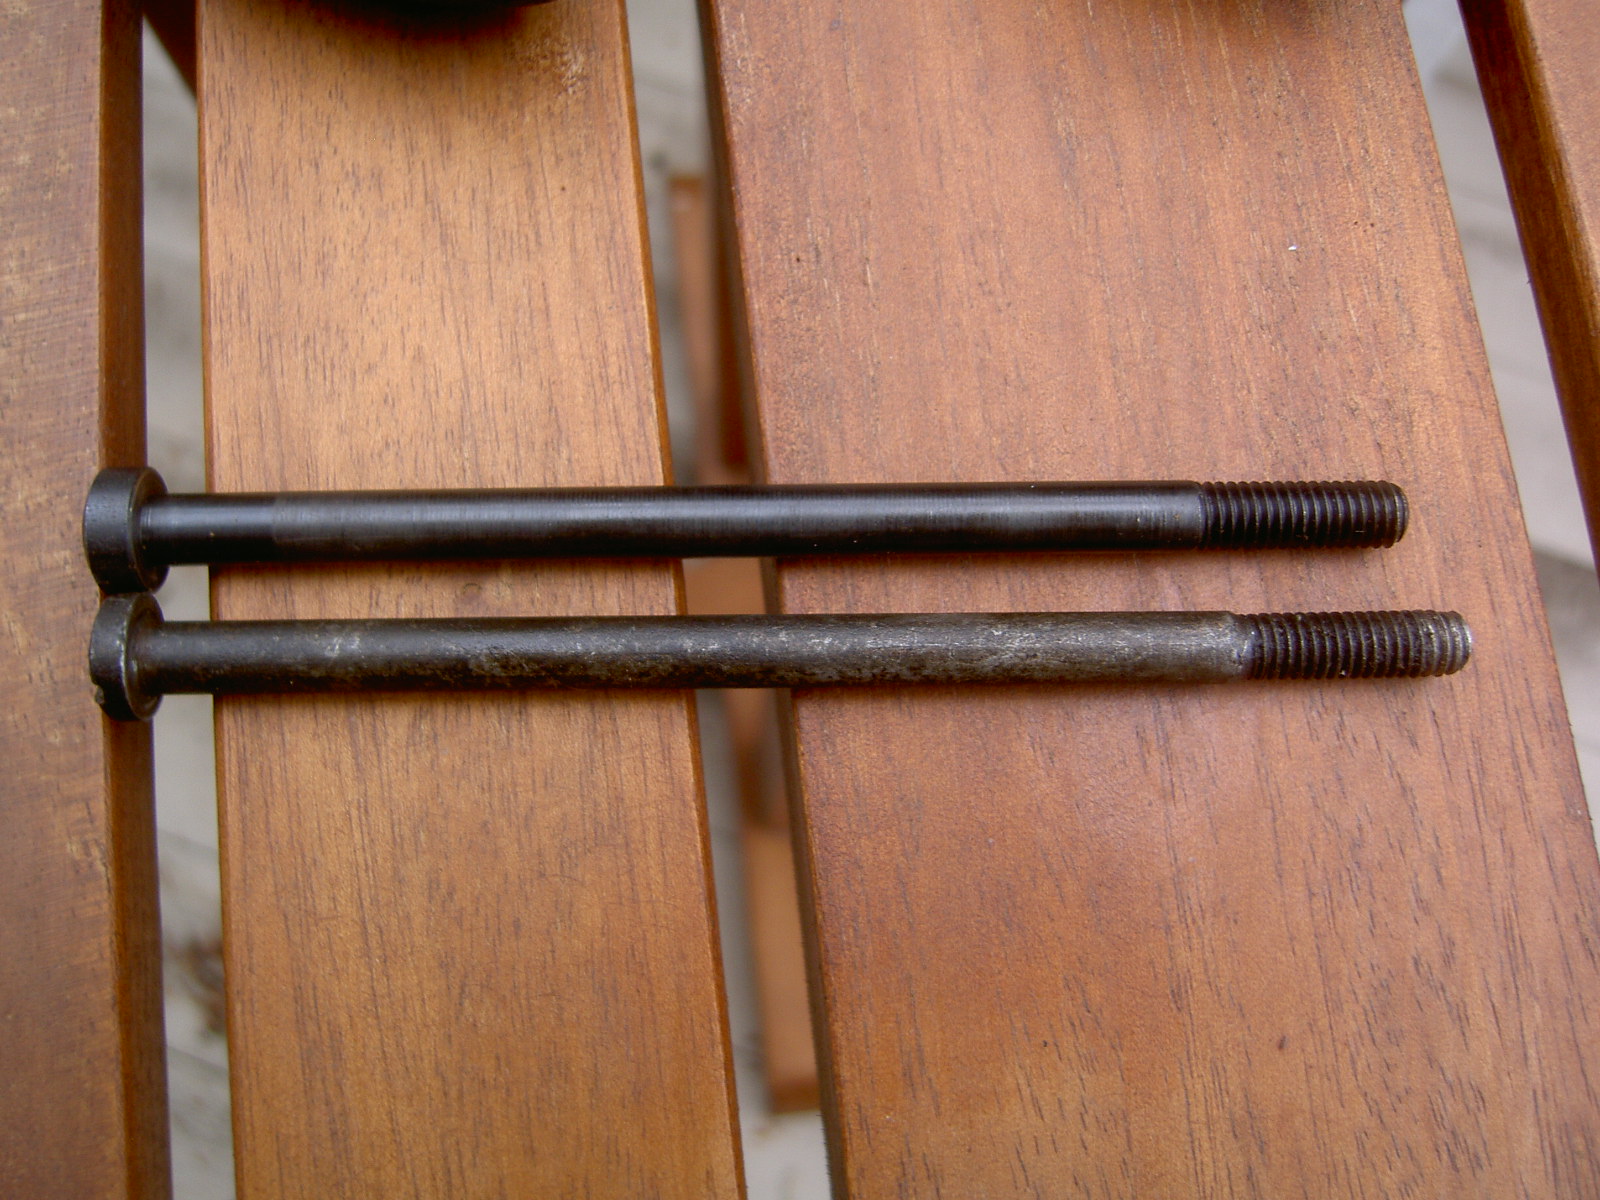
The repro pistol grip is smaller and more dramatically contoured than the original. The original is slightly longer than the repro, requiring a different length screw. Original pistol grip mount screws are longer than the repros, but conveniently they share the same thread.
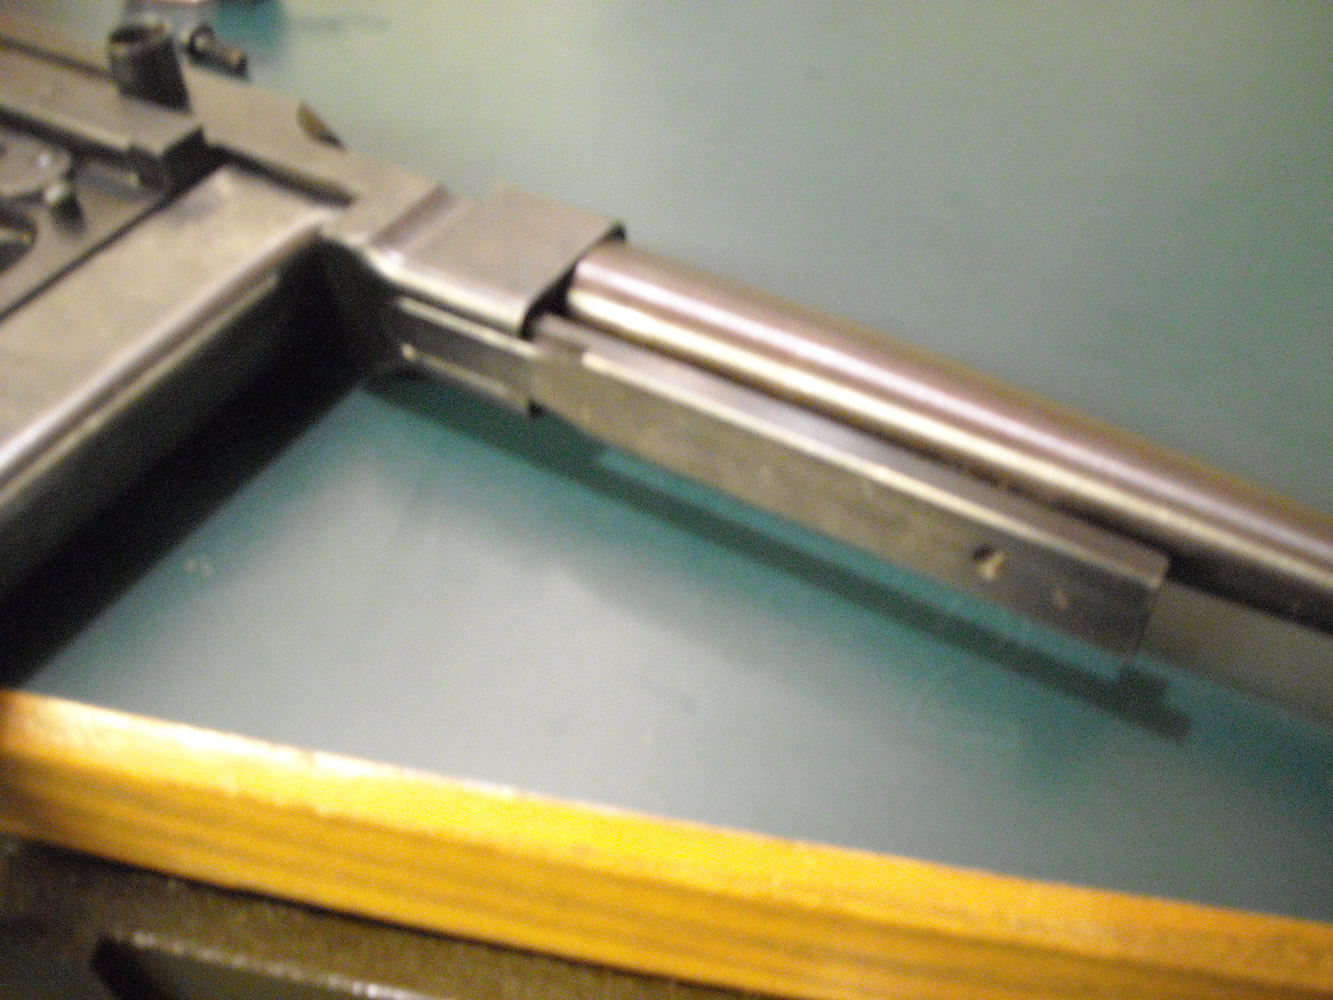
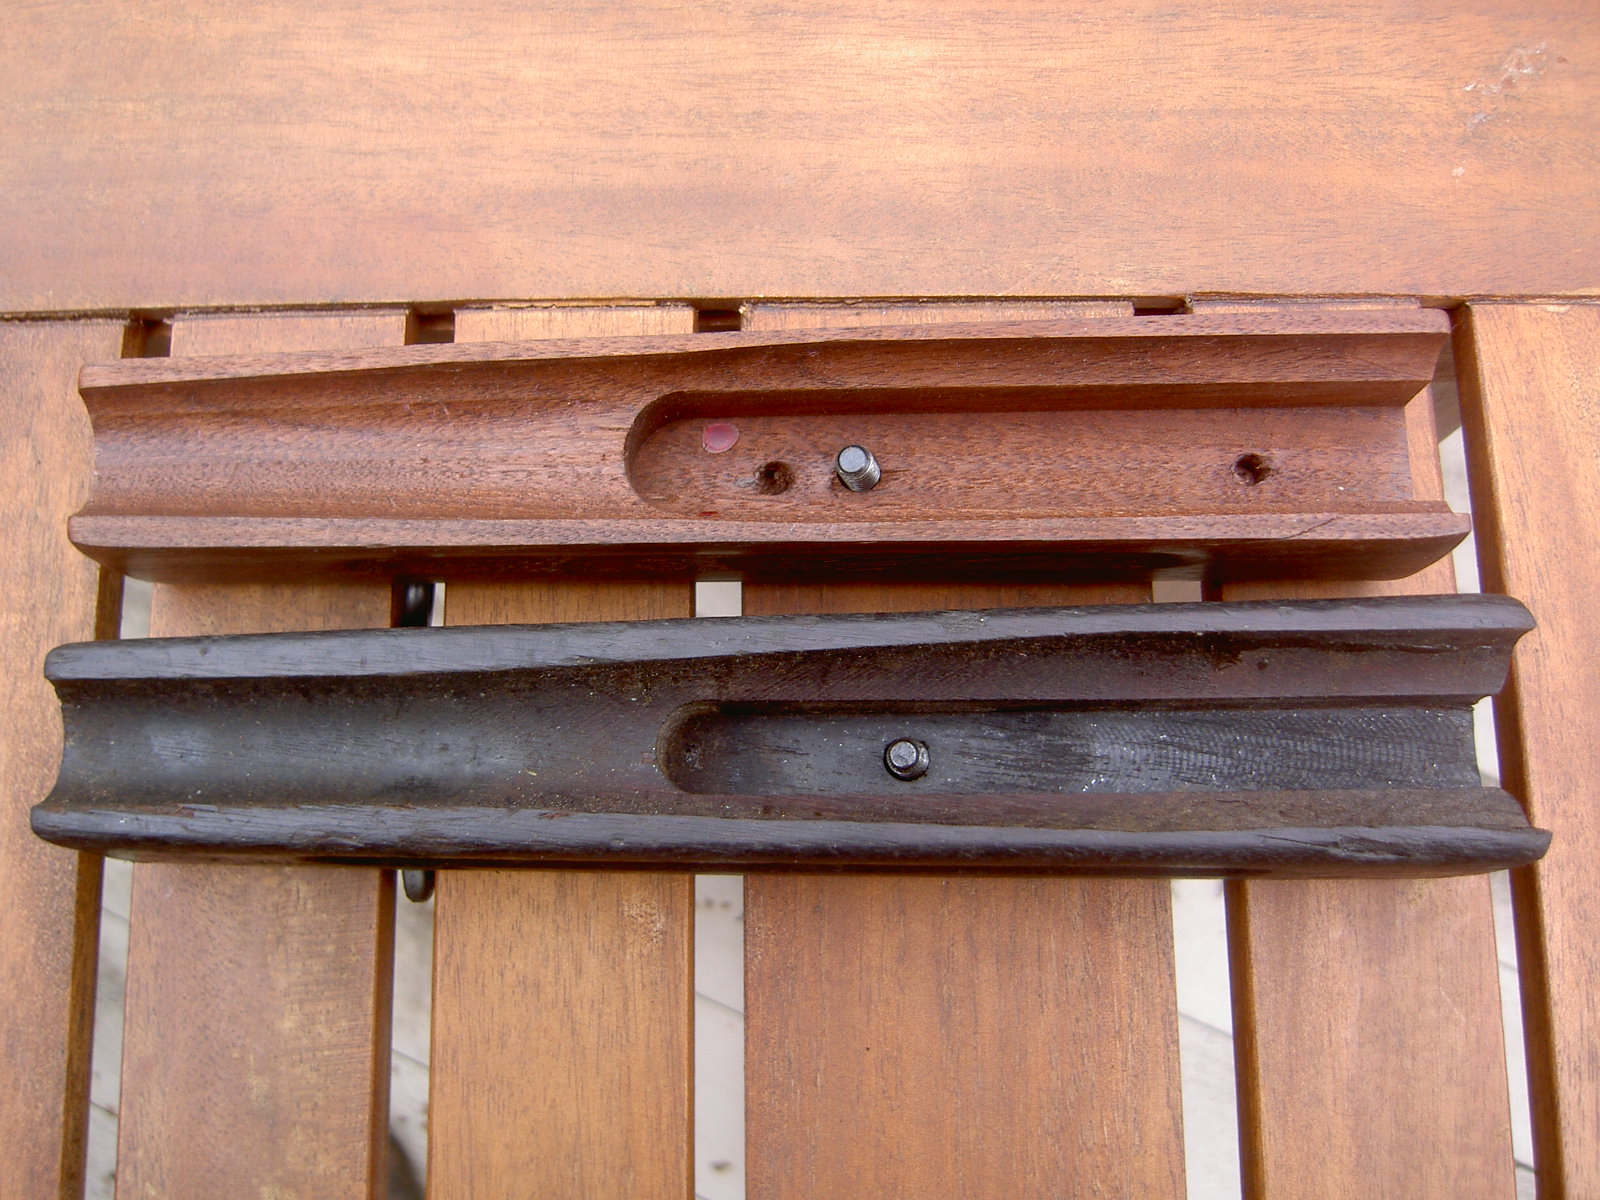
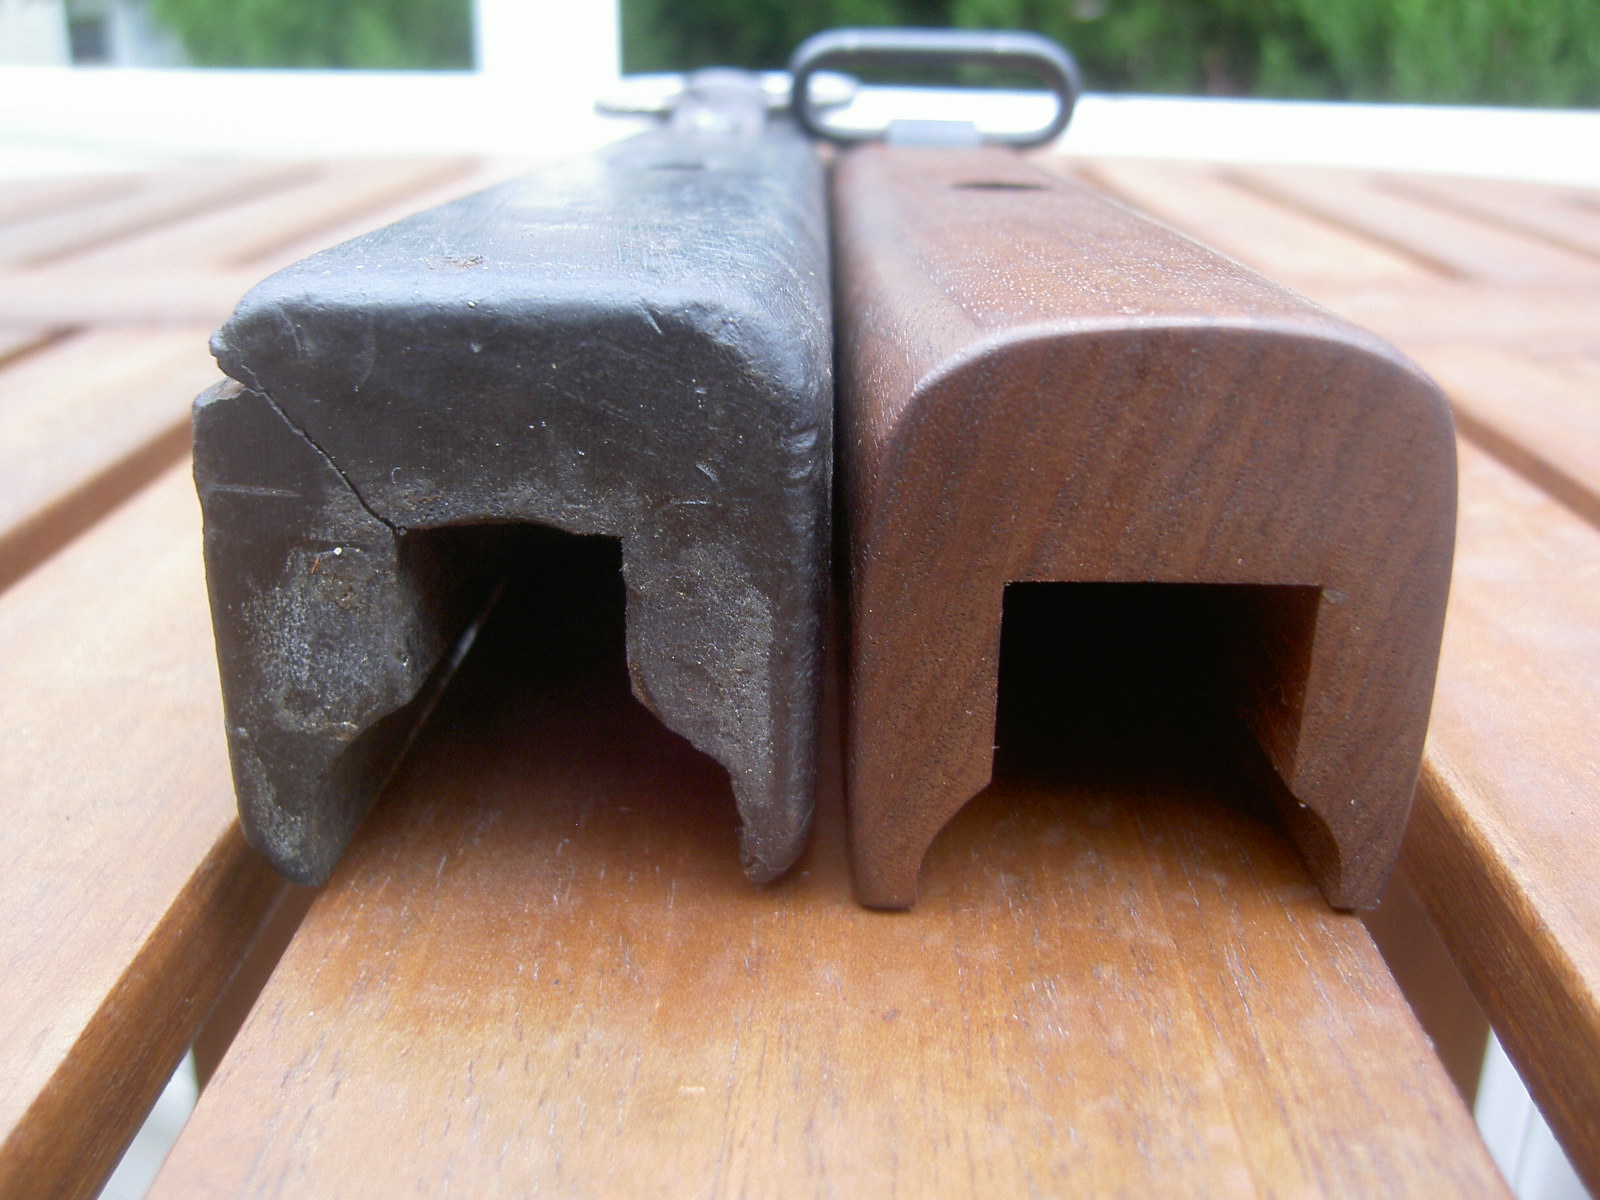
The original fore grips were held on a ½ inch mounting rail, where as the repros are held on a ¾ mounting rail. So, this means that the original fore grips will have to be modified for installation.
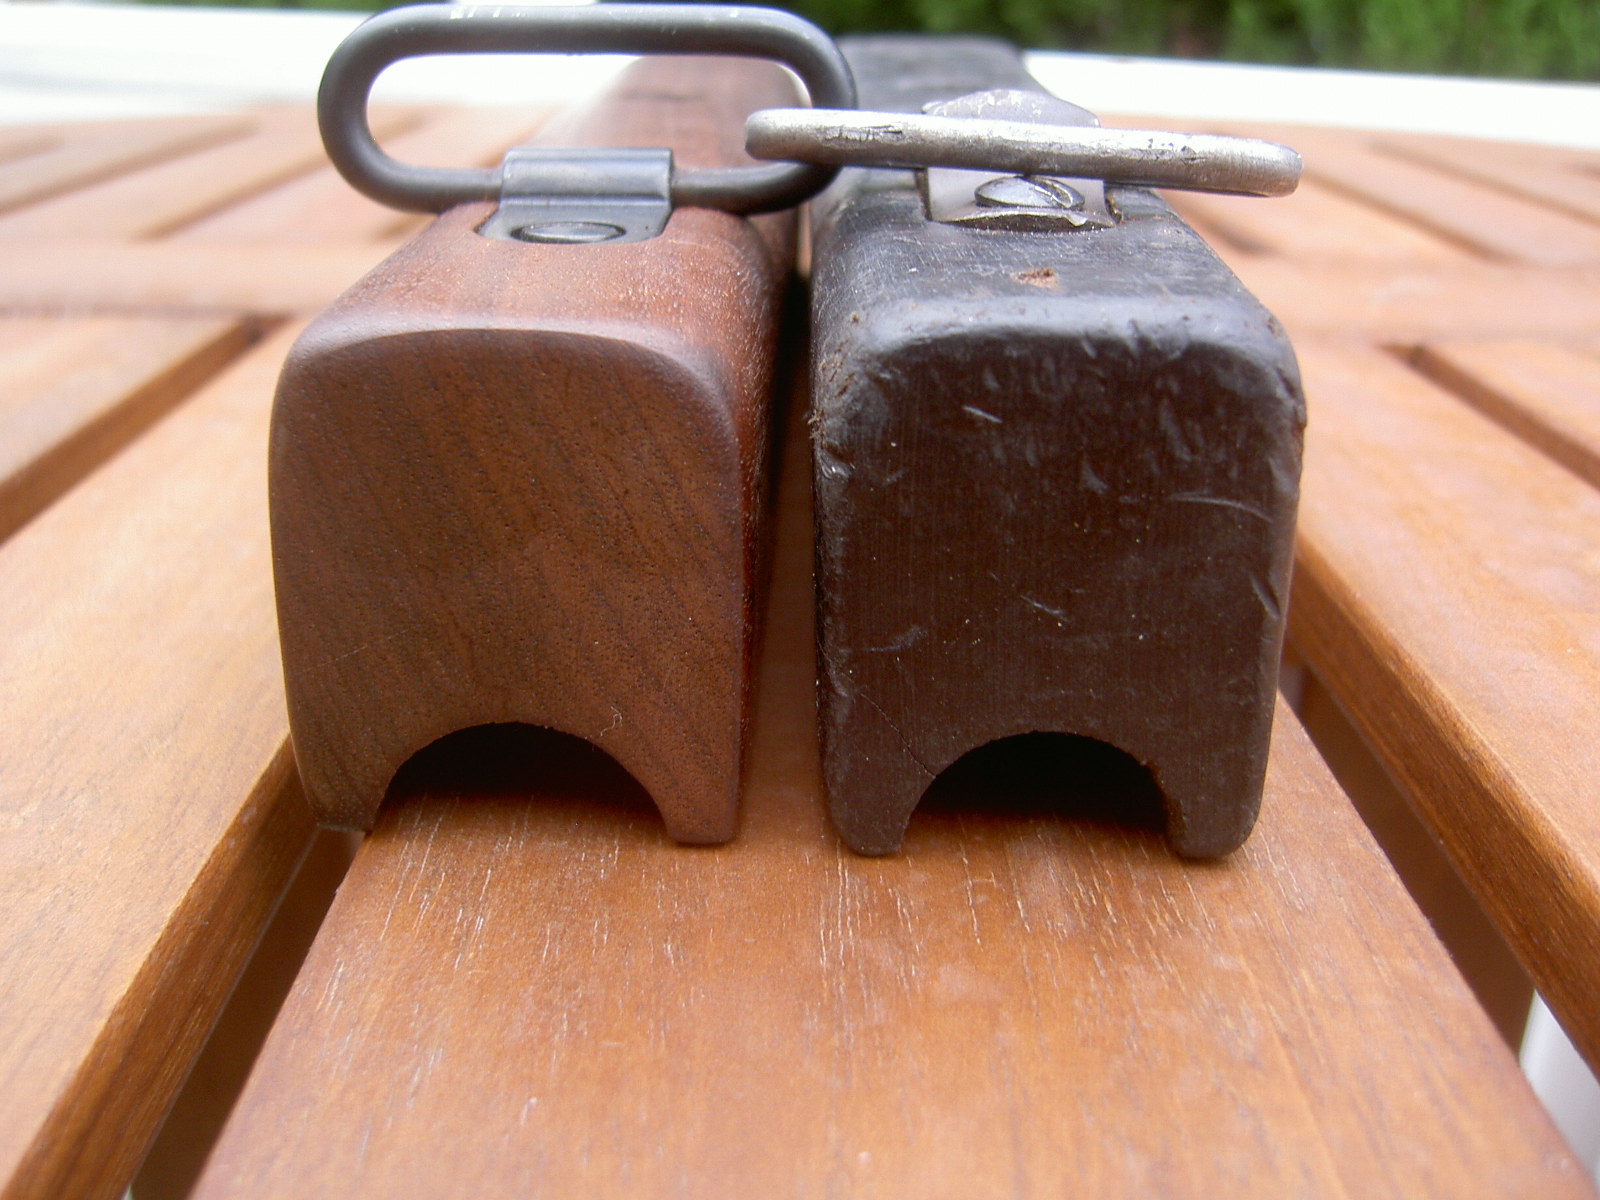
The foregrip itself as expected based on the stock and pistol grip, is quite different than the original. It is smaller overall, the grasping groove is profiled differently, and fits differently when installed.
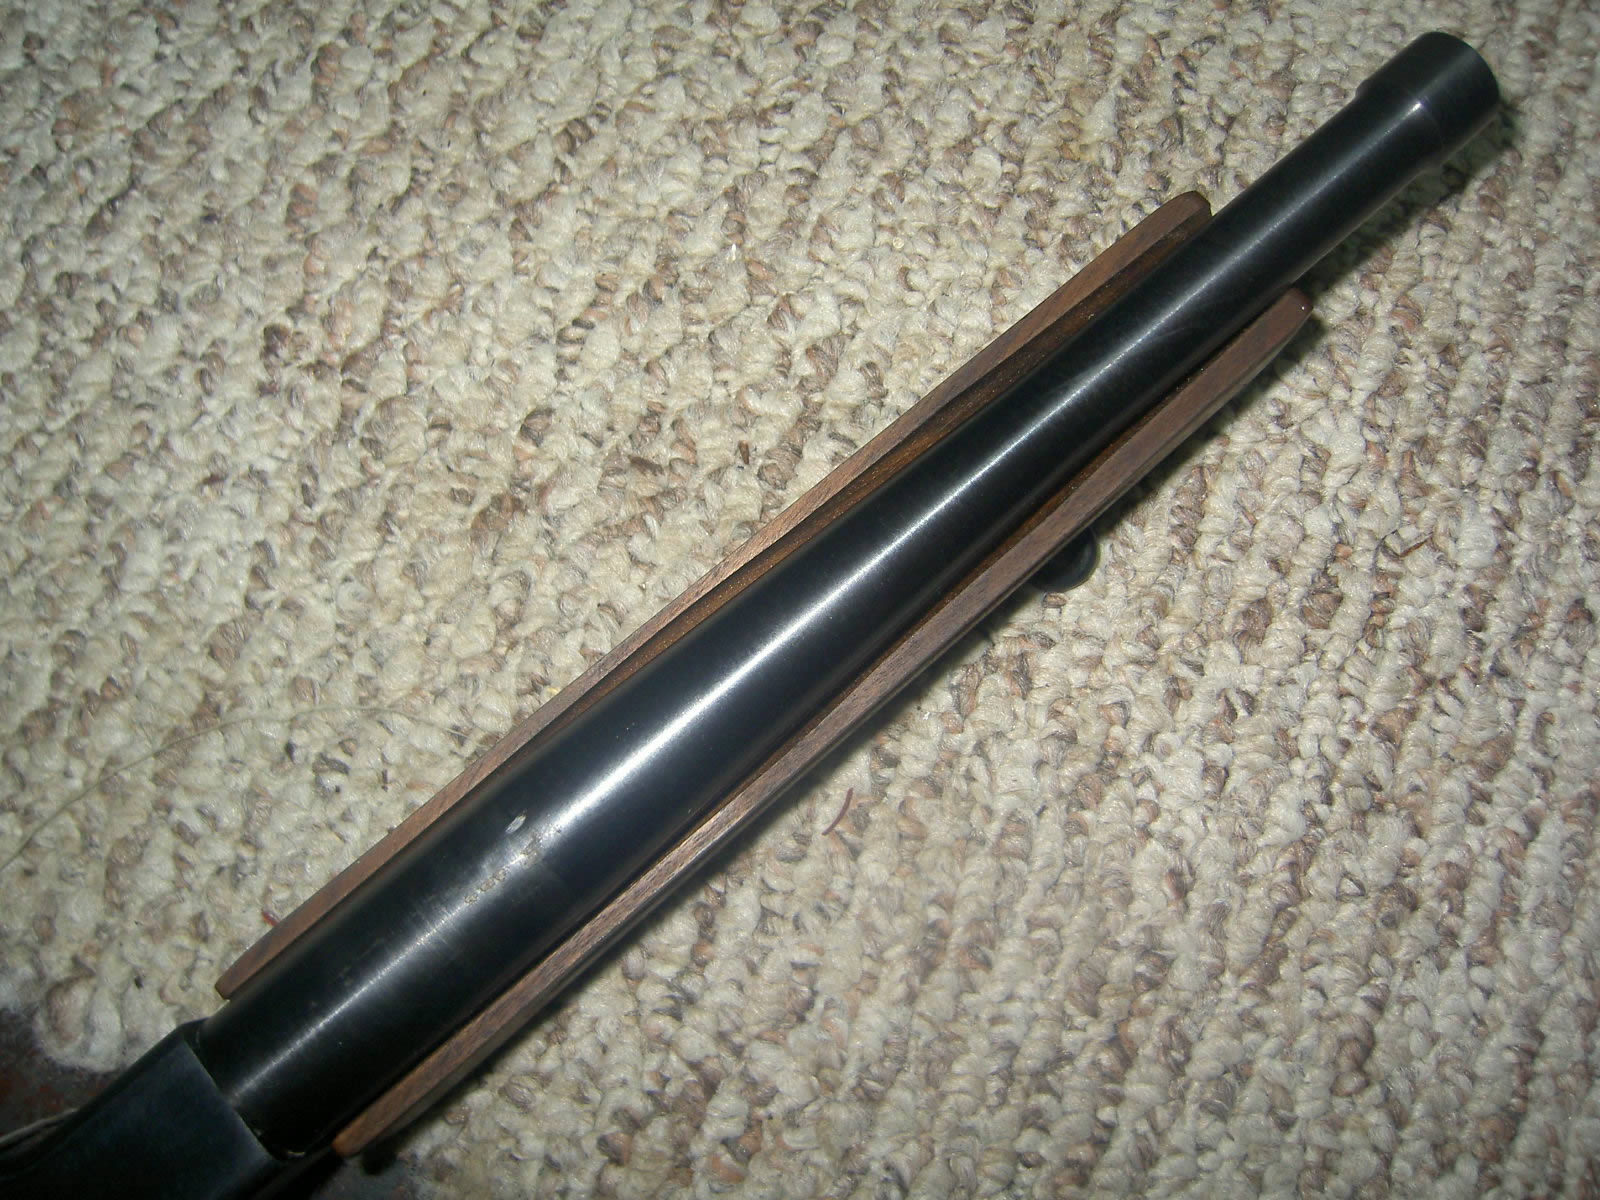
The 16 inch barrel has a totally different profile than a GI contour 10.5 inch barrel. Therefore, the new foregrip is cut for the larger 16 inch profile, leaving a significant gap when the 10.5 inch barrel is installed.
Operation:
The Semi Auto Thompson fires from the closed bolt. The bolt is significantly different internally from the original due to the striker design.
Like a modern pistol or even a 1911, the bolt locks open when the last round is fired, clearly indicating when the magazine is empty, also it makes a mag change to be faster and easier.
Pulling the bolt back does require some brute strength-It is hard, but not impossible -there are three springs in the bolt versus one on the original. I don’t like it, but will have to deal with it.
Field Stripping-
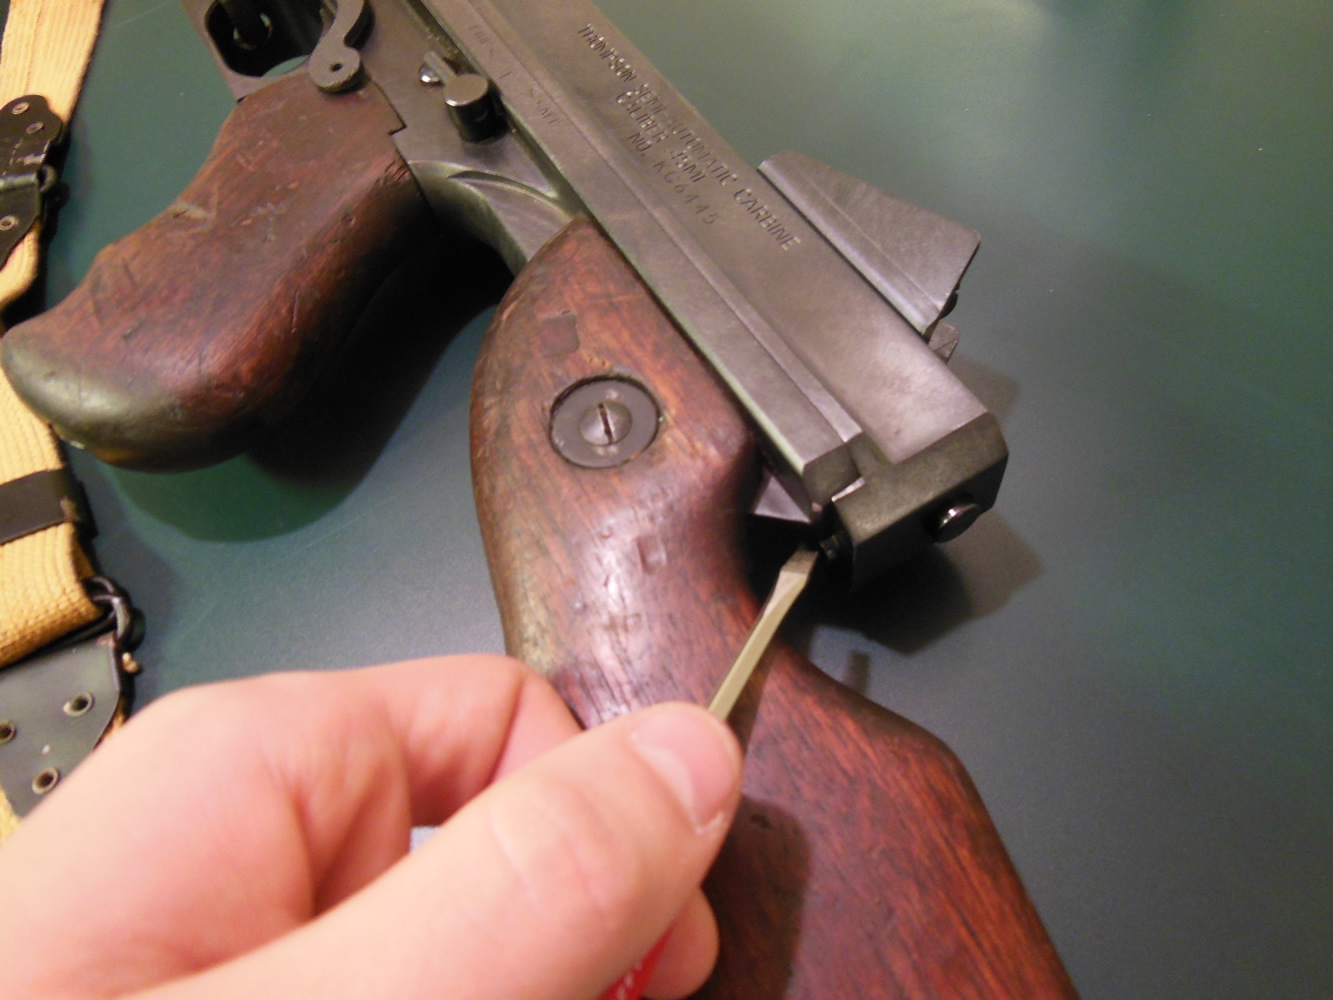
Step 1- I utilized my small screwdriver to push up on the retaining pin on the back of the receiver. This would be the first step in the original.
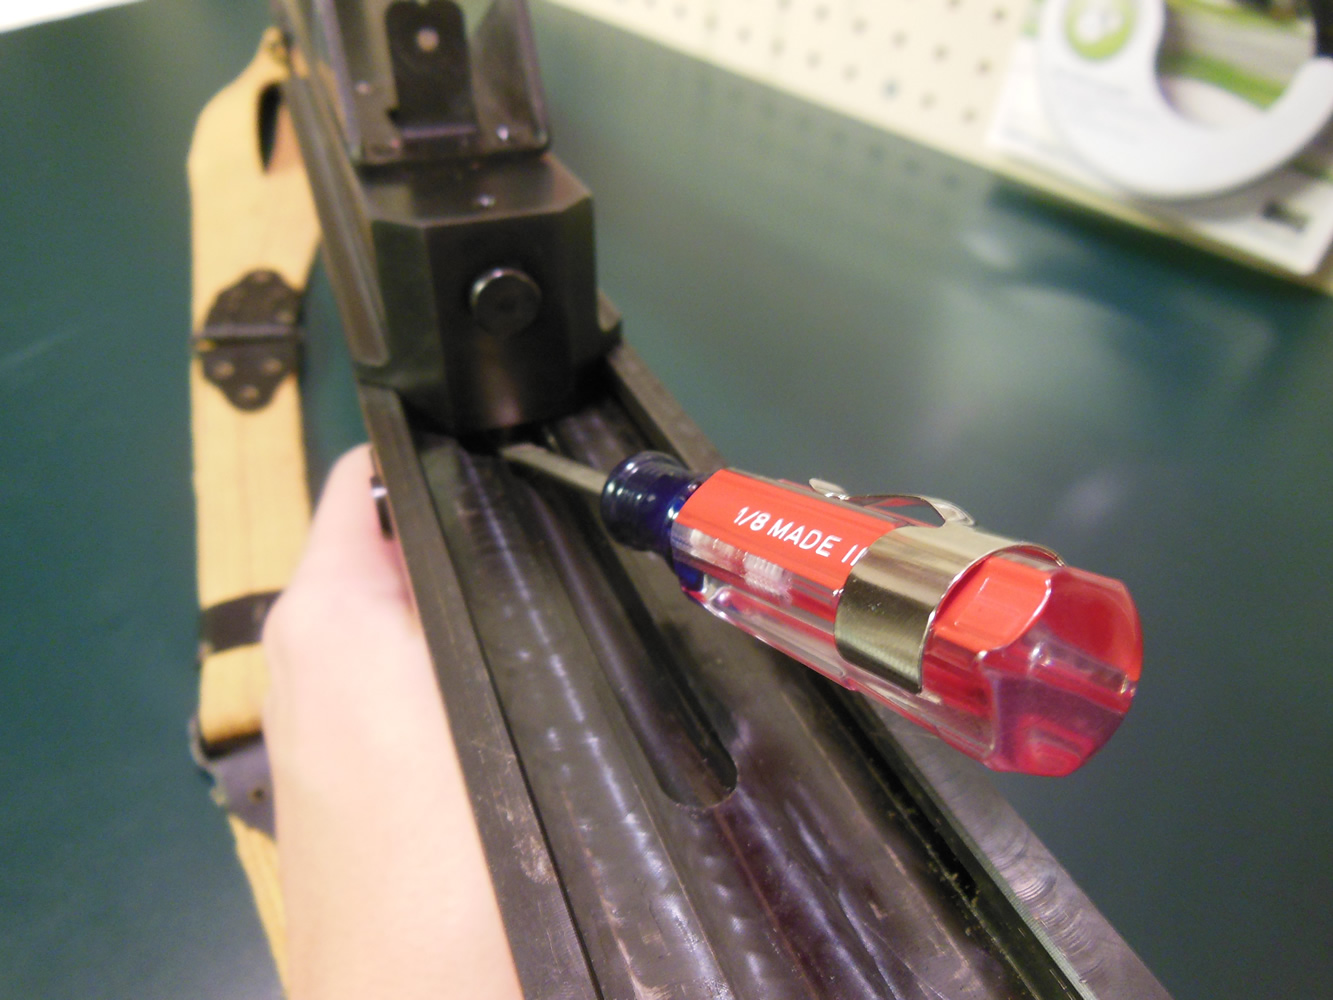
Step 2-Slide the upper receiver forward until it stops, pull the trigger and slide it an additional half inch. This is where it differs from the original. The little retaining pin gets stuck behind the sear block. Utilizing a larger screw driver, you must force the retaining pin up over the sear block-at this point the upper and lower of the gun will separate.
This is not an owner’s manual - I am simply pointing out the notable differences. If you want to completely know how to break down these guns go on YouTube and watch or consult your owners manual.
Update 7/23/13:
After getting to play with my Thompson, I have decided to do an update article. Here is a brief annotation about some observations and modifications I have made.
Here is my Thompson after one of the battles at Alliance this past weekend. I somehow managed to go through 170 rounds in a five minute battle….while mud sliding. It is a crazy fun gun. It can handle abuse and keep on going!
However, there are some things that have not held up to the standards I had expected.
One thing is that the rear sight (Which is held on with farby screws) has started to work itself loose and sort of jingles when the gun is shook. I guess this is a good time to swap if for an original and rivets-it is just disappointing considering the price of the gun.
Observing the Philly Ord Barrel - it can clearly be seen that the blued finish has worn off. It flash rusts very easily now. I have coated it in white lithium grease and should protect it from now on from further surface rust. New, larger aperture sizes have been made. It runs at a .201 size set screw with Rob Walter’s (Atlantic Wall) .45 ACP Sub-Gun Blanks-which is quite a larger opening than the ones provided by Philly Ord. We tried .250 (1/4) and .219 (7/32), which were both too large on a 90 degree summer day. The gun would eject, but not pick up the next round at .219. A .209 #4, or .213 #3 drill bit would most likely be the optimal size for hot weather events.
These are the only two negative things I have noticed about the gun that has come with the use. Both can be corrected quite easily.
In the way of cosmetic improvements - I have added a $10 reproduction fore grip to the gun (meant for an original Thompson). I had to dremel it out to the ¾ inch size to fit on the gun. I then abused it to match the scarred features of the other pieces of wood, and then stained it to a dark walnut color. It now has the correct profile and color. The gaps have been eliminated that were present with the factory wood.
Over all, the gun is still my favorite piece in my collection.
The author with his toy, July 2013, Alliance, Ohio
Conclusion
Pros:
- This is close replica of the original Tommy and will ensure fun blasting at future events.
- It is a lot cheaper than an original full auto
- It is readily available at most any dealer
- It is a good basis for enhancements to add cosmetic details found on original guns
- Aftermarket and replacement parts are readily available.
Cons:
- Does not take original mags without modification
- Furniture is unlike originals in size and contour
- Disassembly is tricky without tools
- Fires in semi-auto from closed bolt
- Entirely missing the selector switch
- Markings are a little off
- Rear sight uses screws
In my mind the pros outweighs the cons. This is an awesome replica and is the best alternative to building a semi auto or purchasing a full auto original.
I would happily recommend this to any other reenactor or unit member.