K Ration How To - Boxes
Written: 9/14/2010
Author: Dave Lammert
Applicable Specs
CQD 28 B - Assembly and Packaging
CQD 28 H - Assembly, Packaging and Packing
PDF's
Single Sheet 11x17
Two Part 8.5x11
Tips for working with chipboard:
1.) .022 8.5x11 and 11x17 chipboard is available by the case from ULINE and XPEDEX.
2.) It is most effective to score the chipboard along the fold lines with a straight edge and the back of a butter knife. There are a multitude paper scoring tools you can buy at the art store to use.
3.) .022 chipboard will not feed reliably through any inkjet or laser printer that I have had available to me.
In place of .022 chipboard, for the 2 part K Ration Boxes, we have used a heavy cardstock weight brown kraft paper for the outers. The inners we used chipboard and hand stamps made for the limited text on the boxes.
Inkjet vs Laser?
I strongly recommend using laser printers whenever possible for these projects. Inkjet ink will run when it gets wet and otherwise look terrible. Laser toner stays in place when exposed to water.
Laser printers work by depositing a toner powder on the paper, then a hot element activates it onto the paper. Most laser printers are calibrated for normal 20lb copy paper and not the heavier card stock weights you may be running through it with these ration projects.
The symptom that manifests itself is that the toner rubs off from the finished item. This is because the heating element wasn't quite hot enough to bond all the powder that was laid down on the paper. The fix for this is to hit it with a light coat of hairspray, or run back over the item with a common clothes iron.
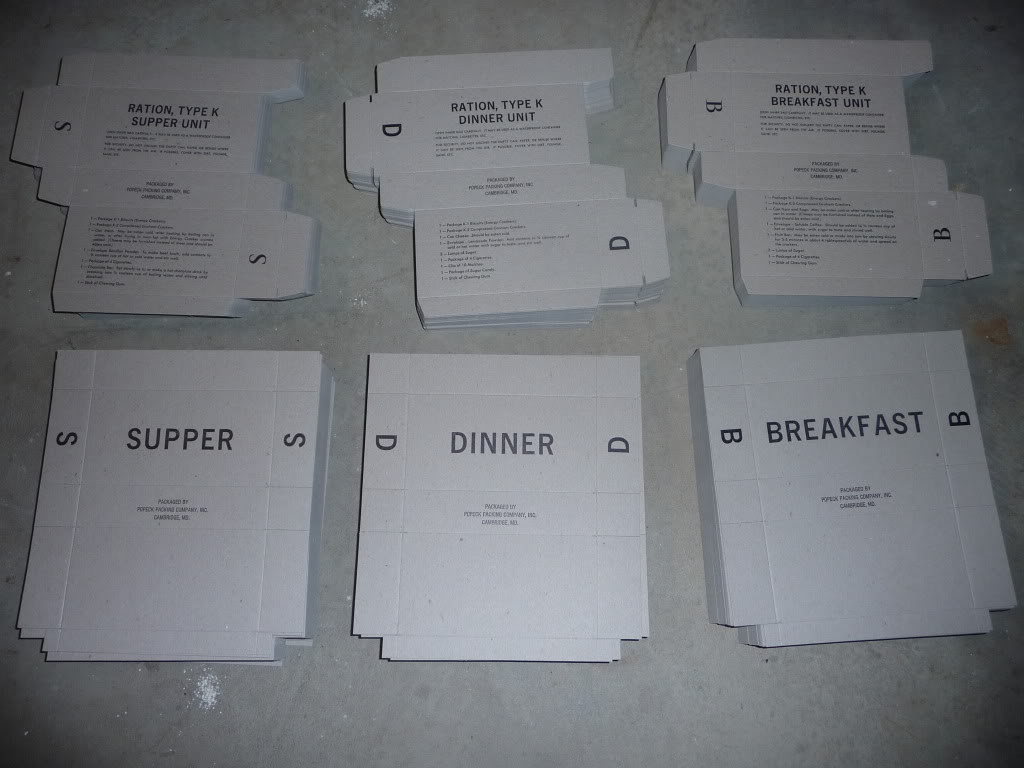
Large Format Boxes
We wanted to upgrade from inauthentic materials and construction methods to a more correct method.
After a rather lengthy process, we were connected with Keith from The Cranky Pressman. Keith specializes in vintage letterpress printing and maintaining the craft.
Dave worked with Keith through various typesetting and cutting die revisions to get to the finished product. We ended up with a set of dies to cut and score both the inner and outer boxes, as well as a stack of professionally letterpress printed boxes.
Unless you have some serious equipment, I'm not sure how you'd utilize the large format PDF's. If you are able to... well... then enjoy. Our PDF's were used as a basis for hand set moveable type rather than having a mag or poly plate made.
8.5x11 Two Part Boxes
We typically used a heavy cardstock weight brown / kraft type paper for these outer boxes. The inner boxes were chipboard and stamped / block printed.
I found the paper at a "local" paper store (Hollos) in Brunswick, Ohio. I cant say that I've seen this same paper for sale anywhere else - but I haven't looked hard. No suggestions at the moment on where to get it.
This method is most convenient to those of us with normal home color inkjets or laser printers since the heavy cardstock will feed reasonably well through most printers.
I recommend cutting and gluing the two halves of the boxes together, then wrapping them around the inner box to be used. There is a degree of variability to hand cut inner boxes, so they may not all be exactly uniform in size. I previously made the mistake of folding and gluing a large number of outer boxes prior to doing the inner boxes. Turned out that the inner boxes would not fit in the outer boxes.... fail.